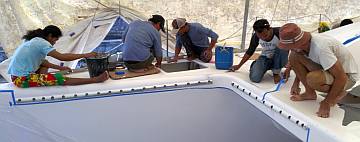
The guys cleaning the starboard side-deck
98 Spray Stbd Deck
Summary: The big accomplishment this week was spraying the entire starboard side‑deck with gelcoat - a big job. Other accomplishments this week include:
|
 The guys cleaning the starboard side-deck |
Monday, September 16:
A hot day and a busy beginning of another week.
The big job of the day was the continued preparation of the starboard deck for its upcoming gelcoat. All day we had Yando, Chambron, Heru, Pla and Baw climbing up and down the ladder and scaffolding carrying buckets of water to scrub the deck and wet sand the areas between the nonskid pieces. The goal of course is to get it crystal clean so that the gelcoat sticks. The sandpaper is to rough the surface (using 150 grit) so gelcoat has a good mechanical bond to the substrate. They worked with the vinyl off the nonskid, meaning of course that we got some dirty footprints on the nonskid, but Baw assures us that tomorrow it will all be cleaned, and acetone wiped, and new vinyl put on with a protective rim of blue tape. Then the gutters will be cleaned and sanded again.
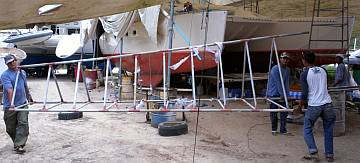 Baw "found" this tall scaffolding - we didn't ask where... |
After lunch the men hauled over a huge metal scaffolding which they wanted up on the starboard bow. Unfortunately it was too tall to fit under our forward tent flap and they figured they could just protect the canvas with a piece of plywood for chafe control. Jon objected (that tarp is darned expensive) so they decided to dig the legs of the scaffolding into the sand and fit it (almost) under the tent. Later in the day, Baw lead the team in putting up a massive spider web of plastic robes to hold the new masking. We did leave the clear plastic on top of the cabin, but either removed it or re‑covered it elsewhere so we don't get messed up with the sticky gelcoat overspray.
Jon did a massive measuring job of the port deck (we naively assume it's about the same area as starboard). He used his "take the whole area and subtract the nonskid" approach, which was a bit tricky with all the curves and ups and down around the 7 hatches, but he's pretty confident about the results. The side‑deck (bow to the targa‑bar) breaks down pretty logically into 3 sections, and each of them is about 27 sq‑ft (2.5m2) and each will need about 3kg of gelcoat, or 18kg to do both side‑decks. Yikes! That just about uses up a whole 20kg drum of gelcoat.
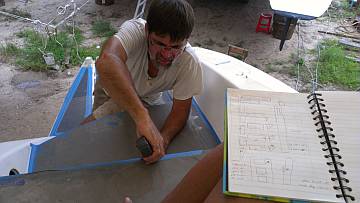 Jon measuring sugar-scoop dimensions while Sue records |
This got us thinking about how much more we're going to need. The other areas to spray are the 2 sugar‑scoops and a bit around the bimini. Measuring the sugar‑scoops is difficult as it's very 3 dimensional. Jon broke it up into measurable sections and started feeding dimensions to Sue. When everything was added up we found that the port sugar‑scoop (which should be the same as starboard) is about 65 sq‑ft (6m2) which means that each one will require 7.2kg of gelcoat, 14.4kg total. Hmmm... We have 15kg left in our current drum and another full drum coming from Bangkok but that only leaves about 2.6kg for the bimini and some of the areas around some hatches. But Mike still has 4‑5kg which he's offered to us, so it'll be close but we should be OK.
A cruising friend (whom we haven't seen since 2002 in St. Maarten) pointed out that nitrile gloves aren't supposed to dissolve in xylene, the solvent we have to use to remove the Nyalic from the spars. Sue managed to buy a box and was very pleased with them. They cost more than twice what latex ones do but they last well so she spent a few hours removing more Nyalic from the mast, going through stacks of white rags in the process.
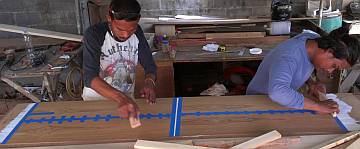 Baw & Houa squeezing the air out from under the teak veneer |
Houa laid out the strips of teak veneer and showed us how he would use the grain patterns. It will be very cool, with 2 nice oval whorls going from the base of each cabinet door to about half way up. He then cut the 1/8" (3mm) plywood to size, sanded it, and spread on a thick layer of white wood glue. This is the stuff Baw wanted him to use so there's no black line between the butted veneers. Once the cut veneer pieces were down on the plywood and glue, Houa and Baw each took a short board and smoothed out the veneer, then used rags to further smooth the veneer firmly onto the plywood base.
At the end of the day Sue, Baw and Houa had a conversation about what protection to put on the teak veneer. It will be inside so no UV problems. From our point of view we want the veneer coating strong, but we also want it to look as beautiful as possible. The guys suggested a layer of epoxy for strength. At first Sue said no, that we just want varnish or preferably the stronger polyurethane to match the other doors. They didn't really understand her, and surprisingly Baw kept saying "You don't want epoxy, why?" It's the first time we've heard our workers ask US a "why" question, and we were actually quite pleased. "Why" has not been in their vocabulary, and we have battled for months to get them to answer our "why" questions. Apparently, their schools do not encourage questions.
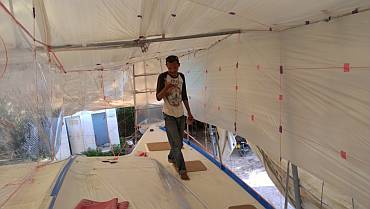 Baw's new spray tent over the starboard side-deck |
Sue explained that she thought epoxy made the wood too dark. A minute later Lek appeared with a sample of veneer on plywood coated with gloss varnish, and another piece that Houa made last week for the cabins which had a coat of gloss over epoxy. They were both richly warm and lovely. Then Baw brought out a piece of epoxied and sanded veneer on ply, which was dull and dark. Sue said, "Yes, I don't want it to look like that!" They laughed and showed her it was sanded, but not varnished, and so of course it looked dull and dark. Suddenly they understood our initial hesitation with epoxy, as that piece didn't look nice at all. OK, convinced. Epoxy first, then gloss polyurethane with a satin top‑coat.
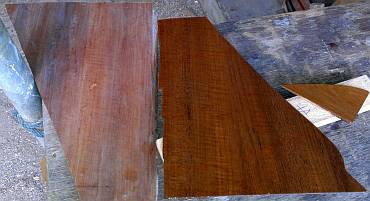 Dull, sanded epoxy on left, varnished epoxy on right. OK! |
Jon consulted with Baw on the rudder project and we hope Baw will be helping him with it tomorrow. The guys exchanged ideas about techniques and how to wrap the fiberglass cloth , finally deciding to wrap from the aft edge of the rubber to the leading edge, and then letting the excess cross over. This will give a stronger leading edge. Baw will help scree on the thick layer of epoxy and special filler from Neil, but for this he needs a plastic screeing tool and his favorite has gone walkabout. So he'll be making one tomorrow before helping on the job. Stay tuned!
Jon's final job on the day was to strip the old lifelines from the deck. We've left them up there, sort of undone and sloppy, but still a psychological deterrent to falling over the side. Now that we'll be spraying on the very side of the deck, Baw wanted things as crisp and uncluttered as possible. Once the spray is done and the mess is finished we can put up our new blue Spectra rope lifeline. That'll be cool!
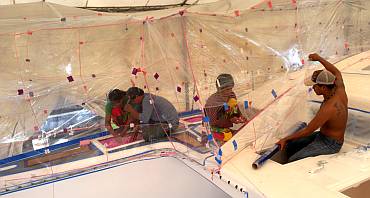 Building more of the spray-tent over the starboard side-deck |
Tuesday, September 17:
A bit of a humdrum day, with lots of clouds, hot sun, no rain, not much breeze, and things just sort
of chugging along on Ocelot.
This was the second day of the big push to get the starboard deck ready for its final gelcoat spray. All the men except Lek and Houa spent most of the day on deck sanding and cleaning, then masking the nonskid with blue tape and vinyl. There was still lots of fancy plastic work for the spray tent to do as well, and the guys were still unrolling cling plastic and taping it to plastic strings well into the afternoon.
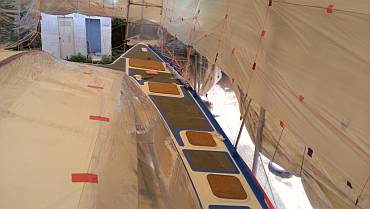 The area we want to spray, down the starboard deck |
Baw consulted with us on how to mask the 7 deck hatches. He didn't want to just cover the holes from below with cling plastic because he's thinking ahead to when the guys wet sand the new gelcoat. We need something waterproof so we don't get rivers of gelcoat and water down in the cabins on the newly varnished teak. We eventually decided to get some brightly colored "future‑board" (plastic corrugated cardboard) and stick it up on the inside, then seal the edges with silicone. It was important to put the silicone in a place where it doesn't matter if we can't get it off when it's time to mount the Goiot hatches. That all figured out, Sue and Pla took 2 motorbikes to the everything‑stationary store across from our apartment, and together they chose big pieces of bright pink and yellow future‑board. Then Pla had the fun of scootering back to the yard, one‑handed. (Sue is not yet that competent on the scooter!) Pla and Chambron mounted the small boards just fine, then got a bit stymied on how to do the fo'c's'les, as you can't climb down in and then seal them up. We'll see if Baw approved of their technique tomorrow.
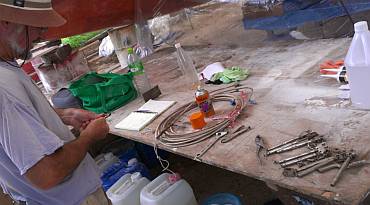 Jon recovering lifeline hardware: turnbuckles & pelican clips |
Jon spent some quality time with the old lifelines we took off yesterday, disassembling them to retrieve the stainless steel turnbuckles, shackles, and pelican clips. We brought new lifeline hardware with us from the States to use with the new Spectra line that will replace the old plastic‑coated cables, but that uses different hardware. These stainless bits and pieces have value by themselves and are still quite serviceable. Anyone want some used lifeline hardware?
Jon really wanted to get the epoxy put on the rudders today, but he needs a couple more pairs of hands plus Baw's artist's skills for screeing the epoxy and filler. Baw said he had another medical appointment at 3, and we didn't want to risk having him leave in the middle of it. It's all ready and waiting...
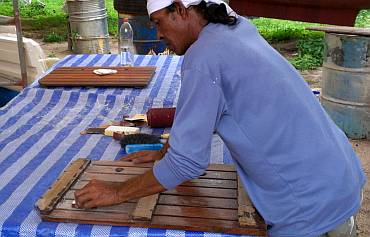 Lek working on the slatted galley and head floorboards |
Sue scootered up to Rolly Tasker Sails to consult with JP, the rigging guru. We wanted to learn what system he uses for painting their bare aluminum masts. Simple answer: the International paint system. He looked through old invoices from customers to check the International paint names and numbers. JP said they switched from the old acid wash and zinc chromate primer system to the newer epoxy primers and high build primers (if needed for fairing) about 6 years ago and have had no complaints. OK. Maybe it's time for us to jump on the modern paint wagon and forget about zinc chromate.
Sue also stopped in at the canvas/tent/upholstery shop, TMT, on the way back and was pleased to find some rubber floor matting that might work for under the floorboards on Ocelot. Each teak and holly board is supported by long stringers, on which we've had a yellow rubber pad. These pads are totally mashed and melted now and need replacing, but we've been reluctant to buy local black rubber. It really stinks, and even the test piece we bought a month ago and laid out in the sun and scrubbed with detergent still reeks. These car floor rubbers seems to be more highly refined and much less smelly.
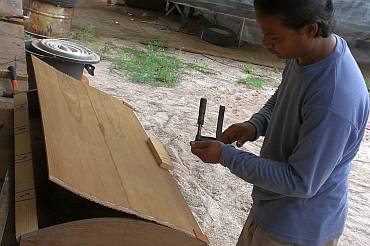 Pre-bending the veneer & ply to go on the curved doors |
Lek continued to be the one‑man varnish guy, and it took him all day to get the 6 slatted teak floors sanded and prepared for another coat of something. Not sure if they plan to put on another coat of epoxy, or move on to the sprayed polyurethane.
Houa worked on the rounded doors and their new veneer all day. He used his table saw to score a series of longitudinal grooves in the bottom of each piece of plywood on which the veneer is glued. The grooves allow the plywood to curve to the desired shape without putting undue strain on the doors themselves. But he daren't just glue the plywood/teak veneer onto the doors themselves, for risk of the whole thing pulling away and curling out from the door. That would NOT be nice. So he built a carefully crafted wooden frame on which he will clamp the plywood/teak veneer pieces while their epoxy‑coated bottoms cure. Today was set up day, the actual epoxying and clamping comes tomorrow.
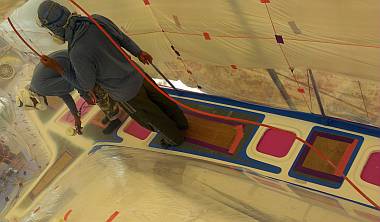 Baw sprayed while Pla kept the hose out of the gelcoat |
Wednesday, September 18:
A Wow of a Wednesday! Still in the 90's but no rain and LOTS accomplished.
Two days of deck preparation paid off big time, as the guys were pulling out the gelcoat, asking for new socks, and doing a final acetone wipe on starboard deck first thing in the morning. Sue hit all 3 7‑11's within a mile and returned with 7 pairs of socks for the guys to protect their feet from the sticky gelcoat overspray. Jon did the final area calculation and showed Baw the parameters for each 2 square meter spray area. Then the 6 kilos of gelcoat were weighed and the correct percentages of mono‑styrene and mono‑wax were added. Lek would be adding just under 1% catalyst once the gelcoat was in the pot.
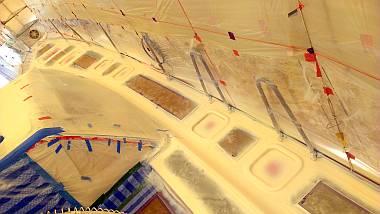 Afterwards, a newly sprayed starboard deck! |
By 10:30 we had Jon, Pla, Baw and Lek all inside the starboard side plastic tent, with the fan blowing from astern to the extractor fan on the bow. It was pretty thick in there so Jon crawled out after the first couple pots. This was a long, narrow spray, from the triangular bow, down alongside the cabin‑top then back by the cockpit to the engine hatch. Bow and Pla had a lot of careful stepping to do on the small plywood pads, avoiding stepping in gelcoat overspray or into the hatch openings. Baw shot 18 pots in 1:20 and now we have a bright starboard deck! Cool! They finished just before noon so there was time to clean the gun and the supplies. Pla returned to the deck with a small pot of gelcoat and a little stick to do the "dit dot" repairs (filling in small holes) to the gelcoat before breaking for lunch.
An hour later, the gelcoat was curing nicely and Baw was able to remove the vinyl from the nonskid panels and cut back the piled up gelcoat that always accumulates at the edges. (For our non‑tropics friends, think tiny snow drifts.) Heru and the men had fun cutting down the plastic tent and pulling it apart. Slow to put up, fast to take down. Seeing the deck all white is sure nice.
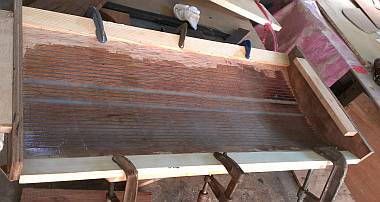 Houa pre-bending the teak veneer on its plywood backing |
Pla, Yando and Chambron were assigned the job of preparing the starboard sugar‑scoop (steps, step walls, side walls, and the groves for the ladders) for spraying, possibly by tomorrow! Not sure if it will happen or not, as everything looked all clean and white and well sanded by late afternoon, but there was no masking in place yet, and that won't be a trivial job. Maybe it will happen in the morning, allowing an afternoon spray.
The other major accomplishment was the rudders. Jon's been dragging his heals here as he's not sure exactly how best to do it all, but he decided to jump in anyway. Sue helped Jon organize all the stuff needed, finding the drill, extension cord, stainless steel wire wheels, epoxy gloves, mixing containers, small brushes, rollers, roller handles, Epotek epoxy Parts A and B in pump jugs, 80 grit sandpaper, phenolic and "microlight" fillers, acetone, rags, plastic sheeting for the table, tape to hold the plastic, double sided tape to re‑mount the rudder template, the pre‑cut fiberglass cloth, marking pens, fiberglass scissors, and a long flexible board to scree the epoxy filler onto the rudders. Whew. Quite a list.
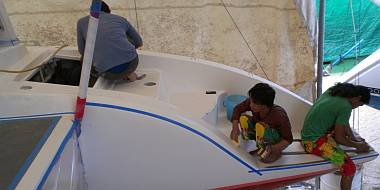 Pla, Yando & Chandron cleaning the starboard sugar-scoop |
Jon began by using the stainless steel wire wheels to rough up the surface of the rudders, but he actually felt like maybe he was polishing them a bit as they'd already been sanded with 40 grit. If nothing else, the small wheel was able to get into places he could not easily get by hand. Then he pumped out 4 pumps of Epotek epoxy, mixed it very well, and brushed it on both side of the first rudder. By now we had Heru and Baw with us, and Sue and Heru began the hand‑sanding of the rudders, using strong circular motions right through the wet epoxy. This caused a bit of a stir, apparently, because Houa came around the corner and exclaimed, "I work with epoxy on many boats many years and I never see this!" We explained that this technique helps the epoxy to stick to the metal surface, and that we do it all the time with aluminum, like the sail‑drives. They still shook their heads. We said we had learned about it more than 30 years ago from a very brilliant engineer. (Kudos to our late cruising friend Henry Chatfield, of yacht Trew.) What we couldn't explain in Thai‑lish was that by sanding the epoxy very soon after cleaning the metal surface, you actually stop the oxidation from forming, and it's the oxidation on the surface of aluminum or stainless that inhibits its ability to bond to epoxy.
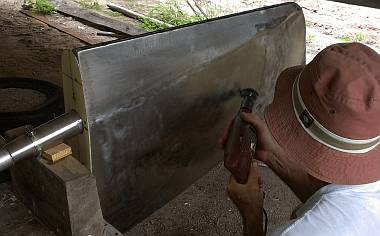 Scratching the rudder blade with a stainless steel wire wheel |
Once the rudder sides were well sanded (Jon took over from Sue) so that the guy's gloved hands were gray with metal and epoxy, Jon mixed more resin and added phenolic and microlight filler. This was used to fill some of the indents and uneven places on the rudder (like the weld seams). Baw used a silicone spatula to smooth the filer into place. Then one after the other, 2 sheets of pre‑cut fiberglass were laid on the rudder blade, draped over the leading edge, down to the trailing edge. More resin was used to wet out the glass and enclose the entire blade. It took a lot of pushing and sliding and edge‑clipping with the fiberglass scissors, but it looked good.
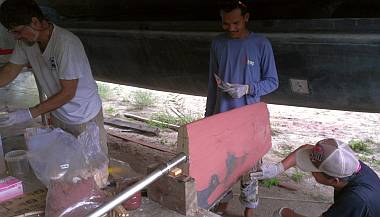 Jon mixing while Baw & Heru put on the microlite/phenolic filler |
Once the glass was in place, Jon was in favor of waiting an hour or so to put on the really thick epoxy filler to create the templated shape of the rudder. But time was moving on, and they decided to go for it right away. Now Baw's expertise came into play as he and Heru paddled the filler onto the rudder, filling the low spots and letting the paddles slip over the high spots. At first Baw was concerned that we could never put on enough filler to match the shape of the template which sticks proud of the rudder blade by quite a bit near the leading edge. But we decided to do it step by step, i.e. we put on as much as we thought it could handle before it sagged, and then called it quits. Baw and Heru worked it into a nice shape on both sides, and the leading edge. Once they declared "Enough!" we let it sit for awhile. Just before quitting time Jon and Baw checked it again and pushed the sagging filler back into place. Weather permitting, we'll sand it and put on the final filler tomorrow.
Thursday, September 19:
The clouds are gathering, but we still had a rainless day and a nice breeze. Nothing happened
the way we planned today, but hey! This is a boat refit!
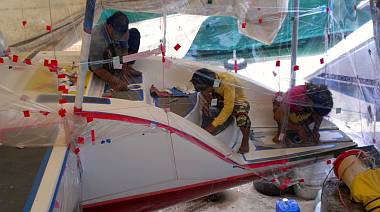 An elaborate spray tent grew up around Ocelot's sugar-scoop |
The whole morning was centered around the gelcoat spray for the starboard sugar‑scoop. This is the whole aft deck area, from the waterline and platform where the swim ladders will be, up the 3 steps, ending at the cockpit and side deck. This area has tall sloping sides as well, so the full gelcoating area is just over 6 square meters. Jon spent time with the notebook and sketches and tape measure trying to figure a convenient way for Baw to break up the spray into 2 square meter sections. Not a trivial task, as it also had to be simple enough for Baw to understand when he's busy with other things, but Jon finally came up with something that would work for Baw as he sprayed his way from the stern forward and up the steps.
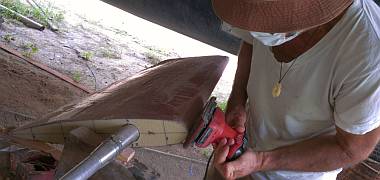 Jon sanding the new shape into the rudder |
An elaborate plastic spray tent sprang up around the starboard sugar‑scoop, complete with a fan to blow clean air into the tent and an extractor fan at the other end to remove any gelcoat suspended in the air. It looked like Ocelot Circus for awhile, with Yando being hefted onto Heru's bent knee to be raised high enough to tie some of the plastic rope. We were surprised that the vinyl on top of the nonskid was not yet taped down, as that is an exacting and time‑consuming job. When the guys broke for lunch, Baw's final comment was, "We need to work through lunch or not get finished." Unfortunately, Baw has another medical appointment today at 3, so we knew we had limited time for the spray. So the guys took a short lunch and retuned at 12:30 to continue masking. That's when they brought out the remaining drum of gelcoat and began to weigh it. Dang! Only 5 kilos, and we figured we needed 6‑7 at least. We looked at options: Don't spray today. Spray part of the sugar scoops today. Spray all but with less coverage than we wanted. None of the choices had much appeal, but we let sense prevail and decided the best thing was to postpone the spray completely and do it right later. Unfortunately, it looks like rain will return later this week...
Jon put in some time on the rudder, sanding the red phenolic filler smooth and trying to get the rudder to the shape we want. Looks like it won't take much more filler to give us a nicely shaped rudder. We didn't even think to ask Baw to help with the rudders again, as his mind was definitely on the gelcoat spray.
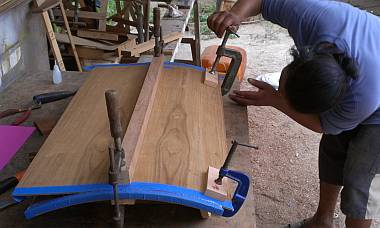 Houa gluing teak veneer (& plywood backing) on our curved doors |
Houa had a good day. Yesterday he built frames for holding the rounded doors and their new veneer, and today he got both new pieces of plywood/teak veneer glued to the rounded doors. We have been a bit concerned because you can feel the ridges of the grooves he cut in the bottom of the plywood to allow the 5mm wood to bend to the right shape. But he has reassured us, repeatedly (he must have a lot of patience!) that we are not to worry. He says when he and Lek are done with the gluing and the epoxy and varnish we will not see or feel any ridges. Getting the ply and veneer to bend and hold onto the curved doors involved a lot of clamps and braces. And once the Hartford (epoxy) glue was paddled onto the surfaces, he spent a long time massaging the veneer surface to ease out any air pockets that might have remained. We have our fingers crossed that it all works out OK, as we would sure hate to see this whole process have to be repeated. This takes faith, as we are not carpenters nor cabinet‑makers.
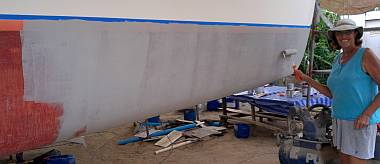 Sue painting an epoxy primer on the epoxy barrier to protect it |
A strange thing happened once we realized we wouldn't be spraying gelcoat today. Baw announced that he would go home. We said, "Three o'clock, right?" "No, now. Nothing to do." We thought he was teasing, and so bantered a bit about all the small jobs still to do. There are the bookshelves to sand and satin varnish, some trim for the heads to sand and re‑spray with white paint, the floor boards to sand (the ones Lek had epoxied early this morning) and of course the hulls to sand for primer and the port deck to clean and prepare for gelcoat. Baw's answers ranged from "Job too small" to "Not clean now, clean again next week" or just a repeat of "I go home." We finally figured he really wasn't into changing tracks in the middle of the day, and he wanted to leave.
The problem is, the other 5 men all stood around looking like they were ready to go home too, and it was only 1:30. Now THIS was annoying. There is so much work still to do on Ocelot. Finally, with Baw still there to translate, we got across the idea that the men should stay and sand the hulls for us, and put primer on top of the red/yellow epoxy barrier coat. There was a lot of mumbling and laughing, and then someone said, "Not time for paint." "OK," we said. "Maybe we paint later, but today we sand."
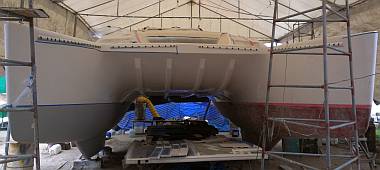 Starboard hull painted, portside hull sanded and ready to paint |
Baw left for home and surprisingly Lek left as well. Maybe he figured his varnishing/epoxying jobs were done for the day and he wasn't going to sand the hull. So, Sue scootered out and bought paint rollers (they like the small ones, and we like the big ones) and lots of sandpaper, 120 grit for the orbital sanders. In 1 hour, with all 4 men working on one hull, they had starboard hull sanded. Sue and Jon went over it all for touch‑ups and checking (like under the keels and at the water line). Then Heru masked the waterline with blue tape. Jon did some fancy calculations about how much left‑over Intergard 263 Part A we had to go with Part B (we had partial cans from a couple other cruisers) then mixed it all up to the right proportions. Sue, Heru and Pla painted the starboard hull a nice light gray primer, while Chambron and Yando continued sanding, but on port this time.
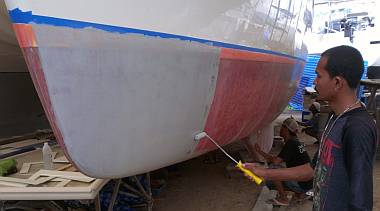 Painting primer on the port hull to finish the priming job |
By 4pm we had starboard hull painted enough that we sent the men to help sand port, and Jon and Sue finished the painting. The drinks lady arrived in time to help us all kill our thirst with "soda manau" (fresh lime‑aid and soda water over ice). We had sort of hoped to get port hull sanded and painted, but it just wasn't going to happen. Thinking about it, that was pretty optimistic thinking given that we started the whole project at 1:30. Anyway, we ended up with a bicolor Ocelot, light gray hull on starboard and still red and yellow on port.
Friday, September 20:
Thank goodness it's Friday, and NOT the end of the week, as we're on a roll and we want to continue!
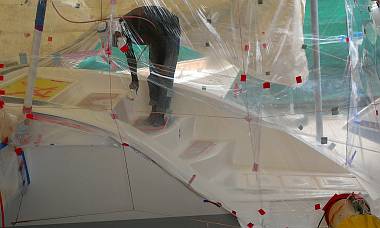 Capt. Jack Baw spraying the starboard sugar-scoop |
A very productive day, with several major events underway or finished. When the men arrived in the morning, it was fun to see Baw's expression of surprise at the newly primed starboard hull. But he didn't miss a trick -- he got his men moving right away to sand the remaining 20% or so of port hull. Then they wiped it with acetone, taped the waterline, and VOILA! We were ready to roll. Jon mixed a brand new batch of International Intergard 263 and the men began to roll it on. Well, men and woman, as Sue jumped right in, not wanting to miss the fun. And it is fun changing the color of the boat, giving it bright, fresh lines. We got 2 coats on the port hull and a second on starboard, all before lunch. We are now a fully primed and rarin' to go!
We had our usual picnic lunch down on the beach, facing all the boats, but we kept an anxious eye on the clouds to the west‑northwest, as a bunch of rain was due to come from that direction. Baw promised "It no rain today" but the radar didn't agree with him (and Bangkok is drowning). In any case, the humidity had been borderline for gelcoat spraying in the morning, but had dropped enough that right after lunch we prepared to spray the starboard sugar‑scoops. By 2pm when Baw and Pla entered the sugar‑scoop spray tent the temperature was a moderate 84°F (29°C) and the humidity had dropped to 66%.
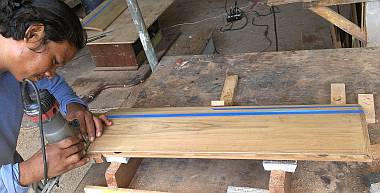 Houa cutting the teak veneer away for the thicker teak frame |
We mixed up 6.5kg of gelcoat, with the idea of getting 6 pots on each 2 square‑meter area from the waterline up to the cockpit. This is somewhat less than we usually do, but much of the starboard sugar‑scoop already has Ocelot gelcoat on it. Baw, with his moustache, gold earring, and pirate's head wrap looked a lot like Captain Jack Sparrow. And yes, the men all were familiar with Pirates of the Caribbean so everyone had a good laugh!
The spray went well, without needing a full gun cleaning mid‑stride like on longer sprays. The main hitch was that it suddenly poured with rain for about 20 minutes right in the last half hour. Sue watched the relative humidity rising like a hot air balloon, but then it dropped just as suddenly once the rain stopped. Whew. Never did get over the 75% limit for spraying. This spray took exactly 1:30 and there were whoops of delight when the compressor was turned off and we realized we now had a fully sprayed starboard deck, from bow to stern. While the men cleaned the supplies and gun, Pla donned new socks and entered the tent once again with a small cup of gelcoat and catalyst and a small stick, ready to apply gelcoat in "dit‑dots" to areas that were pitted or had some other blemish. The big blemish he wasn't able to dit‑dot away was where Baw mistakenly turned the gun to full air, but no paint and blasted a bunch of compressed air at a corner of gelcoat, rumpling it badly. It will have to be sanded off, but hopefully not re‑sprayed.
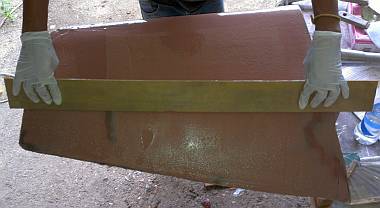 Baw screeing the epoxy filler into a nice rudder shape |
Jon grabbed Baw and Heru after the spray and got them in epoxy mood. Early in the day Jon had power sanded the epoxy and filler on the rudder and it was all smooth with the high spots sanded down, and ready for a final filler application to get to its appropriate shape. So, at 4pm Jon mixed epoxy and phenolic and microlite and Baw and Heru paddled and screed it on, giving the rudder a nice fat shape, matching the template made for us by Neil, the rudder designer. They worked with the rudder horizontal instead of vertical like yesterday, so there was less sagging. Tomorrow the other side (weather permitting) can be done, then we can wrap it in fiberglass.
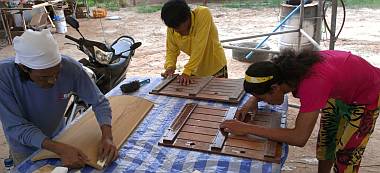 Lek, Yando & Chambron sanding bits to be epoxied tomorrow |
Houa got the rounded doors sanded down and the new teak vertical frame put in place. He used a bit of epoxy to hold the trim in place and is counting on the epoxy that will go on top to wick down between the trim and the plywood/veneer to do the final job. Everything was ready to go on the epoxy job, but it was put off until tomorrow. This will be a joint effort by both Houa and Lek, our varnish/epoxy guy. Apparently the idea is to put several layers of epoxy on top of the veneer, so it can be sanded really smooth, giving us a nice, rumple‑free rounded cabinet front. Fingers crossed.
Saturday, September 21:
A bit of a slow end to the week, with a bit of a disappointment.
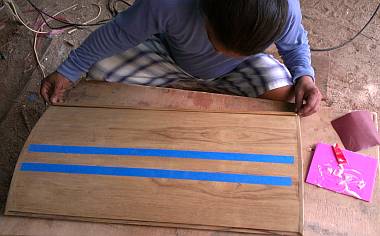 Houa gluing in one of the vertical teak frames on a rounded door |
First the disappointment: We had a fingers crossed for Houa's process of applying the teak trim to the rounded doors, where he first glued the veneer to some thin plywood, then slit the plywood (so it would bend more easily) and glued teak veneer and plywood to the front of the rounded door. But the slits made the plywood kink rather than bend uniformly. Houa thought he could sand them a bit and then cover them in epoxy and sand the epoxy round, but when he was sanding the veneer he went through to the plywood. <sigh>
Strangely, he still gave it to Lek to coat with epoxy, which he did, and that's when we noticed the plywood (which is a very different color from the teak). We called Houa and Baw together to see what could be done (again). Baw said he could color it so it looked like teak, but it wouldn't last and it wouldn't change color the way the rest of the teak would. Which really means that the job has to be completely redone.
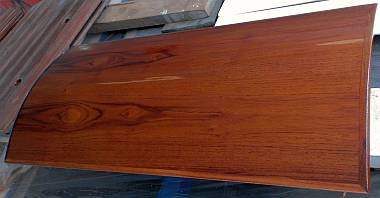 The 2 flaws, where the teak veneer was sanded through |
Houa felt really bad and offered to pay for the new veneer and to make the whole thing over again on his own time, after 5pm. We were frustrated, and not very happy with the poor sanding, but appreciative of Houa's offer to repair it on his own time. We bit the bullet and offered to pay for the veneer, ourselves, as we wanted to make sure he bought enough to be able to choose a really nice teak pattern. Jon spent some time talking with Houa about how to improve the old system he used. Together they decided that Houa would still use plywood underlayment, but put the grooves on the top, pre‑bend it to fit the door, fill the grooves with epoxy, and sand the surface smooth before applying the veneer. This should result in a much more uniform surface and hopefully avoid the sanding‑through issue.
Lek continued his epoxy/varnish campaign. We agreed that 2 coats of epoxy on the grated floor boards is enough, as long as we get lots of layers of sprayed‑on polyurethane afterwards. One person sanding all those grates and sides of grates and between boards is a slow process.
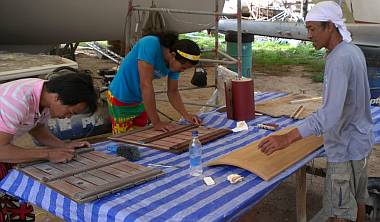 Lek and his sometimes minions, dressing up our teak work |
Late in the day Lek got a coat of epoxy on the rounded door without the problem and it's looking good. But it will take a few layers to build up enough epoxy that it can be sanded safely to a smooth rounded surface, as this door still has the slightly kinked surface.
Baw and the other men were up on the port deck all day sanding and cleaning and starting to build the spray‑tent. We are going through a lot of sandpaper and acetone, but we want to be certain that the new gelcoat will stick. They seem to clean first with sponges and water, then wet/dry sand paper (150 grit), then clean that off, checking to see that the surface is free of stain, grease and dirt. Then they vacuum, and follow that with an acetone wipe.
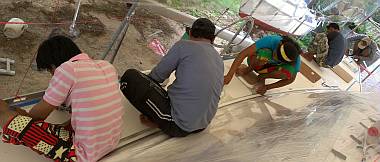 Everyone but Lek & Houa cleaning the deck for gelcoat |
The plastic spray‑tent slowly grew together, held up by cheap plastic string (some of it knotted into a net off the inside of the port bow). We have used more cling wrap plastic in the past month than in our whole lives. It would be nice if there were an easy, recyclable alternative but we haven't found it. This is a very throw‑away society, even more so than the US, and they don't recycle much except aluminum and cardboard. Besides the plastic cling wrap, they are using a ton of duct tape and masking tape. They use the more expensive but more easily removable blue tape with our blessings, as we don't want stickier stuff on the deck.
Jon spent much of the day sanding and shaping the rudder. Baw's work was good, but it made the belly of the rudder somewhat fatter than it needs to be, and the front still isn't as rounded as we'd like. Jon used a straight‑edge to tell where the filler was high, then he'd mark those areas in pencil before attacking them with the orbital sander. It took many iterations and a lot of time, as he didn't want to sand too much, but now it only needs a tiny bit of filler before we can add the outer layers of fiberglass.
Sue spent more of Saturday out of the yard than in it. First she ran lots of scooter errands for duct tape, blue tape, plastic rope and things for the deck crew. Then she took off for Boat Lagoon, about 45 minutes north. Boat lagoon is both a marina and a big hard‑stand area, with lots of different chandleries all around. She was basically on a recon mission to see what the alternatives are for painting our aluminum mast and other spars. Conclusion: the "good old stuff" (zinc chromate primer) is not longer sold in Thailand and all the merchants are pushing their favorite epoxy‑based primers, none of which contain anti‑corrosive chromate. Our choice now may be between a new product from Singapore by OceanMaster or the very expensive Max Cor CF by Awlgrip. Any thoughts would be appreciated.
Thai Refit:
Ocelot Pages:
Top Level: Home | Destinations | Cruising Info | Underwater | Boat Guests | Ocelot | Sue | Jon | Amanda | Chris | Site Map | Make a Comment
|
If our information is useful, you can help by making a donation |
Copyright © 2000‑ Contact: Jon and Sue Hacking -- HackingFamily.com, svOcelot.com. All rights reserved.