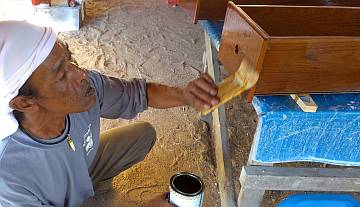
Lek brushing another coat of gloss varnish on a drawer face
95 More Varnishing
Summary: Another varnishing week, but most pieces got finished. This week the team:
|
 Lek brushing another coat of gloss varnish on a drawer face |
Monday, August 26:
A beautiful, hot day, but we got off to a bit of a slow start as we scootered down from Ao Po about
an hour later than normal, and Jon had errands to run, so he didn't arrive at the yard until midday.
The temperature in the cockpit read 107°F (42°C) at 1pm! YIKES. But it was a beautiful,
sunny day as viewed from our lunch spot on the beach.
Yando, Chambron and Pla never appeared, but we were very glad that Houa was back. Baw got some great final polishing done on the salon table. Yes, it was polished on Saturday, but he had wrapped it in cling‑wrap type plastic, and when he peeled it back, it seemed to leave a shadow or pattern on the new finish. So he re‑polished it and we wrapped it in butcher paper from the local stationary store.
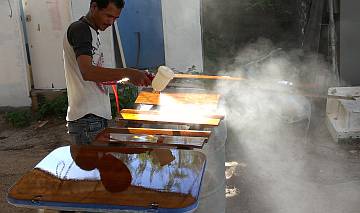 Baw spraying polyurethane on 6 pieces in bright sunlight |
After all the polishing work Baw set up the compressor, and with Heru's help he got another layer of polyurethane sprayed on the 3 pieces that Houa's been working on, the removable steps to the companionways, one of the salon table sections, and the nav‑desk. Shiny!
Lek worked alone all day under the shade of Ocelot - probably the coolest place around, as there was a nice breeze. He sanded a bunch of locker doors and drawers for the galley and salon, then he brushed another coat of gloss varnish on everything. For most of the pieces that is the second gloss, so tomorrow there will be one more sanding, and a last gloss. Then sanding and 2 satins in one day. Almost there...
 Houa chiseling off water‑damaged teak veneer in a fwd cabin |
We could have hung locker doors today, but the heat below was pretty intense. Only Houa had the stamina to work inside. He chiseled off the water‑damaged teak veneer from under the steps in both port and starboard forward cabins. Then he began creating a big piece of teak veneer which he will epoxy to a thin plywood backing board so that it doesn't warp on that vertical surface. Unfortunately, he was short some veneer so he couldn't finished the joining. Teak veneer comes in rolls of varying widths, so to make a big rectangle you have to butt join sections together.
As usual, Sue ran errands for hardware store items we need, like more varnish and masking tape, took pictures, and tried to organize things on the boat. Never ending jobs! She also carried a bunch of items to the storage room. <sigh> We're supposed to be taking things OUT of storage to put on the boat, not vice versa. Oh well. These were odds and ends that have accumulated in the salon, plus the newly polished cockpit table. The goal is to clear out salon so the guys can work in there more easily. But in fact, once they finish the cabins and lockers we'll probably get them back on deck, finishing up the gelcoat. Once the gelcoat is finished, we can start putting back the deck hardware.
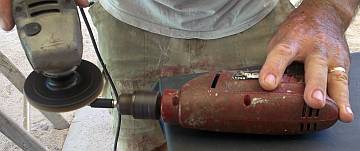 Jon shaving down rubber tubing - no, the wire's in no danger... |
Jon talked for quite a while with our rudder expert Neil, who gave us 3 patterns for our rudder shapes - One big piece to show the overall profile, and 2 smaller wing‑shaped foils to set on top of the rudders, on the shafts. These will be used as templates for adding filler to the correct shape and depth when the time comes. But that time wasn't today - Jon decided to finished his Goiot friction hinge pieces before moving on to the rudders. It's so easy to get 85% done on projects and then get distracted and let them linger unfinished for weeks.
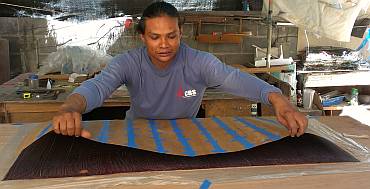 Houa epoxying teak veneer to a thin plywood backing |
So Jon found a relatively cool place under Ocelot, downwind of all the varnish work, and setup his rubber‑grinding shop. He put a small bolt through one of his new pieces of rubber tubing, clamped the tubing in place with nut and washer, and clamped the bolt into his drill chuck. He held the drill (and the trigger) down on the table with his left hand, and used a grinder with a sanding disk in his right hand to spin the tubing while sanding it down to precisely 0.385" (9.8mm) outside diameter. By day's end he had another 10 good pieces made to add to the 10 from Saturday. The goal is 24, but that means 24 that work, so he'll for sure be making more, as we don't think all the hatch hinge areas are going to be exactly the same internal diameter, as they were powder coated and that will add thickness.
Tuesday, August 27:
A whirlwind day with lots of projects going on as we had all our men back for most of the day.
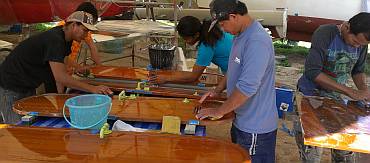 The sanding crew, hard at work under Ocelot's bows |
As if we didn't have enough varnishing going on, we went to the store room to retrieve the last (non‑floor) wood to be varnished, the 9 bookshelves. These teak shelves were originally built by Jon and the kids in Ecuador in 2003 as a high school "wood shop" project. They have withstood a dozen years of book holding, but the varnish is a bit tired, so time to be spiffed up. Chambron and Yando spent hours sanding them down, and by afternoon Lek had applied a coat of gloss to 4 of them.
As in previous days, Lek was mainly under Ocelot in the big varnish station, just rotating the locker doors, drawers, and now bookshelves through his workshop. Heaven only knows how he keeps track of which pieces have received how many coats of what, but we're glad that we don't have to.
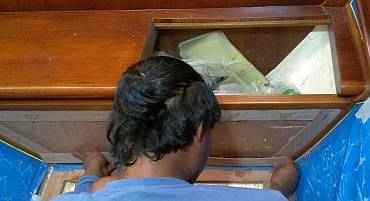 Houa making a template of the teak veneer he has to replace |
Pla worked with Baw on preparing the polyurethane-coated pieces. And before lunch Baw got 2 sprays on the last piece of the salon table, the Nav‑desk, the companionway steps, and the rectangle of veneer and the long teak strips that will repair damaged wood on the port side of the salon. Although it seems like a big production to set up the spray gun and compressor, it goes really fast when everything is at hand. Probably the slowest part is cleaning the spray gun afterwards. Since it's now Baw's gun (he's finished paying it off) he takes pretty good care of it.
Houa once again braved the heat of the interior of Ocelot. Having removed the veneer from the steps up to the forward bunks yesterday, today he was ready to create the templates of each area. Of course, they're not the same shape (silly us for asking). He used thin wood strips and superglue to make the templates, which will be the guides for how to cut the veneer. Down in his workshop he sanded, cleaned and applied Hartford epoxy glue to one surface of 2 mm plywood, and to the back of the composite of veneer strips. As this veneer is only 1mm thick, it needs to be glued to a stronger backing board so that it won't buckle and get damaged once installed. Tomorrow he'll be able to cut the veneer/backing board into the correct shapes and epoxy them to the bunk steps.
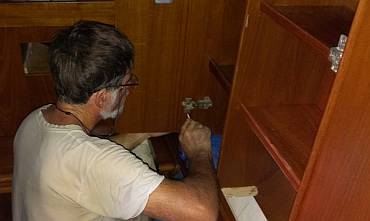 Replacing a cupboard door - Feels good to put things back! |
Sue and Jon decided to get some of the nicely varnished doors installed on the lockers so they don't get damaged just hanging about. Sue matched several doors to locations first thing in the morning, then Jon took over the actual mounting. Of course the old screws weren't always the ideal ones to use, so we scootered out for another batch of stainless screws for the project. Then we had to re‑assemble the hinges where they'd been taken off, and get the latches re‑mounted. Some of the hinges needed to be adjusted to get the doors to hang straight. What probably took 15 minutes to disassemble, took hours to put back together. And we're just beginning.
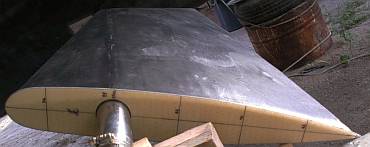 The new rudder foil shape, mounted on top of a rudder blade |
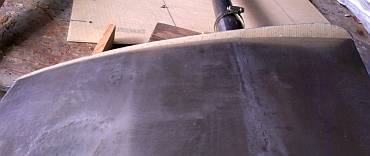 From the bottom you can see how much filler we have to add |
Neil came by to loan us his hot glue gun and in the late afternoon Jon, Houa, and Pla got the top templates of the rudders all lined up, and using many hands to guide and position, they got the templates glued into place on the tops of the rudders. These templates will show Jon just how thick and what shape to scree the epoxy and phenolic filler onto the stainless rudders to give them the ideal shape for our boat. The templates are not an ideal NACA shape because Neil didn't want to make the rudders much wider than they are. Since the rudders are stainless steel, we can't remove any material, we can only add. So Neil came up with shapes that are much better than what we have and should work well over a variety of speeds. Now we just need some dry days for major epoxy work. Unfortunately we've just had a run of 10 sunny days, so we're probably up for a week of rainy ones. Such is the southwest monsoon.
As the varnishing project winds down we are beginning to think of moving onto the next big project ‑ the gelcoat on the deck. Baw directed Heru to removed the old masking from the salon windows and clean the edges and re‑tape them with new blue tape. This will better allow us to remove the tape once the spraying is finished. There's still lots to do on the deck itself, like more of the cleaning Sue started last week, and re‑masking each piece of nonskid with blue tape and vinyl. Stay tuned.
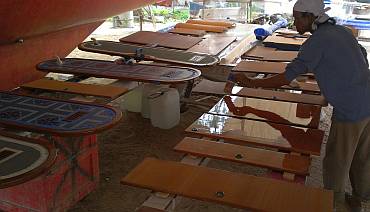 Lek working his gloss varnish magic under Ocelot |
Wednesday, August 28:
A bit of rain in the early morning, so temperatures were down, thank goodness.
The day started like many others recently, with all the team involved in sanding and preparing the locker doors, drawers, etc. for varnish. Only Heru had a different task, which was to peel back the old masking on the salon windows and prepare new vinyl masking and blue tape. It gave us a chance to see, once again, the heavily damaged acrylic window on port, where acetone had been trapped beneath plastic masking and wrecked the window. Baw once again assured us that he could fix it with lots of fine sanding and polishing, "Same like AwlBrite and polyurethane. Plastic. Can fix!" Stand by on that one. It will be a while before we ask him to try it.
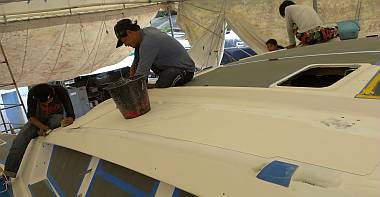 Baw, Pla, Chandron & Yando all cleaning the cabin-top |
The big news is that we're starting to prepare the deck for gelcoat. In the afternoon, Baw moved the whole team up onto the deck (minus Lek, who was brushing one more coat of gloss varnish on many items under the boat). It must have been a welcome change after 2 weeks of sitting and hand‑sanding varnished doors and drawers. The goal is to scrub the gutters between the nonskid pieces so that they are clean, clean, CLEAN, to avoid the problems we had months ago when the gelcoat didn't stick and all had to be laboriously chipped off. After this initial water wipe and wet sanding, the gutters will get a final sanding to rough up the surface, and a final cleaning with acetone to remove any lingering fingerprints or grease. We hope no new filler is needed anywhere, but Baw will assess that once everything is white and clean, when any flaws will be more visible.
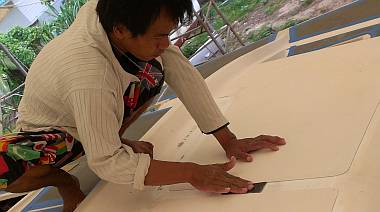 Yando sanding the "gutters" between patches of nonskid |
Jon braved the interior heat and mosquitoes (they seem to love hanging out in there) to work on matching lockers to cabinets. Each cabin has a set of 3 big cupboards in a row - the middle one has its latch in the middle and those middle cupboards are larger in the aft cabins than forward, so those 4 got located pretty easily. The flanking cupboards open towards the middle one but they're otherwise very similar, so difficult to tell which goes where. Sue thought she was clever to figure out the original French shorthand abbreviations on some of the lockers (like babord for port, T for tribord for starboard, etc) but then the latch buttons ending up at different heights. We're sure they were always all the same, 3 in a row at the same height. But measuring the height of the latch buttons and reorganizing them we were able to group them all correctly into 4 sets of 3 doors.
The hold‑up today was the discovery that about 25 of the hinges were either broken or missing some critical part. We have over 30 cabinets, each using 2‑3 of these relatively common, internal hidden hinges. So Jon went on a scooter chase to the local ritzy hardware store to hunt for hinges. He found 2 brands, neither stainless steel, but with price tags differing by 4:1!
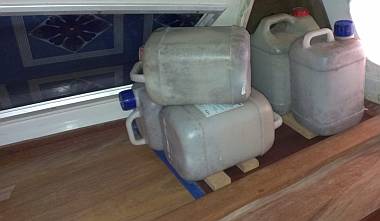 Houa's new teak patch in the port forward corner of the salon |
More to the point, about half of the hinges mount on walls at right angles to the doors, and the other half go on walls that are essentially extensions of the door. The type that mount at right angles to the door are easily available, but the others can't be found anywhere (and there's no sign of the type that open to more than 90°).
This is VERY frustrating - in the US the different types are in big bins right next to each other in any decent hardware store. Here, you can get the one type but not the others. The search continues, but we may have to import them from the US. Sue feels bad that this hardware job fell through the cracks, as it could have been done months ago as part of her hardware organization. All we can say is that the idea of mounting locker doors felt like a million years in the future. But the future is here.
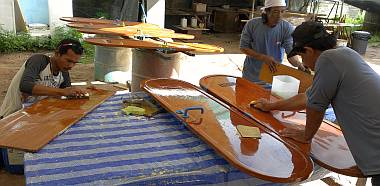 Baw, Lek & Pla sanding the people doors under Ocelot's bows |
Houa used the morning to install the long teak backing boards on the port side of the salon. These are barely visible beneath the white vinyl headliner, but enough so that they needed to look good. They did get covered in epoxy (and polyurethane varnish) so they're waterproof, which is good. Houa's afternoon project was to remove the old teak veneer at the forward end of the port side salon shelf. He cut the new teak veneer (that has already had epoxy and polyurethane put on it) to exact measurements and fitted it into place, epoxied it down, and voila! We have a newly teaked shelf. Tomorrow he'll add a small frame of teak as a visual separator from the old veneer and the new, because the patterns don't match.
Thursday, August 29:
The rain is back, but scattered, with hot sun and high humidity between showers. Strangely
enough, Jon made the major achievements, but others continued forward movement so no complaints.
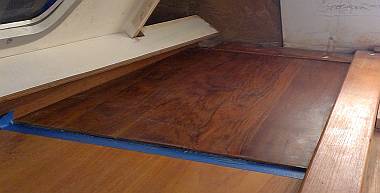 Houa's teak epoxied down to our big portside salon shelf |
After Jon's frustrating time yesterday not being able to find the relatively common but complex and articulated cabinet hinges we need, he got better hinge results than expected today (of course, one secret to happiness is low expectations). He took advantage of a sun break to make a scooter run to Phuket town to visit some of the hardware stores, trying to replace our 25 broken hinges. First stop was Oridipan, a magic little place with a small facade but they must have a worm‑hole in the back, because you tell one of the people what you want, they dive back into the back, and 5 minutes later they bring you the exact part you need. At least, this is the way it often seems to work. Today they didn't have the hinges Jon needed (only stamped steel parts, and their display pieces were already rusting) but they told Jon to try another store, and gave him directions when he pulled out his map of Phuket Town.
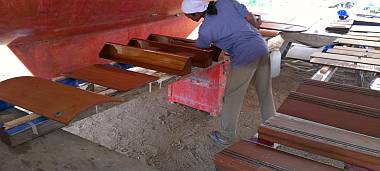 Lek seems to have taken over much of the varnish brushing |
So Jon headed off to Rachaphon Trading (LOVE these names!) On the steps leading up to the store were 6 plastic bins, overflowing with the sorts of hinges Jon needed (although still just stamped steel). When Jon asked about the other type of hinge he needed (the variant that nobody seems to have in Phuket) at first they demurred, but then they pulled out pretty much the exact part he's been looking for! Not stainless steel, of course (lets not get silly here) but the type of hinge where the mounting surface is in the same plane as the door, not at right angles to the door (which is what everyone has). Their version has a tiny gas strut to close the door gently, and they're only $2.50 each. They only had 2 left, but they promised to order more and give us a call in a week when they come in from Bangkok.
Then they pulled out another basket brimming with the much more complicated hinge variant that lets the door open much wider to almost 180° instead of stopping the door at about 90°. Jon pulled out a magnet and found that many of the parts were non‑magnetic (always a good sign) and the others were only weakly magnetic, which bodes well for our marine atmosphere. They were only $4 each so he bought 3 to try out.
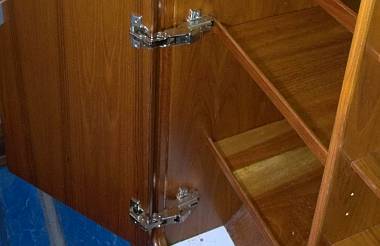 Trying out the more complex hinges that open extra wide |
Jon's next stop was the very upscale Haefele House‑wares showroom. The very pleasant and helpful woman pulled out their catalog and (glory be!) they list the common right angle hinge in stainless steel for only $6! So Jon ordered 25 and again they should arrive in a week from Bangkok.
When Jon got back to Ocelot he tried out the fancy hinges that open to almost 180°. They seem very nice and work well, allowing someone to walk down a passageway even when a cabinet door is open. Taking a quick inventory of Ocelot's doors, only 6 of them can really take advantage of opening wide. The others run into walls or doors or beds so there's no use in upgrading their hinges. So tomorrow he plans to go back to Rachaphon to get 15 more of the wide opening hinges.
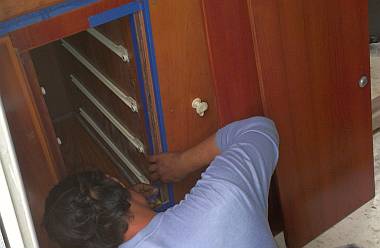 Houa epoxying in a teak strip near Ocelot's entryway |
Houa got a couple of the fiddly little teak jobs done today. Having mounted the new teak veneer on the port salon shelf yesterday, he was able to cut, sand, trim and fit the new teak border that separates that teak from the old teak. It's all epoxy glued into place now, and only awaiting varnishing when the whole salon gets done. His second small job was fitting and epoxying a border teak strip in the cabinet with drawers by the companionway. Then he started measuring and figuring out how to add teak strips along the bulkheads on the cabin floors. These bulkheads used to have thick plywood and a rubbery suede covering which Houa removed for us and replaced with thin, waterproof Formica panels. This left a big gap between the bulkhead and the floor boards where the old plywood used to be.
Baw and his team of varnishers and sanders were busy doing just that, all day. Lek got another coat of gloss on the small drawers and the second set of bookshelves. Heru got to wield a paintbrush with West System Epoxy to coat the big new composite veneer piece that Houa made up that will be used for the fronts of the bunk steps in the forward cabins. We had hoped Baw could use the afternoon no‑rain time to get a coat of satin varnish sprayed on these last pieces, but he left after lunch to tend to his sick daughter. We hope all is well, and he's back with us tomorrow.
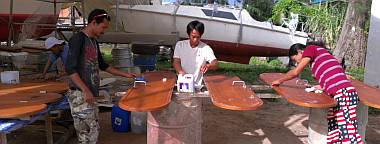 Preparing the doors for their final coats of satin varnish |
Friday, August 30:
Rain threatened all morning but never hit the yard, so that was good. Baw took advantage of
the sun between dark clouds to spray varnish!
It was basically a "Let's finish this varnish project" sort of day. We were sorry to not have Pla with us again today, as he is such a valuable team member. Hope to see him tomorrow. But Baw was back, so that was good. He organized the guys into a sort of sanding assembly line. The first set of doors to be satin varnished got laid out under the bow tent and were meticulously checked, touched‑up and wiped down. By mid‑morning Baw had 2 coats of Epifanes satin on them (1 side only) then they were carried under Ocelot and the next set brought out. Again final sanded, checked, wiped, and sprayed just after lunch. Baw even sprayed some polyurethane on the final table pieces!
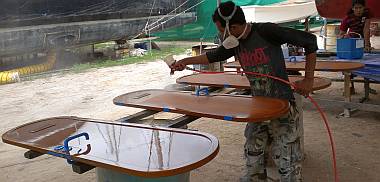 Baw sprayed 1 coat, waited 5 min, then sprayed a 2nd coat |
We have lots of small odd teak pieces that need varnish. Some were water damaged and only half the old varnish was removed, so now they look bi‑colored, and need to be stripped back completely. Others have small circles of damage or stains and maybe Baw can fix those. We hope tomorrow will be the last big day of THIS varnish episode, as we want to move on to the gelcoat event on deck. There will be a few left‑over pieces still to do, like the book shelves, and the pieces that need stripping, but otherwise the cabin varnish will be done (assuming everything dries nicely tonight) and that will leave only the salon varnish to do, later.
Sue worked in the hot salon today peeling back old white tape from the edge of the salon seats. Someone very thoughtfully put tape around the top edge of the teak, in an effort to keep the thin veneer from cracking and peeling down. But, they were thoughtless in using sticky white tape instead of easy release blue tape. Lots of hours of cleaning and scraping were needed to get back to the teak. Some of the veneer chipped away despite the tape, so that will have to be repaired. But Sue did get blue tape on all the seat tops, so hopefully there will be no more veneer peeling.
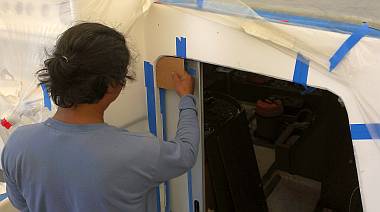 Houa planning how to make the teak rim for the entryway |
Jon took the scooter back to Rachaphon Hardware in Phuket Town and the folks were cheerful and happy to exchange the lesser‑quality concealed hinges for the more complex, wide‑opening hinges. After lunch he had fun mounting some of the cabinet doors using the new wide‑opening hinges. So nice to be putting Ocelot back together again!
On the inside walls of the cabins, under the 3 big cabinets, there used to be some plywood with a suede‑rubber covering. The plywood and rubber have been ripped out and replaced with Formica, but now there's a gap between the floor and the wall. Houa sanded the old Sika joining compound off the cabin floor trim, and took measurements for all the new pieces. "Not same same," he declared. "Some wide, some not same wide." Gee, another case of Ocelot's asymmetry.
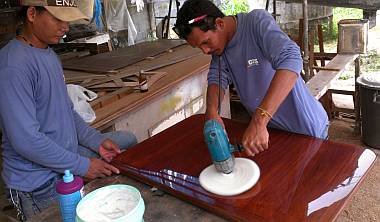 After polishing this salon table, Baw said it needed more varnish! |
But our preference is that Houa work on the entryway door frame before the floors. To that end, he took measurements, started making templates, and gave us an estimate of the teak needed. He'll check a number of shops tomorrow to find the best teak for us. He wants to get some 2x4" (5x10 cm) pieces as well as some 2x6" (5x15 cm) pieces for the corners. He was a bit miffed to find that the rebuilt vertical walls alongside the door were not straight in some axes. It will take some fancier woodworking to make them look uniform. But he assured us, "No promplem."
Saturday, August 31:
A sunny, rainless end to a productive varnishing week. Considering that for this varnishing
project the men have put 3 coats of gloss and 2 coats of satin, with sanding between each coat, on
almost 60 pieces (over 120 sides) as well as all the fixed teak in the cabins, it's gone pretty
quickly.
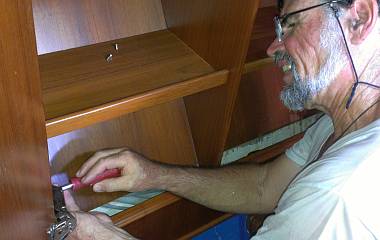 Jon having fun putting Ocelot back together - installing hinges |
Jon spent the day down in the cabins, mounting the new hinges and any doors that were ready. These hinges are adjustable 3 ways, so you can really fiddle with them to get a good fit. Of course if you have one door too far to the side and it interferes with the next one, you have to start all over. It was a hot and sweaty job but he's happy with it so far, and the new hinges seem to work really well.
Under Ocelot the assembly line of varnish continued. Today was the final big push on varnish before moving (on Monday) to the deck preparation for gelcoat spraying. This meant that everything was carefully examined, sanded where needed, and put in the works for either a spray or brush satin finish. Baw worked with Heru and set up the big head and cabin doors, doing the last satin spray on the back sides. With Lek brushing satin varnish on the inner sides of the head doors, this means we now have 8 fully finished, beautifully varnished cabin and head doors! Woot! Jon was thinking ahead on mounting them, but first we have to locate the doorstops and latches for them. Time to consult the inventory lists in the computer.
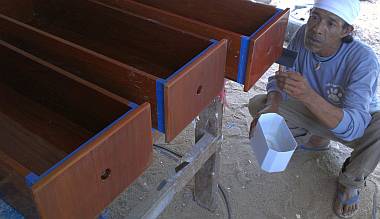 Lek varnishing the fronts of some long drawers |
Lek has taken over a lot of the hand (brush) varnishing. He worked alone under Ocelot with foam brushes and satin Epifanes varnish. He got 2 coats on the drawer fronts for the galley, cabins and salon. And he brushed satin on the insides of the drop‑down cabinet doors. Most of these are now finished.
Chambron cleaned up and sanded a last few push‑button latches and they got spray painted. One of the guys threw his cell phone case on the spray table and it's now shiny silver as well. Baw topped it off with a swipe of sprayed polyurethane when he was spraying some of our tables. They offered to do our smart‑phone/camera, but we declined.
Pla and Yando tackled fiddly bits on some of the interior steps. The pull‑out steps that lead down to the cabins have about 20 narrow grooves cut in them for nonskid, and before each epoxy or varnish spray they need to be sanded. They also prepared and sanded the raised rubber strips (another form of nonskid) on the bunk steps before they were satin varnished. More parts of the boat to put together!
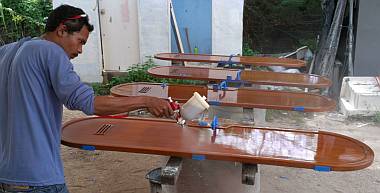 Baw spraying a final coat on some of the people doors |
Sue did her normal Saturday errands and bank run, payroll figuring, and photography. Between it all she played deck hand, swabbing the deck with wet sponge or acetone and scrubby pad as a precursor for Monday's full‑on deck attack. It would be nice to keep the little Asian Tree Sparrows from perching and squatting on the deck, but we haven't figured out how. Bird poop to clean up, every day!
Houa arrived late morning on his motorbike laden with 2 big slabs of teak. One was a 7' (2m) long 2x4" (5x10 cm) - a monster to carry on a scooter. He was hoping to buy only a 5' (1.5m) piece but the shop was out. The other chunk of teak was 5' (1.5m) long 2x6" (5x15 cm) for the corner pieces. Heavy! How he does it we don't know. Real cycle talent. He worked a bit on the template for the companionway door, but we could see his heart wasn't in it. After lunch he said he needed to go home, which we weren't very happy about, but he assured us he'd be back Monday to work all day on the door.
TGIS! Weekend! Rain is coming in, and we're going out for a Thai dinner - Tom Kah Gai (a delicious soup of coconut cream, lemon grass, strips of boneless chicken, chunks of ginger, cilantro, various mushrooms, and several aromatic leaves) and Tiger Prawns in Penang Curry, washed down with icy blended fruit drinks and sweet sesame balls for dessert! Yum!
Thai Refit:
Ocelot Pages:
Top Level: Home | Destinations | Cruising Info | Underwater | Boat Guests | Ocelot | Sue | Jon | Amanda | Chris | Site Map | Make a Comment
|
If our information is useful, you can help by making a donation |
Copyright © 2000‑ Contact: Jon and Sue Hacking -- HackingFamily.com, svOcelot.com. All rights reserved.