
The happy Birthday Girl partying down with cruising friends
77 Start Templates
 The happy Birthday Girl partying down with cruising friends |
Summary: A major change of direction - Mike (AME) agreed that instead of spraying gelcoat around where the nonskid will go, then sticking the nonskid down and then spraying more gelcoat around the edges, it would be simpler if the nonskid went down first and then he could do a heavy spray of gelcoat around the edges of the nonskid. This would save lots of masking and sanding, give us one fewer layer on the deck, and probably save all concerned both time and money. So Baw and Team Hacking spent the week preparing for the nonskid - marking off the borders of where it will go, smoothing the existing deck, laying parallel alignment lines down the deck, and building the first 10 templates for Mike to use for cutting out the nonskid panels. Ben and Lek worked under Ocelot, sanding and painting the undersides of the cockpit hatches and the shelves from the scuba locker and the fo'c's'les. Houa finished both the teak lattice and the broken floorboard he's been working on. He put gaskets on the engine hatches so they could be put back in place, cut 3 sheets of 3mm plywood into thin strips for the templates, routered out the areas for the swim‑ladder hinges, and made 10mm plywood covers for the other 14 deck hatches so we won't risk falling through one. Pla worked on the cockpit lockers, putting a thick layer of epoxy filler and some glass on the floor, and spreading polyester filler on the walls to smooth them out.
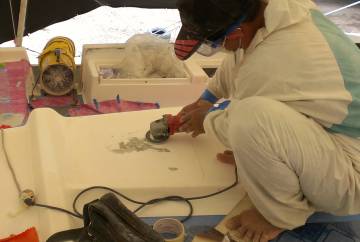 Pla grinding off bad gelcoat above the companionway |
Monday, April 22:
A little slow on the uptake in the morning, as we returned from a great belated double birthday party
up in Ao Po with 14 cruisers. No, the party didn't go all night, but we did spend the night up
there and it took most of an hour to drive to the yard! But we got some good stuff
accomplished.
Ben and Lek continued the minute finger sanding on the inside of the cockpit hatches. About noon Lek asked for a roller (thank goodness) which was the trigger that we'd better check the sanding job before the paint was mixed. Sure enough, there were still lots of shiny places on the epoxy/glass surface. It was nice that it was Houa (and not one of us) who told them to sand more. We hate being the "bad" guys all the time. But we do wish these guys would learn that nothing sticks well to shiny epoxy.
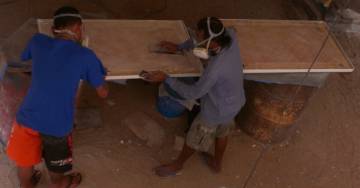 Ben and Lek sanding the undersides of the cockpit hatches |
Baw and Pla climbed up onto the cabin top to continue their clean‑up of the surface pre‑gelcoat spraying. But all of that ended up getting postponed...
Mike Cherry from AME came by and we had a long talk about "what's next" and "how we'll do it" and finally, a serious discussion about the sequence of gelcoating events to come. Originally, the plan was that Mike and his team would spray a couple coats of gelcoat on the "gutters" - the areas between where the nonskid patches will go. Then those edges would be rough sanded, the nonskid put on with polyester resin and the nonskid masked off to within a millimeter of its edge. Then the boat would all be masked again, and the gutter areas (re‑sanded for spraying) would get sprayed again. This final spray would also catch the very outer 1mm of the nonskid, to hide the fiberglass under‑layer that would otherwise be exposed. This is the way Mike has always done it. But we've just started to question the need to do it this way, because of all the layers of substrate needed, and the time involved to mask, sand, spray, mask, sand, and spray again. Each new layer means another place where adhesion problems can start, and we'd like to minimize those.
So, Mike graciously spent some time thinking outside the box, and after pondering whether there were any risks in changing the method, we all agreed on a new plan. We will mark out the exact placement for the nonskid panels and make templates of those pieces out of thin plywood stuck together with super‑glue. Mike will use those templates to cut out the nonskid, shape it, and glue it to the bare deck (per our markings). Then the nonskid will be masked (with the outer 1mm still showing) and the gutter surrounding the nonskid sprayed with a thick layer of gelcoat, just once. This saves a lot of sanding and prepping and masking steps, but more importantly it saves a whole layer on the deck, and it should save us both time and money. We'll begin by focusing on the forward part of Ocelot.
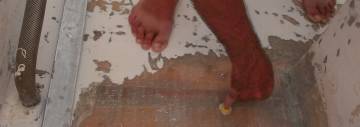 Jon pushing a PVC sleeve into a new cockpit locker drain hole |
To that end, we took Baw and Pla off the preparation of the deck. The areas under where the nonskid will go now have higher priority that the areas between the nonskid panels. And Mike's wanting to focus on the forward part of Ocelot means that we have some time to work on Ocelot's deep cockpit lockers. The cockpit lockers are actually one big space, with 3 big hatches on top to get at stuff. Those hatches have teak on top and form the floor of the cockpit. But the bottom of the cockpit lockers has always had a bit of a dip in the middle, so water that gets in there tends to puddle instead of draining away. While our new drain‑holes have improved the drainage so less water should get into the lockers, we'd also like to improve the drainage within the lockers.
First Jon showed Baw and Pla what he wanted done in the floor of the cockpit lockers, starting with rough sanding the epoxy and fiberglass that we'd laid down yesterday. Then Jon worked with Baw to drill 2 more drain holes in the floor of the lockers, straight into the "wave‑breaker" channels under Ocelot's bridge‑deck (the wave‑breakers double as drain channels). It turns out that Ocelot's bridge‑deck is a plywood/fiberglass sandwich, so we epoxied some PVC tubes into the holes that we drilled, to protect the wood. This is much easier than digging out the hard plywood and smearing in epoxy.
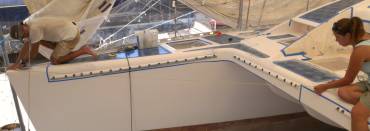 Jon and Amanda measuring triangles on the deck |
Tomorrow Baw and Pla will apply epoxy filler and then epoxy glass to the concave floor of the locker to give us better drainage. We also want them to apply some polyester filler to the walls of the lockers. This will smooth them out, making them much easier to keep clean. Finally we'll paint the entire insides of the locker with an epoxy paint.
By that time, Lek and Ben should be finished with the cockpit hatches, so we can put the new rubber gaskets around the edges of the hatches, put in new hoses for the new drains, replace the hatches, and cover the whole cockpit in thick plastic until Mike is ready to deal with the it.
Amanda worked with Jon most of the day on finding the exact fore/aft lines on the boat. When the diamond‑shaped nonskid is laid down, it wants to be aligned perfectly fore and aft, with all the diamonds lined up in rows. Otherwise it will look squiff and drive us crazy forever. But finding straight and parallel lines on a curvy sailboat deck is challenging, especially when Ocelot isn't exactly symmetric. There was lots of head scratching and discussion followed by measuring tape pulling and pencil lines drawn on the deck.
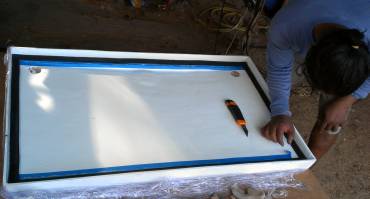 Houa pulling off the tape after epoxying down a thick gasket |
They started with a line across Ocelot, in front of the salon but behind the triangles of Ocelot's twin bows.. Unfortunately, Ocelot has a bit of a crown, which prevented them from drawing a straight line, but at least they could measure across Ocelot and find a midpoint. Then they chose points right up at the tips of the bows, exactly 3.10m (10') from their athwart‑ships line. Then a bit of geometry and trigonometry allowed them to find points on their athwart‑ships line that should be exactly aft of their 2 forward points. At least it's a start...
Jon and Amanda also got started discussing the exact placement of the nonskid, and what size all the corners will be. Mike has said that the minimum radius he feels comfortable with is about 1" (25mm). Any smaller and he can't guarantee that it will stay down. Mike has also said that we should try to stick with just one or possibly 2 corner radii for the whole boat, otherwise it looks patchy and is difficult for him to make. So Jon found some 60mm (2.4") diameter PVC pipe that we can use to draw out our corners. Since it's a standard size here, Mike can use sections of PVC pipe to shape the corners of our nonskid.
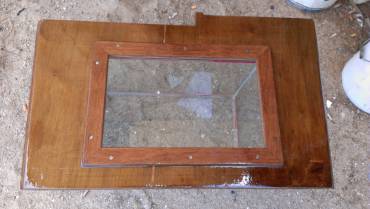 Houa's repaired floorboard, with a new frame & new epoxy |
Houa had his fingers into several projects today. First was the small floor section for which he had already finished the teak and ash (holly) repair. Today he worked on the underside, ripping off the delaminated hatch frame. But he also found the bottom veneer was delaminating. Darn water, gets everywhere! So he'll have to take off the veneer and build it up again. In the middle of that project we asked him to glue on a new gasket to the undersides of the engine hatches, now that they have been painted. So he sanded the inside rims, laid down blue tape, applied Hartford (epoxy) glue, and put on nice wide gaskets. Tomorrow when the glue is cured we'll be able to place the hatches back on deck, which will make for much safer maneuvering up there. Several people (like Jon) have already had unexpected drops into the engine rooms. Ouch.
Tuesday, April 23:
A high humidity, super hot day, but everyone seemed to gets lots done.
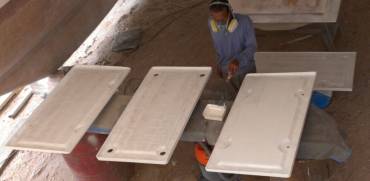 Lek painting the undersides of the 4 big cockpit lockers |
On the finished project list, Houa won. He rebuilt the underside of the teak floor that he repaired, and got the old veneer pulled off and the plywood all epoxied up. He also fine‑sanded all the interior holes of the anchor chain lattice (building himself a cute square sanding tool) and knocked the edges off the corners so it won't be so sharp to walk on.
Lek didn't do so badly either, as he got all 4 of our cockpit locker hatches epoxy painted (insides only, as the outside will get teak). So they look all bright and spiffy. Tomorrow we hope he'll put the gaskets on around the edges - then we can put them back in the cockpit.
The big, messy job of the day was up to Pla and Baw. First thing in the morning they spent time sanding the cockpit locker floor, then gave it an acetone wipe down. Then came the epoxy filler. And more epoxy filler. And even more epoxy filler. The goal is to have a flat floor in that locker where all our tools and tool boxes and painting gear sit so that water doesn't puddle under the boxes. (Let there be no repeats of the loss of 4 cases of Panamanian beer in that locker due to water corrosion of the cans!) Tomorrow's project is to sand the filler flat. If they don't have to add too much more filler, they'll be able to glass the area over.
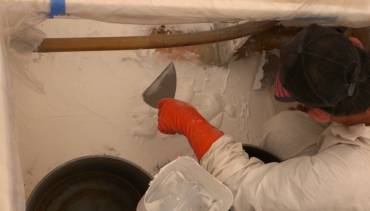 Pla spreading filler on the floor of the cockpit lockers |
On the smaller jobs, Sue got some good 400 grit sanding done on the forebeam, but went home mid‑morning to nurse her cold‑aching head. Tropical colds are nasty. No idea where this one came from.
Ben continued with the hand‑sanding of the louvers so that they'll be ready for more gelcoat.
Jon and Amanda win the thinking/frustration award of the day. They found the mid‑line of the boat yesterday, and drew 2 (mathematically) parallel lines from the tips of the bows aft until they run into the salon. Today they carried on, laying lines up each side‑deck. They used fine fishing line tape‑tacked to the deck to mark the lines, as a chalk snap‑line apparently does nasty things to gelcoat. But double‑checking their work they found that the lines up the side decks aren't quite parallel to the lines up to the bows, even though they're supposed to be. They're out by about 1%, or 0.5°. It's probably just Ocelot not being quite symmetrical, but it's annoying to mathematical perfectionist types like Jon and Amanda!
 Houa cutting out damaged screw-holes from his teak lattice |
Mike dropped by with a sample nonskid template, so we now (hopefully) know how we're going to do our own, starting tomorrow! Houa went home with money for 3 sheets of thin, cheap plywood that he'll cut into strips for us to use to build the nonskid templates.
Wednesday, April 24:
A beautiful blue‑sky day which was surprising after last night's hours of thunder and lightning.
Amanda and Jon held the fort today as Sue was still out with an earache and a sore throat. They got Lek and Ben busy sanding and preparing the shelves in the scuba locker (the aft‑most cockpit locker, under the aft seat). By the end of day we had several very smooth, white, fresh looking shelves. We have yet to address the issue of what to do on the sides and bottom of this locker.
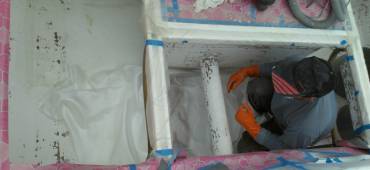 Pla spreading fiberglass on the floor of the cockpit lockers |
Pla sanded smooth all the epoxy filler he put on the floor of the big cockpit locker yesterday. Then he cut and laid some woven fiberglass over the filler to give it strength and a water‑proof layer. By the end of the day he and Baw were smearing very wet epoxy mud with micro‑balloons to give the top layer a smooth, paintable surface. Tomorrow they should be able to smooth the sides of those lockers with some polyester filler. Once that's sanded smooth, it will be ready for painting.
Houa arrived with 3 sheets of 3mm (1/8") plywood which he cut into many long strips. These are to be used to make the templates for the nonskid on the deck. Mike from AME came by with a sample so we know what we're trying to do. Then Houa returned to his teak grating. When it was removed from the anchor support months ago, the screws wouldn't come out, which left some ugly holes in the teak. He's cutting out those holes and filling them with good teak.
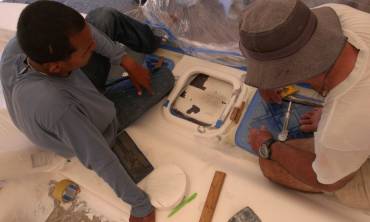 Baw & Jon working out how to lay nonskid around hatches |
Jon and Amanda attacked the gnarly issue of how close to lay the nonskid to the hatches, deck fittings, other patches of nonskid, etc. If we make a large gutter, that's more slippery area and more area for the guys to sand smooth. If we make it too close, it will show up flaws more easily, like lines that are supposed to be straight but aren't. And it doesn't help that Ocelot doesn't have many straight lines. In fact, she's got lots of curves, and even changing curves that we have to deal with. It will probably boil down to a bit of math and a lot of eye‑balling.
In the late afternoon Amanda rode Scooter back to the apartment to pick up Sue to try and get another opinion on the gutter sizes. So far, it looks like we'll have 20mm (3/4") along the toe‑rails, 60mm (2.4") out from the metal edges of the deck hatches, 25mm (1") around most deck hardware, and probably 50mm (2") between patches of nonskid. Other places we'll have to play games with the curvature of the deck and be sure that where the nonskid stops is well within the flat, before the curve starts. Any nonskid that tries to curl up a slope or over an edge is at risk of peeling off, and we sure don't want that!
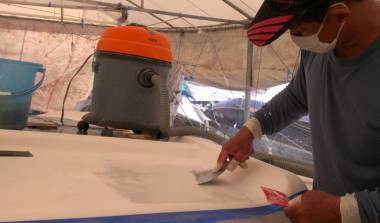 Pla applying filler above Ocelot's entryway |
Thursday, April 25:
Sun, breezes, and a good 30 minute downpour just after lunch. Typical SW monsoon!
Sue was feeling better today which was good because she and Amanda had to scooter into Phuket Town to Customs and Immigration to take care of formalities, like Amanda's visa extension, Sue and Jon's 90 day reporting, and collecting Ocelot's customs extension papers.
On Ocelot, Pla got more polyester filler put on the walls of the cockpit lockers, to help smooth them out. He works in a small area, then does something else while the polyester hardens, then returns to sand it. The "something else" today was putting filler onto, and later sanding, the water damaged areal above the companionway. Pla's a wonderful worker who doesn't wait to be told to do something. He also works longer hours than pretty much everyone else.
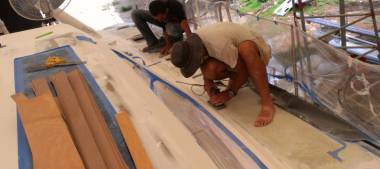 Baw and Jon trying to make the decks flat and uniform |
Baw spent most of the day patiently sanding Ocelot's decks, making sure they're flat. Around the hatches he wrapped sandpaper around some PVC pipe and used that to make sure that all of the transitions from the hatch‑frames to the deck are uniform. This is stultifyingly boring but much appreciated work. He also put filler in the area on the foredeck where lots of filler had been chipped out by an overly‑enthusiastic worker last month when the loose gelcoat was being removed.
Jon worked on the deck sanding and fairing in of the gelcoat line so that we'll have a flat area to put the nonskid onto. He and Amanda spent more time agonizing over the placement of the nonskid up against the curved edge where the decks meet the cabin top. Unfortunately, the guys who rebuilt these walls last year did not make exact copies, so on one side we have a bit more of a slope than on the other. And both slopes change as you go from the foredeck aft. So.... just where to put the nonskid so that it both looks good and is placed for safety is quite tricky. The two sides will probably end up being slightly different, but no one can see both decks at the same time, so as long as both look good we're OK.
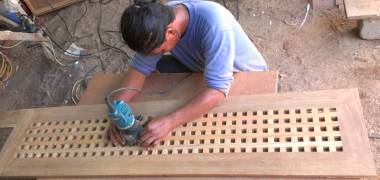 Houa rounding the many sharp corners of his teak lattice |
Houa really and truly finished the teak lattice for the anchor support today. He filled the old bolt holes with teak blocks and rounded all of the MANY sharp edges so they'd feel good underfoot. Then Jon carted both the lattice and the small floor section off to the storage room. Can't get more finished than that, at least for now! Houa also got some 3/8" (10mm) plywood and cut it into temporary hatch covers so that "Mr. Mike no fall troo." We don't want Mike (or anyone else for that matter) to fall through, either.
Lek and Ben continued their adventures with hatches, happy to be in the shade under Ocelot, and later out of the rain. Lek sanded the rims of all four cockpit hatches and cut and glued on gasket material so they're ready to drop into place once the cockpit locker area is finished. Ben did more sanding on the scuba shelves, then his brother Baw helped demonstrate good filler technique to smooth out the rough biaxial fiberglass. As Baw was artfully troweling on the filler, Jon asked him if he liked frosting cakes. He smiled, "Oh, yeah!"
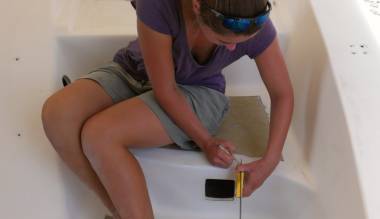 Amanda measuring where the sugar-scoop nonskid will go |
Sue helped out with the gutter measuring and pulling up the protective blue vinyl stuff which is no longer needed, taking pictures and sort of taking it easy. Jon built a couple of tools to help keep an even line from some of our curves, but it still got a bit frustrating, as Mike's instructions on where he could lay nonskid and where he couldn't seemed inconsistent to us. We'll try to stay with 2.4" (60mm) gutters around the metal rims of the hatches, but we'll have to make sure the deck stays level that close in, as the hatch frames have extra fiberglass around them. We'll stay with 3/4" (20mm) gutters from the toe‑rails as the toe‑rail is the same height as the deck, so there's only a visual line there, not a real barrier. Elsewhere we're going to try to go with a 1" (25mm) gutter, like the edges around the fiberglass hatches and at the edges of the sugar‑scoop steps.
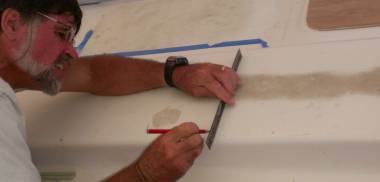
Sue tried to help with the curvaceous gutter decisions, but didn't feel very effective. Near day's end her frustration led her to sit on the sugar‑scoops with a metal T‑square and start marking off the possible outlines for the nonskid back there. This led to a happy distraction for Jon and Amanda who were sort of fed up with the frustration of curves, and we all decided on the gutter sizes for the sugar‑scoop steps. We should be able to build the templates for the engine hatch and 3 steps tomorrow morning.
Friday, April 26:
A sort of fun, creative day on the boat, although we were short 2 workers. Baw and Ben didn't
come in. Fishing? Painting? Sleeping?
Team Hacking probably had the most fun. We worked all day making templates for the new nonskid panels that will be manufactured and installed by Mike and his AME team. The past few days of trying to figure out the borders of the nonskid in relation to the weird curves and up‑liftings of the deck were very frustrating, but today was so satisfying!
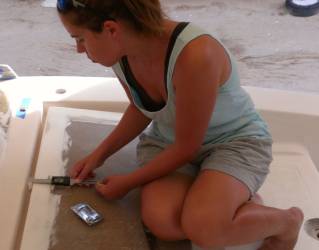 First we drew out exactly were the nonskid was to go |
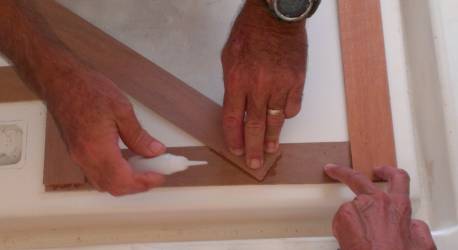 Breaking thin plywood strips to the correct lengths & gluing them together |
We started with the port engine hatch. It has a bit of a crowned surface but it's otherwise easy and straightforward, with only the lifting handle to avoid. Amanda laid out the borders using a T‑square and digital calipers to score a perfect rim around the edge. Then we took the long, thin plywood strips that Houa cut up for us yesterday, broke them into suitable lengths for the edges, laid them against Amanda's lines, and super‑glued the corners together. We put one brace diagonally across the middle for added strength, as these templates will have to travel up to AME's workshop, where the nonskid panels will be cut out.
It all went together really easily, and the superglue was awesome in its holding ability. Once port engine hatch was done, we laid the finished template on starboard, and VOILA! It fit close enough that we can use the one template for both pieces of nonskid.
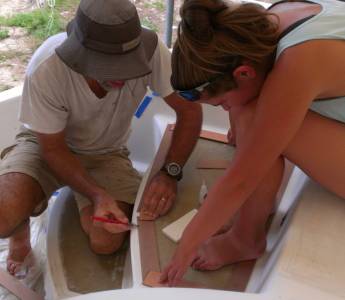 Drawing any curves onto the wood strips with a pencil |
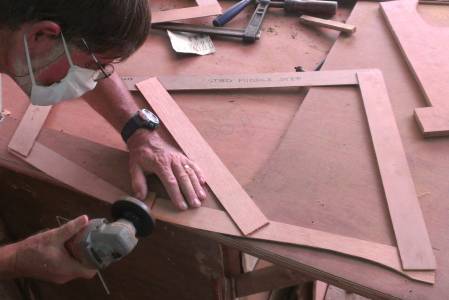 Trimming the curved bits to the correct shape, following our pencil line |
From there we moved to the tougher, and less symmetrical steps aft down the sugar‑scoops to the swim‑platform: the top step with the emergency tiller access panel in it, the middle step with its curvy aft edge, and the bottom step which is curvy both front and back. After building a template we'd check to see if we could use it on the other side, but the steps weren't symmetrical enough and we had to make separate templates for each side. The really challenging part of the day was creating the curves on the fore and aft parts of the steps. Once the lines were drawn, we glued bits of plywood together, laid them down, glued them together, and then re‑drew the lines on the wood. Jon finished the templates by grinding the excess wood off, leaving just the curved shapes.
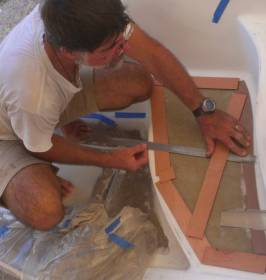 Marking an alignment line for the diamonds |
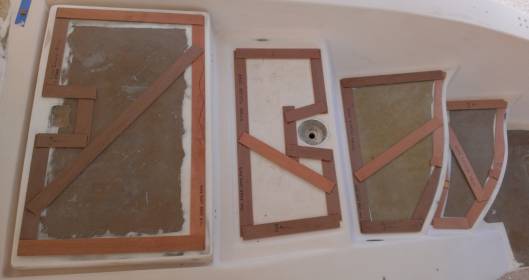 The 4 templates on the 4 starboard sugar-scoop steps |
It was also interesting trying to find the guide line to use for lining up the diamond pattern of the nonskid. We want the diamonds all lining up from one panel to its neighbor, not pointing this way and that all over the place. Symmetry is the goal. What a shock to learn that the top "tiller step" on starboard is a full inch (25mm) bigger than on port! And that's original factory construction! Houa came by as we discovered this and he laughed and said, "Yes, I learn that long ago. You have 2 boats. Ocelot One and Ocelot Two!"
All together we made 7 templates for 8 steps. Mike will pick them up tomorrow to take to his shop to use as patterns for cutting out the nonskid!
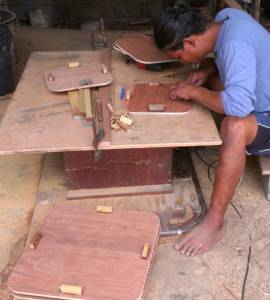 Houa making the plywood hatch covers |
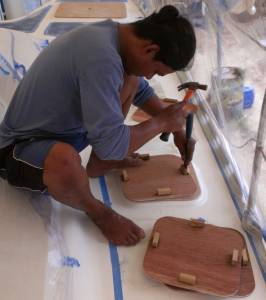 Trimming the legs to fit the hatch openings |
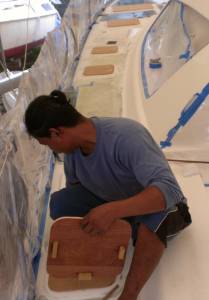 Installing the hatch covers |
Houa spent the day creating the plywood hatch covers that will be our safety covers while walking around on deck. He did such a neat, cool job we wished we had done it a year ago! Sure would have saved lots of dust and junk from going inside, and prevented a few bruised legs! He put little stopper feet on the bottom of each plywood shape so that they're easily removable but fit snugly into place and don't slide off.
Lek worked tirelessly under the boat sanding, preparing and finally painting more bits and pieces. He finished the 2 rectangular scuba shelves (for the lazarette) and got started on the triangular hatches that go on the shelf of the fo'c's'les.
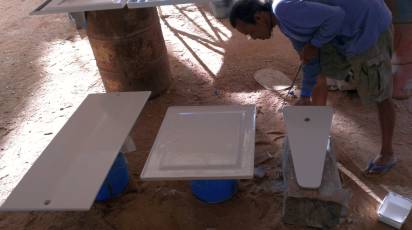 Lek painting hatches and shelves with epoxy paint |
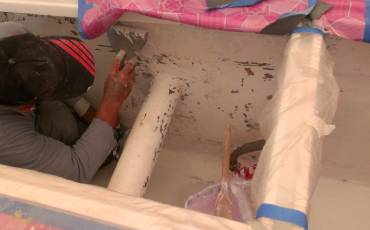 Pla smoothing out the cockpit locker walls with filler |
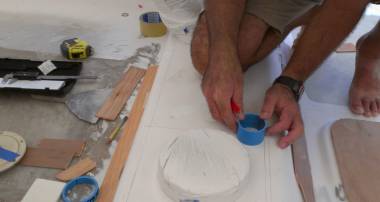 Marking in the rounded corners of the nonskid panels |
Pla could be seen (or not seen, much of the time) deep in the cockpit lockers, mixing polyester filler and spreading it like cake icing on the walls of the lockers. Soon he should be able to sand the filler smooth and paint the lockers with epoxy paint.
Saturday, April 27:
Yay! Another Saturday come and gone. And NO boat work scheduled for tomorrow! This
is a first for Sue after 5 weeks of Sunday Nyalic work!
And a cool and thundery and rainy day it was, but we got a lot done, although much of it was in the details that don't show so well to on‑lookers. Lek plugged away on the fo'c's'le hatches, adding epoxy and filler where needed to reinforce the slightly beat up plywood. Not critical, but nice to see it taken care of.
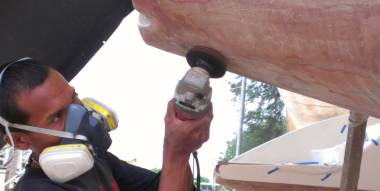 Baw preparing to patch the transom repairs we made April 12 |
We pulled Ben from under the boat, which we hope he appreciated after a week and a half on hatches. We set him up to scrape and finger sand the mast step up on the foredeck. He was working right next to Baw, so that was good, in terms of supervision. He got the aluminum step all nicely sanded back to either bare metal or really stuck on white paint, which we'll leave and Nyalic right over. Nothing under there shows except for about 1/2" (1cm) around the edge, but it will be nice to know it's protected and sealed.
Baw got several small jobs done. He finished power sanding the new filler up on the foredeck, an area that had been filled months ago, then gelcoated, then scraped off when the non‑adhering gelcoat was taken off. We covered it after his sanding to try and keep it clean until time to put nonskid on. He also ground back the phenolic filler under the starboard transom to get ready to put on fiberglass patches. These will be patches over the small holes Jon had to drill to try and find when the water had seeped in from in the new extensions. We eventually decided that it probably came in the bolt holes for the handrails, which are exposed to the air/rain/bugs. Yes, wasps fly over, crawl in, and create little messy green cocoons in the bolt holes. The sooner we get the bolts in the better. But first, we need gelcoat!
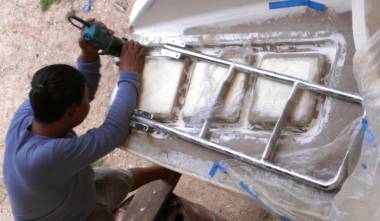 Houa readying the swim-platform for the swim-ladder hinges |
Houa probably had the least busy day, which is OK. He's been working hard, and come Monday he'll be busy into the teak deck project. He did finally get the bolt slots routered out for the swim ladders, so that they will mount nicely. Speaking of which, we have been distressed to see that the custom‑made stainless steel hinges for the custom‑made stainless steel ladders are NOT 316 stainless. This is apparent from the surface rust that has appeared after just one week of being exposed to salt water. OK. We cheated. We sprinkled ocean water on both the hinges and the ladders when we saw a touch of rust on both, after months in storage. Now, however, it's clear that our supplier did NOT give us 316, but probably 304 stainless, which WILL rust. No way are we going to deal with polishing and cleaning those ladder hinges that will be just inches from the ocean day and night, forever. We now have the swim ladder immersed in ocean water on one leg, and every few days we "wash" it in more. We will wait a month to report....
 Nonskid must be mounted on flat fiberglass - Jon finding the edge |
Pla continued sanding the cockpit locker, then he washed it all out, ready to see if we were happy enough with it for painting. The walls look OK. Certainly better than before when they looked like craters of the moon. It's just as well that today was too wet for an epoxy job, because the washing out showed us that we still have a slight lake in the bottom of the locker, about 2' (60cm) wide. So on Monday Pla will once again build us a layer of flooring with epoxy filler, but this time we'll be sure he gets a crown on the floor so the water will drain.
Team Hacking continued on their roll of marking the deck and creating new templates for the nonskid. Amanda got the outside edges by the toe rail all marked. We decided to switch from 1" (25mm) to 1.3" (30mm) width just for artistic sake. Then she marked out the curves and angles of some tricky areas where the nonskid goes around deck fittings, like pad eyes or winches. The afternoon project was to get the templates made for the two "ridges" that are between the cockpit and the decks. These are long (over 7ft, or 2.2m) narrow, flat ridges that we step on all the time, but which drop to the deck in graceful curves. Of course port and starboard are not mirror images, so we had to work on each side separately. Both have sloped edges, so it's difficult to find valid reference points.
Mike Cherry came by to pick up the 10(!) finished templates and drop off a couple plastic "inspection hatches". These are the round plastic "hatches" that fit over deck fittings (in our case the emergency tiller holes). The old ones are terribly UV damaged, and we had to get new ones to fit the spaces. Eureka! Got them. Another small victory in a long list of little details.
Thai Refit:
Ocelot Pages:
Top Level: Home | Destinations | Cruising Info | Underwater | Boat Guests | Ocelot | Sue | Jon | Amanda | Chris | Site Map | Make a Comment
|
If our information is useful, you can help by making a donation |
Copyright © 2000‑ Contact: Jon and Sue Hacking -- HackingFamily.com, svOcelot.com. All rights reserved.