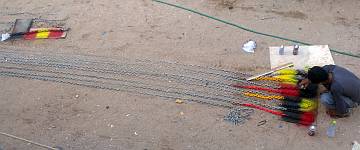
Baw spraying distance marks on our anchor chain
115 Stern Jewelry
Summary: Again, a week of mostly small jobs, but they all need to be done. The main focus was putting the stainless steel "jewelry" on the swim‑platforms, but we also made significant advances in the bathrooms, headliners, and the bimini. Team accomplishments this week include:
|
 Baw spraying distance marks on our anchor chain |
Monday, January 13:
A bit of a discouraging start to the week, but at least the day ended on an up note.
The hard part of the day involved the non‑cured epoxy and filler we put in the bimini last Saturday. It still wasn't cured. And the test mix that Sue made on Sunday hadn't kicked either. Nor had Houa's. So, with a 3 out of 3 failure rate, Jon and Houa scootered off to Phuket Fiberglass to see what they had to say about it. We are still overly optimistic Americans, expecting service even where there isn't any. They gave us no joy, and foisted Jon off on the Epotek rep in Bangkok, who said he'd call back but never did. Houa blamed the epoxy pumps, but Jon blamed the epoxy itself.
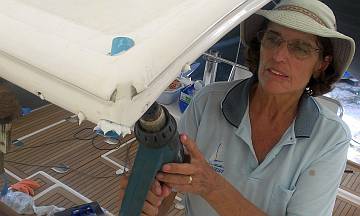 Sue heating the soft epoxy, trying to make it cure better |
Back at the yard, Houa mixed a batch of the new epoxy without the pumps, but it was huge batch, crudely measured, and ended up boiling (and making a very interesting golden dome resin sculpture). Jon tested the pump ratios as well as he could and found that they were very close to the 3.3:1 that they're supposed to be. So he mixed up another small test batch. It was getting warm at the end of the day, but hadn't kicked yet.
The problem is that we need this epoxy/fiberglass mixture to be very hard, as the big bolts holding the bimini legs will be threaded into it. Threading into cheese isn't going to cut it. Jon borrowed a heat gun from E‑U and Jon, Sue and Baw all took turns heating the corners of the bimini to try and encourage the epoxy to kick. When heated like that, the epoxy actually softens first, then as it cools, if it's going to cure, it hardens. The jury was still out at 5pm.
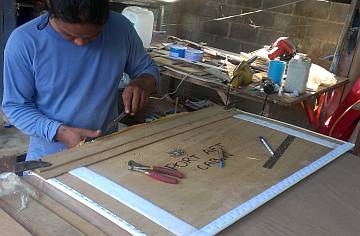 Houa trimming the edge off a vinyl covered headliner panel |
Houa continued working on the headliners, taking each one and assessing where it needed trimming. Then he'd pull the staples from 1‑2 sides, trim off some of the wood underneath, and staple the foam and vinyl back in place. He figures that just about every panel will need some help. It's the extra thick foam that TMT used (it was the thinnest they had) that seems to be the culprit.
Baw mixed up new gelcoat color in the morning for the small "hole fills" in the heads. Pla and Yando masked off the areas of the heads that needed better color, and Baw was able to spray the gelcoated walls of all 4 heads. He used very reduced air pressure, to be sure to contain the overspray. After lunch, when the new gelcoat was hard, Pla and Yando started polishing the new gelcoat patches. Most seem to blend in very well.
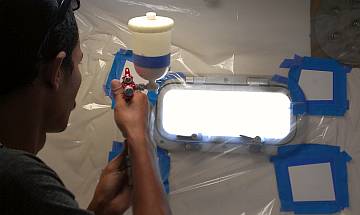 Baw spraying gelcoat on old screw holes in the heads |
Between gelcoating jobs, Baw took charge of spraying the marking stripes on the anchor chain. Sue helped lay out the pattern first, and then he could follow through as the paint dried and the chain needed to be turned. We realized that we need a glaringly obvious "end" to the anchor chain (the point beyond which we cannot attach the bridle and still keep the bitter end on the winch). Using the colors red, white, black and yellow, Sue realized that she could use the east coast children's ditty concerning coral snakes to remember the colors: Red and black, friend of jack [a harmless snake]. Red and yellow, kill a fellow [the poisonous Coral snake]." So at all the mid‑chain markings we have either red and black or yellow and black adjacent. Only at the very bitter end do we have red and yellow adjacent.
|
A nylon wheel scrubs old silicone off a leaky deck hatch |
Heru removed the 2 leaking aft cabin hatches. First he used the razor to slice around the horizontal edges of the hatch where it met the deck. Then using small wooden wedges, he forced them in as he worked around the hatch rim, thereby slowly lifting the rim from the gelcoat, without damaging either. Removing the old silicone was harder, involving razors, sandpaper, a nylon wheel on a drill, and liquid "Silicone Off" to get the last film off. Finally the hatches were cleaned with soapy water, rinsed, dried, and cleaned again with acetone.
The best accomplishment of the day was that Jon, Heru and Sue got those 2 hatches mounted back on the deck! Jon squirted a very generous bead of silicone around the hatch rim and the deck rim, put a dab of Tef Gel on each bolt hole, and bolted the hatches down, with Sue handling the washers and nuts below deck. Excess silicone scloobed out everywhere. We hate wet beds!
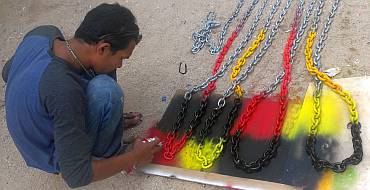 Baw spraying clear-coat so the colors will be visible longer |
Tuesday, January 14:
Today's mantra: Ignore the problems and forge ahead on other things. We've got a boat to launch!
The issue of the epoxy not curing in the bimini corners continued. The Epotek technical rep called from Bangkok and Jon explained that the lost work was our problem, but that we don't trust the batch of epoxy and hardener we got, so all we want is to have the 5 liters (1.5 gal) of epoxy, worth about $70, replaced by Phuket Fiberglass. The Rep said he'd call and talk to them. Anyone want to take bets on our satisfaction in this?
In anticipation of when Jon will mix (hopefully good) epoxy for the bimini corners again, Baw cut up fiberglass into tiny strands, ready to be added to the resin. Baw also sprayed the colored areas of our anchor chain with a clear coat, in the hopes it will keep the paint visible longer.
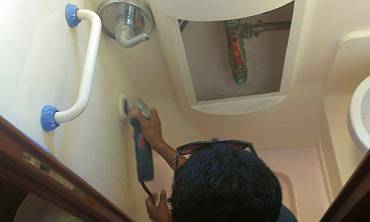 Baw polishing the walls of the starboard forward head |
Jon drilled out 5 holes needed to run the new diesel hoses from the forward tanks back to the new diesel manifolds in engine rooms. Laying those hoses is holding up the placement of some of the headliners, so this should allow the headliners in the forward cabins to be finished. To protect the plywood coring from moisture he painted the inside of each hole with the epoxy resin we have, as it's not critical that it set hard.
Yando, Baw and Heru sanded the gelcoat in the heads all morning. Both starboard heads were finished up to 2000 grit sandpaper, and in the afternoon Baw used his new Bosch variable speed grinder/polisher with 3M "74" Perfect‑It to polish the walls. He topped that with 3M wax for protection. They are looking oh, so bright and shiny now! On port side, one head was hand sanded to 1500, so ready for 2000 grit tomorrow, and the other is lagging at 600.
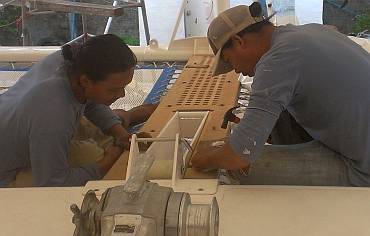 Houa & Heru epoxying teak plugs in the anchor platform lattice |
Last night we washed all 10 Sunbrella cushion covers in our top loading machine in the apartment, so Scooter Queen Sue scootered to Thai Sailing where our salon cushions are being remade. Sue and a worker checked out the covers to see which ones were permanently stained and needed panels replaced. They also decided that longer zippers (going around the corners) would be good as the new foam is much stiffer, and it's already difficult getting the covers off and on.
Houa got a new hole saw set and was able to cut the circles for the finger pulls for the head locker doors. Then he mounted his teak trim rings in each opening and cut the backs off flush with the formica. Dodging Baw and the guys polishing the heads was a challenge, but Houa managed to check the fit of each locker door (they are all different, of course!) and get the small spring‑loaded latches mounted on the first couple doors.
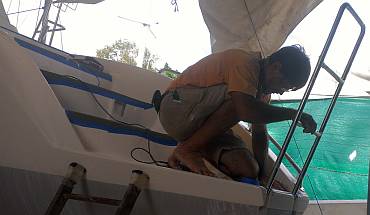 Trying to work out where the ladder is binding on its hinges |
Houa also commandeered Heru to help insert and glue in the teak plugs on the anchor chain lattice up on the tramps. These big bolt holes have been open for months, so it was nice to see that small job finished.
Jon's afternoon project was the starboard swim ladder. Test mounting it on the swim platform revealed that the hinges don't sit in the same plane(!?) and the ladder interferes with the hinges at some angles. Some time with the drill press in the yard's workshop aligned the hinge holes in the ladder, and grinding parts of the hinges should get things moving more freely, but the hinges need a bit more work and then they'll need to be polished again.
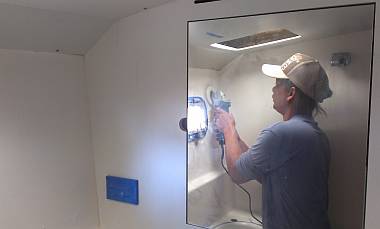 Heru, reflected in the mirror, polishing the walls of a head |
Wednesday, January 15:
Best day of the week, so far. Quiet but productive.
Beautifying of the gelcoat in the heads continued, with Pla and Heru each taking turns with the new polisher and 3M "74" Perfect‑It polish. Pla offered to hand polish the inaccessible (by machine) bits around each of the toilet bases, which showed nice initiative. Three of the four are now all polished up.
Jon was late to the yard, as he was sending electrical engineering advice to Amanda for her Department of Ecology research boat. He also got an interesting phone call from a fellow cruiser who said that there have been other examples of Epotek epoxy not curing, bought from Boat Lagoon. Epotek may have sent out a bad batch. We await further word from the Rep.
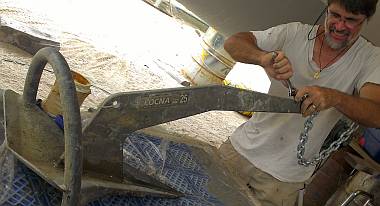 Shackling our working anchor onto our chain |
Sue dragged the painted/marked chain from the side yard to under Ocelot. Houa had the good idea to pile it on the table so we could wash it with the hose. Jon tied the bitter end to Ocelot, then we went to raise the chain. Oops. No windlass "up" action. We'd tested it earlier but the guys had broken a control wire when they were cleaning or painting the locker where the big relays live (and hadn't told us, of course). Jon told Heru where to hold the broken wire and we winched up the chain and the anchor. Jon will fix the broken wire when he replaces the relays, a job that has been pending for a while now.
Jon's project was the starboard swim ladder. He ground off some of the swim platform gelcoat, where the hinges bolt down, to make better space. Then he ground the hinges and the ladder itself, to prevent them from binding. The yard had mounted a polishing disk to their bench grinder, so Jon used that to polish up his grinder marks. It's so satisfying to turn rough steel into brightly polished, smooth and unmarked steel. A test mounting showed that everything was good so he drilled the mounting holes for the hinges. Tomorrow he should be able to mount that starboard swim ladder.
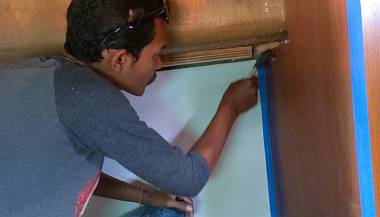 Repairing the varnish of a wall scratched by forcing a headliner |
Baw was only with us in the morning as his daughter's teacher called to say she was ill, so he left at noon. He spent the morning sanding the teak bulkheads in both aft cabins where the men had scratched the varnish while (too forcibly) trying to mount the headliners. Baw was able to get both walls sanded and a new coat of satin Epifanes applied before lunchtime. It was a step forward, but of course, it was really only a repair to already finished work.
Sue was in the port aft cabin when she noticed several deep scratches in the vinyl of some of the headliners already in place. Grrr. Why had no one told us about these 2 headliners when they knew we were sending the damaged ones to TMT to repair, and it takes a truck to transport them? We now have 3 big headliners (each about 2 meters long) to be sent back for re‑covering. Can we say frustrated?
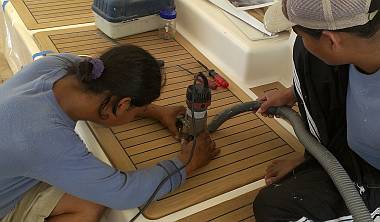 Houa & Heru routing out the battery hatch to mount the pulls |
Houa was cajoled into working on another boat in the yard that needs carpentry, as they are trying to launch tomorrow. We don't like to let him go, even for half a day, but there are politics involved, for him and us. In the afternoon he mounted the finger pulls for the cabinet doors that will go in the heads, under the sinks. He also got the last of the latches mounted, while Heru got the first layers of polyurethane brushed on the teak trim. Once we get the tiny (3 x 10mm or 1/8" X 3/8") bolts, nuts and washers, he can install the doors in the heads.
Houa and Heru also worked together on the battery hatch pulls in the cockpit. Houa routed and chiseled and Heru assisted with the vacuum, then sanded the edges of each cut‑out so the pulls fit nicely. Mounting them is the next step, which falls to Jon.
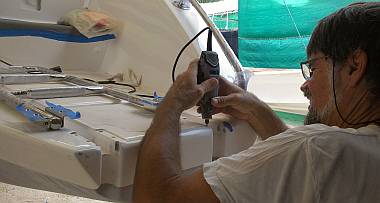 Grinding off a bit of gelcoat so the hinges sit down better |
Sue played with screwdriver and latches a bit on the aft cockpit seats, but found it all a bit frustrating as the nuts wouldn't go on the small bolts, and the fittings wanted to go in crooked so that they were binding. Yo, Husband! Help! Poor Mr. Jon. We all depend on him so much!
Luckily Sue can do some things on her own, like tackle the roadways to Phuket town on the scooter and deal with the bureaucracy of reporting our continued existence here in Phuket to the immigration authorities, hopefully for the last time.
Thursday, January 16:
A day of great motion on Ocelot. Some of it forward, some sideways, some backwards. An
endless roller coaster ride on this Thai Refit that feels like it will never end.
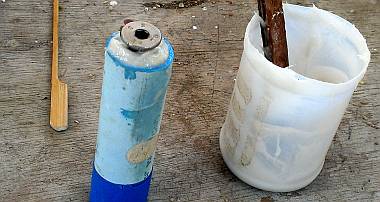 Our 8mm test bolt & 2 nuts, encased in epoxy in a PVC pipe |
The great steps forward came from Jon, who got some good stuff done today. Thinking about the bimini legs, we'll obviously have to remove as much of the uncured epoxy from the corners of the bimini as we can before starting over. A friend suggested that instead of tapping threads into the cured epoxy, that we put the bolts into the epoxy while it's still wet, essentially burying the bolts in wet epoxy mud. This would hold the bolts more securely, but it wouldn't let us pull the steel legs onto the bimini, to hold the legs as tightly as we can. But if we covered the bolts in release wax first, then we should be able to remove the bolts after the epoxy has cured, cut off a bit from the ends of the bolts, run them back into their (already threaded) holes, and tighten them as much as we like. Even better, we could put nuts on the bolts and bury the nuts as well. This would add steel to the threads, making them much stronger than just epoxy.
But for this to work, we have to be certain that we can remove the bolts after the epoxy has cured. So we decided to try a test that emulates the bimini situation. We took a long 8mm bolt, rubbed release wax on the threads, and ran 2 nuts onto the bolt. We capped one end of a short length of PVC pipe, filled it with a mixture of West Epoxy, high density 404 filler and shredded fiberglass, and buried the bolt and both nuts in this epoxy goop. We'll let it cure for a day, see if we can remove the bolt from the epoxy, and see if the bolt goes back easily into its threaded hole (and the nuts, still buried in the epoxy).
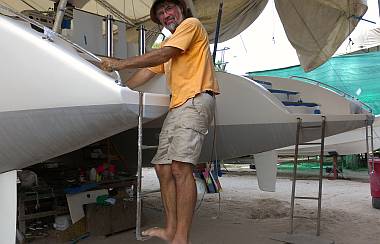 Both swim ladders are now mounted and ready for the water |
Jon's next job was to double check the fit of the starboard swim ladder and hinges. He was so pleased with the fit of the newly ground and shaped steel (which he had nicely polished) that he went ahead and mounted them with silicone around the bolts and under the hinge flanges. Checking the portside ladder, he decided to grind back some of those hinges as well, and then re‑polish them. Late in the afternoon, Sue helped Jon mount the port swim ladder, so we are now officially able to climb back aboard Ocelot once she's in the water!
The backwards step was that after Houa had carefully mounted the beautiful newly veneered rounded doors in the salon, we realized that one of them had developed the dreaded "epoxy blush" under the polyurethane. Given that the blush reputedly spreads with time, it was only going to look worse as time went on. So Baw used TOA paint remover and a scraper to peel back layers and layers of polyurethane and epoxy, getting down to the bare veneer. Sue joked that if he took off the veneer, she would take off his head. Those rounded teak doors are beautiful, and made with true craftsmanship, but they have been a pain in the budget. Baw brushed on the first 2 of 6‑8 layers of clear polyurethane this afternoon. He may brush a few more coats, and then will spray the rest for a really fine, smooth finish. The whole thing will be top‑coated with a satin varnish.
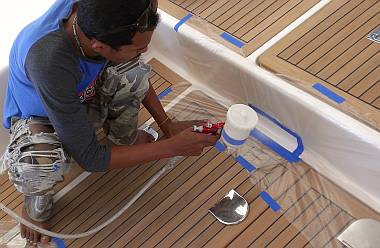 Baw sprayed 6 thin gelcoat patches (and his model boat) |
The sideways action involved more gelcoat touch‑up. Heru, Yando and Pla sanded, cleaned, and masked 6 small deck patches that were showing dark fiberglass and Baw sprayed them with more color‑matched Thai gelcoat. Invariably these thin areas were on rounded corners where someone had gotten overly enthusiastic with sanding. Other than more dit‑dot gelcoat repairs to the edges of the nonskid, we are about ready to declare all the little spray jobs finished.
Sue got lots of errands run on the scooter. She took our 2 rounded seat back cushions to Thai Sailing, the company that's making the new salon seat cushions for us. They suggested getting new foam, slitting the backs, filling the slits with cotton batting, and then covering the whole curved cushion in a thin white "holding" cloth so we'll be able to take the covers off easily to wash them and not have the cushions falling apart anymore. They also agreed to increase the length of the zippers on all 10 seat cushion covers so we can get the covers off and on again more easily.
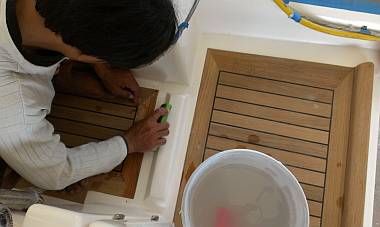 All 6 patches were sanded smooth by the end of the day |
At Rolly Tasker, the sail maker, Sue hunted through stacks of sails to look for our lost mainsail bag. No luck, but they gave us some old sail ties and another big bag which will work nicely. We also discussed getting our boat name put on the mainsail "stack pack" cover.
Since the guys seem prone to damaging the new vinyl on our headliners, Sue bought more vinyl and a big roll of Velcro at TMT. Now that Houa has a pneumatic staple gun, he can re‑cover the 3 remaining damaged pieces, which will save time and money.
The downer of the day came at the end, when we discovered that 1 of our 23 liter (6 gallon) jugs full of diesel had walked away. The list of things stolen from us grows. To the $30,000, our Dremel, palm sander, all the diesel in Ocelot's tanks when we hauled, several small tools, petrol from the compressor, chemicals, paint supplies and beer, we can now add an Ocelot‑labeled jerry jug of 23 liters of new diesel. On the positive side, given that we have only recently been able to lock the boat at night, it's amazing that the list is so "small". Welcome to boat work in a country where many people think that all foreigners have more money and things than we need, and that we won't miss them. How wrong they are.
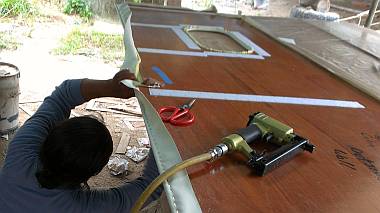 Houa had problems re-covering the big headliners with new vinyl |
Friday, January 17:
A slow start with some workers missing, but some landmark events by the end of the day!
Jon's morning excitement was that the 8mm bolt that he embedded in epoxy filler yesterday released relatively easily, and the embedded nuts let him screw it back in with much more force than if the threads were just in epoxy, so our test was a success! We've been feeling our way along with the bimini legs, and it's so nice to now have a definitive direction and procedure.
But before Jon could get to work on the bimini, he had to scooter to the other side of Phuket Town to get our brand new Dremel repaired. It's under warrantee, but one never knows what that means outside the US. Bangkok Hardware took it back, noted but didn't comment on the changed plug, and said they'd call us tomorrow. Fingers crossed...
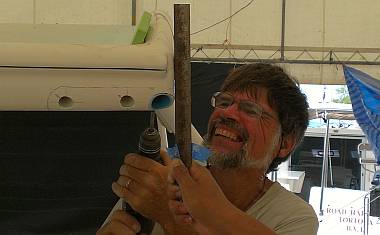 Sue helped Jon aim the drill between the ruler & the green block |
Yando and Pla were only with us in the morning, doing small gelcoat repairs on deck. These are places where we have small voids or dips, things that can be gelcoat dotted and don't need a new spray. The work they've done around the edges of the nonskid panels is fantastic, giving the panels a real "organic" look, as though they were molded with the boat.
Houa wasn't in until lunchtime, as he had worked until midnight for another boat. Hmmm. This isn't working too well for us. Houa spent the afternoon re‑covering one of the really big headliner panels only to find that one man cannot do a good job. Or else he needs a heat gun to help stretch the vinyl. In any case, after half a day of frustration (for him) we all decided it would be best to send the damaged headliners back to TMT, the local experts. Each large panel won't cost any more than a half day of Houa's time, so well worth it. And we still have lots of other work for Houa to do.
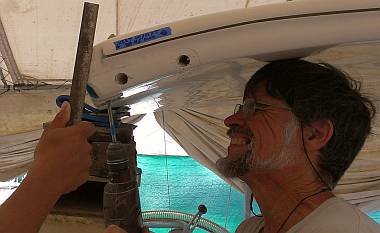 Sue had a much better perspective on where to aim the drill |
Heru and Sue did some diesel clean‑up of one of the deck winches, but we really need Jon as part of the assembly line so that as parts get cleaned, he can grease them appropriately and re‑assemble the winch right then and there.
Baw sanded the rounded salon door once again, and brushed on 2 more coats of polyurethane.
Jon spent the day on the bimini project, preparing the corners to receive West epoxy and filler, into which we'll embed bolts and nuts. The mounting holes in the stainless steel legs are already drilled, so the bolt heads will have to end up in exactly the right spot when we embed them in the bimini. So Jon marked the bimini with circles and cross hairs showing where they need to be. Drilling out the chewy, un‑cured epoxy required Sue to help align the drill, as the angles are deceptive and the bolts are 80mm (3"+) long. First we drilled a 6mm (1/4") pilot hole, and then we went in with bigger wood-boring bits, 5/8" (16mm) for the 8mm bolts that come in from the bottom, and 3/4" (19mm) for the10mm bolts that come in from the sides. These holes are large enough that the nuts can slide down them.
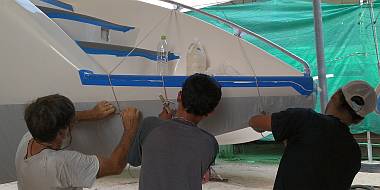 Tightening up the "Spanish windlasses" on starboard |
Once the holes were drilled, Jon was all gung ho to prepare the bolts and mix the epoxy, but he didn't realize it was already 4:30 and too late to start that project. Time flies when you're having fun!
The big FUN of the day happened on the swim‑platforms, as Baw and Heru prepared the inner edges to receive their stainless steel "armor". They dry mounted the long steel sections to check the fit, then masked the steel and the hull with blue tape. The interesting part was developing a rope system to pull the stainless pieces tight against the boat, since we aren't using any fasteners at all, just mastic. They ran ropes all the way around the aft ends of the sugar‑scoops, using the grab‑rail to keep them from sliding aft, and tightened them by twisting a wooden bar through the loop of rope and winding it up in a "Spanish windlass".
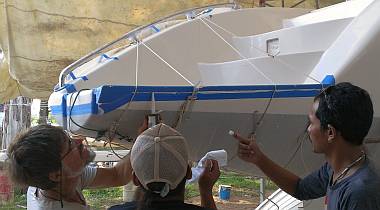 Injecting more 5200 into gaps on the portside "armor" rail |
Once everything was setup, they gently sanded the hull to improve adhesion, and cleaned everything thoroughly with acetone. Jon stopped his bimini project to apply generous beads of 3M 5200 to the insides of the stainless, and the men pushed the protective armor into place. The ropes were tightened and extra 5200 was squirted into any gaps and wiped smooth around the edges. We did both sides(!) so now the swim‑platforms are a maze of ropes. We're using the "fast cure" 5200, so they should take "only" 24 hours to cure. Tomorrow we hope to add more jewelry to Ocelot, so stay tuned!
Saturday, January 18:
Last day of a long week. But we're on a roll with the bimini legs, so we'll be working tomorrow.
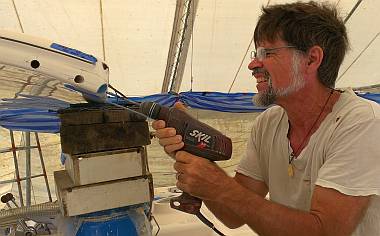 Jon finished de-coring & preparing the bimini for epoxying bolts |
Jon finished de‑coring the starboard corner of the bimini, getting it ready for the epoxy injections. Sue once again played sidekick with the vacuum and as a spotter for keeping the drill pointed in the right direction for each different bolt. Baw cut up more fiberglass for adding to the filler and resin. At the end of the day Jon and Baw discussed the upcoming epoxy injection, and then Baw taped the bimini hole perimeters and masked the deck under the bimini so we're ready for another Great Epoxy Event, maybe tomorrow.
Heru and Baw had to be asked to NOT unmask the new stern stainless steel armor in the morning. The required 24 hours was nominally up at 3pm, but they couldn't wait. They unmasked it all after lunch and it sure looks beautiful. Then they prepared the ropes and trusses for the other transom plates and the 2 bow stainless armor plates (shoes). Unfortunately all of Phuket is out of the fast‑cure 5200, so Sue had to buy 2 tubes of the slow‑cure variety, which is supposed to be stronger, but it takes a week to cure. But the ropes holding on the bow shoes don't interfere with anything, so leaving them up for a week is no real problem.
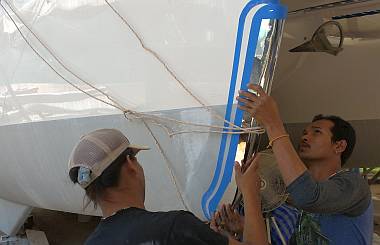 Sliding a bow "shoe" under the tensioning ropes |
The bow shoes went on pretty easily, and used less 5200 than we'd expected, about 3/4 of a tube each. Baw and Heru had, at Jon's direction, rigged up 4 ropes to hold the shoes tight against the bows while the 5200 cured. Everything was cleaned with acetone, Jon shot the 5200 onto the shoes, Baw slid each shoe into position, and the ropes were positioned and tightened up until they sang when plucked. A bit of thumping with a hammer to make sure they were solidly against the hulls, and the excess 5200 was spread into a filet around the edges.
The 4 remaining stern plates were quite small and went quickly. Baw and Heru had rigged 2 ropes for each piece, tying them between the rudder post and the swim‑ladder or the grab‑rail. We had enough of the fast‑cure 5200 for the stern plates, but we'll leave the ropes in place for the weekend, just to be sure. So now Ocelot's vulnerable sterns are edged in 3mm stainless steel armor to protect her from errant dinghies.
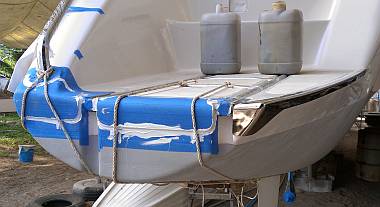 Last bits of (blue-taped) stern armor stuck down |
Pla and Yando were in the heads all day, grinding, sanding and filling the numerous cracks in the gelcoat on the shelf and on the sink front wall. Why these things weren't seen last week when everything was being polished we're not sure. Even Pla, our picky gelcoat repairer, failed to mention the scratches and cracks. Baw will have to mix up another super special batch of Thai gelcoat to match those head walls once again before spraying. This spraying and sanding, and then re‑spraying has all been very inefficient, but it doesn't seem to faze the men.
Houa was ready to throw in the towel yesterday on the re‑covering of the vinyl headliners. But when Sue arrived she pushed and prodded the vinyl into the right places and told Houa that surely he and she together could make it work,. He said he'd call for her if/when he needed help. Soon he had the whole big 2M long headliner nicely covered all by himself.
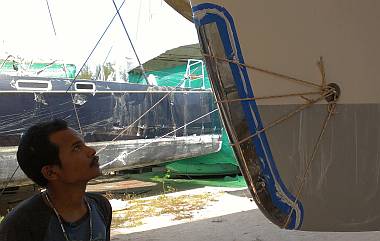 The ropes will have to stay tight for a week while the 5200 cures |
Next he removed the right angled piece above Amanda's bunk. Unfortunately, this piece showed signs of water damage, and no one had bothered to look under the vinyl to see the condition of the wood. Not good. So Houa said he could cut it off and re‑attach new plywood to the right angle fiberglass, then coat it all in epoxy and re‑cover it. Sue scootered off to TMT to buy more thin backing foam and some Velcro for the mounting. Houa had that piece all pulled apart and sanded down by day's end. Monday he will attach the new plywood section and do the epoxy coating before adding back the foam and vinyl. It's nice to get rid of the moldy wood that was lurking under the headliner, so maybe it's a blessing in disguise that that piece got scratched and had to be pulled apart.
Sunday, January 19:
A half-day of rest for the Intrepid Twosome, with Skype calls to family, brunch out at Flint's, then off to the yard.
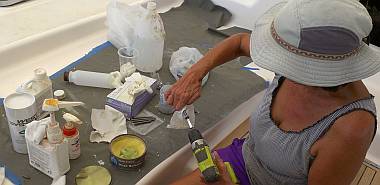 Sue put a second coat of release wax on all 12 bolts |
We arrived at mid‑day to find Houa working for E‑U on a woodworking project. But otherwise we were alone, just the two of us with our own music working on our boat. It was nice to have a single‑minded purpose, and to be without the distractions of other workers and other needs.
Up in the cockpit we assembled all the supplies for the Bolts Into The Bimini event: West system epoxy in pump jugs, West 404 High‑Density Filler, finely chopped fiberglass "dust", big syringe and straw for a long snout, latex gloves, stirring stick, rags and acetone. While Jon filed out the bolt holes one last time to be sure there was room for the nuts to get epoxy around them, Sue smeared release wax on the bolts, again, then wiped them off, to leave only a thin film. The trick is to have enough release wax to have the bolt not stick to the epoxy, but not have so much that the threads of the bolt are filled, thereby reducing the "grip" of the threads. Jon had a great idea to put screwdriver tips on the screw gun and let the Ryobi rotate the bolt, while we wiped with a rag. Hooray for the Mechanical Efficiency (read: lazy) Guy!
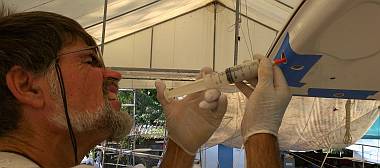 Injecting epoxy, filler & fiberglass into our first bolt hole |
We set up the bolts with 2 nuts, one near the far end from the head and another near the middle. This should anchor the bolts well to the fiberglass bimini.
With perfect timing, our cruising friends Roy and Ella dropped by to see Ocelot and talk with Houa about a small job. Who'd have known to find us at the yard on Sunday? People who read these entries! It was great timing, as we were all set to go on the epoxy job but had not yet pumped the first batch.
Visiting finished, Jon mixed a 2‑pump batch of West epoxy, filler and fiberglass, aiming for a consistency of soft peanut butter - soft enough to push through the syringe, but gooey enough not to fall out of the holes, 4 of which were vertical. Sue brushed straight resin into the first 2 holes and we filled the syringe. Jon injected the epoxy mud into the back of the hole, filling most of it, then spread mud on the sides of the bolt itself, and pushed it gently into its hole. We wanted to avoid air pockets, and be sure there was enough epoxy around all of the bolt, on both sides of the 2 embedded nuts.
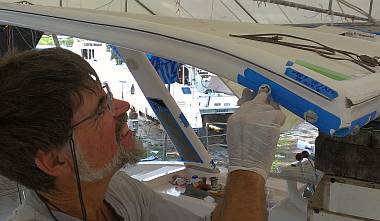 Pushing one of our last bolts home - note other bolts in position |
Once the bolt was pressed home, Sue cleaned off the inevitable stray epoxy and Jon got into contortions to be sure the bolt was aligned properly into its hole. Sometimes we had to secure its position with a bit of tape, but most times it seemed to nestle quite happily into a good position. We had enough epoxy in the syringe to do a second bolt with the same batch, then we had to mix up another batch of epoxy mud. We kept the batches small, to prevent an exothermic run‑away reaction, but even so Jon could feel the epoxy getting hot in the syringe.
We repeated this whole thing 6 times, embedding four 10mm (~3/8") bolts and two 8mm (~5/16") bolts in each corner of the bimini. In that one sentence we have described work that took 5 hours! Home by 5:30, and definitely "Beer Time". Can we have a bit more weekend now?
Thai Refit:
Ocelot Pages:
Top Level: Home | Destinations | Cruising Info | Underwater | Boat Guests | Ocelot | Sue | Jon | Amanda | Chris | Site Map | Make a Comment
|
If our information is useful, you can help by making a donation |
Copyright © 2000‑ Contact: Jon and Sue Hacking -- HackingFamily.com, svOcelot.com. All rights reserved.