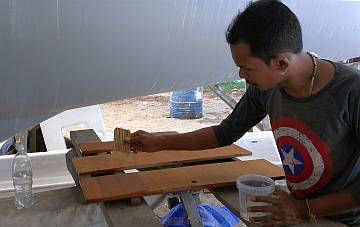
Baw brushed 4 coats of polyurethane onto 3 cabinet doors
118 Mount Cleats
Summary: This was largely a week of deck fixtures and headstay roller gear, with some interior varnishing and headliner work as well. We have a nominal splash date of early March, so we're hustling to get everything done. There were a couple of setbacks, but that's to be expected, and we made good progress. Accomplishments by the team this week include:
|
 Baw brushed 4 coats of polyurethane onto 3 cabinet doors |
Monday, February 3:
Oh Happiness! We had our first real weekend in 2014! On Saturday we scootered 30 miles
north to Ao Po to hang out with Bruce and Alene, from Migration, newly returned from the Middle
East, Europe, South Africa and the States.
Scootering south on Monday morning we stopped at Boat Lagoon to talk with Mike about making us some strainers to go into the water‑catch holes on the bimini, so we don't lose things like leaves, sticks, screw drivers, etc down the (inaccessible) bimini legs. We also hoped to pick up the 2 remaining LED fixtures for the heads, but they are no longer made, so we had to compromise on design, and will now have 2 different fixtures in the 4 heads.
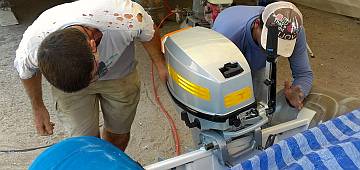 Jon and Heru mounted Tomcat's outboard and locked it on |
Closer to the yard, Sue was happy to discover a very upscale company called Phuket Art less than a kilometer from the yard, right there in Ao Chalong. They speak good English, have several graphics artists‑types at computers, and a room full of rolls of vinyl. We'll be heading back there soon to talk about making up Ocelot's name and logo for our bows.
At the yard, the men were at work on projects we'd discussed with them on Saturday (knowing that we'd be late coming down from Ao Po). Baw was happily sanding the coat of polyurethane he'd applied on Saturday. Throughout the day he managed to sand and apply another 4 coats of clear polyurethane. The super fast drying time is one of the great advantages of this 2‑part polyurethane over traditional varnish. One coat of varnish in a day is about the norm.
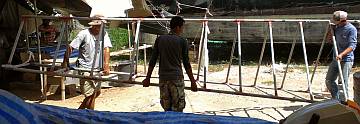 Moving some big scaffolding out of the way |
Heru had used his ingenuity to fix an expensive mercury float switch that one of the men had stepped on months ago. One of the 2 arms holding the floating switch to the base had cracked, so that it no longer held onto the base. Heru coated the cracked area in epoxy resin then trussed the whole thing up until the epoxy cured.
Our big step forward today was to return to working on the mast and rigging. Because we have roller gear on our headstay, we had to find a way to support the new Dyform wire from top to bottom while we worked on it. To that end, Heru, Baw and Jon scoured the yard for unused work tables and lined them up next to the mast. They also moved 2 tall scaffolding supports to get them out of the way. Then they unrolled the 60' (18m) of 12mm cable and set to work.
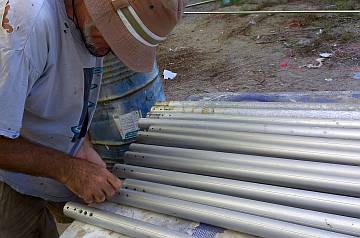 Jon checked every hole, looking for stripped threads |
This is brand new $1,000 wire cut for us by Rolly Taker over a year ago, but it was showing signs of surface corrosion. Heru cleaned it with soap and water, then used a brass brush to scrape off the surface marks, and a folded piece of 120 grit sandpaper to touch up any remaining brown spots. The goal was to clean the wire surface so we could see and feel any breaks or mars in the wires. Thankfully, there appeared to be none, which is what we'd expect of such new wire.
Sue led an expedition to the storage room for all the Profurl roller furling bits: 12 long aluminum extrusion tubes, bags of aluminum joiners and plastic bearings, bits of hardware and all the spares. Baw and Heru cleaned everything up so it's ready to use.
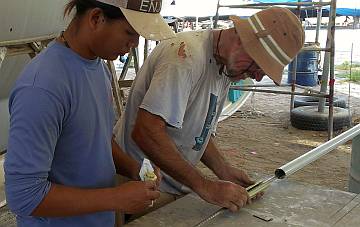 Heru and Jon had fun assembling the roller gear |
Profurl's 2m extrusions are joined together with short joiner/bearing pieces attached with tiny proprietary allen‑key set‑screws. Over the past 20 years 6 of the 42 screw holes had stripped and were no longer usable, so Jon and Heru drilled and tapped several new holes in the extrusions and the joiners. Several of the proprietary set‑screws have been lost or destroyed but there were enough to start assembling the extrusions, threading them over the end of the headstay wire, and assembling a bearing into a joiner piece. The set‑screws are stainless steel threading into aluminum so each got a liberal coating of Duralac anti‑corrosive, which also acts to keep the screws from backing out.
Jon and Heru managed to get 3 of the 8 sections installed before they ran out of set‑screws. Sue phoned all over and finally located a source for the proprietary set‑screws up in Boat Lagoon. Had we only known this morning when we had stopped by AME! So we'll be riding up there tomorrow.
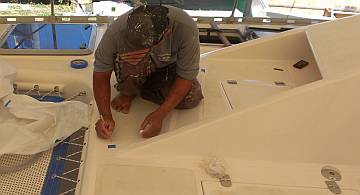 Pla quietly touched up several minor gelcoat flaws |
Houa almost finished the last of the headliner sections in the port forward cabin, so tomorrow he should have all the cabins done. He'll then be checking the fit of the fiberglass hatch trim pieces that join the hatches to the headliners and then he hopes to move back to the heads for final cutting of the holes for the lights before moving to the salon headliners.
Pla was with us today, doing several small gelcoat repairs on deck. He also assisted Houa, fitting headliners and carting them back and forth to the workshop for trimming and re‑covering.
The yard finally launched the 2 catamarans that were behind us, blocking us in, so now they can put their trailer under Ocelot anytime we want. We've tentatively scheduled Ocelot for an early March launch.
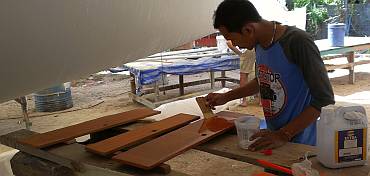 Baw got the final few coats of polyurethane on the cabinet doors |
Tuesday, February 4:
A busy day on Ocelot, with lots of small tasks completed. We are getting it together!
Jon and Heru created cardboard models of the cone‑shaped strainers that will nestle into the PVC water‑catcher drains on the bimini corners. This was tricky, but should result in well‑shaped stainless steel strainers, to be made by AME. Sue rode up to Boat Lagoon with the models and discussed their details with Mike. Then she picked up the 40 tiny set‑screws for the Profurl from the riggers at East Marine, bought big rubber spreader boots for the mast spreaders, and received a free caramel latte frappe for the purchase! Yum.
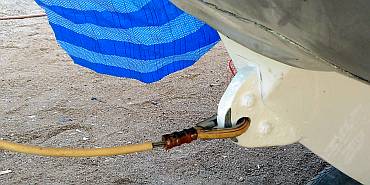 Tomcat's steel painter, swaged onto her new bow tang |
With the forestay project halted until Sue's return with set‑screws, Jon worked on the dinghy painter. He used the Dremel to shape the hole in the new fiberglass tang on the bow of the dinghy, then he opened an 8mm stainless steel thimble and eased it into the hole. Jon carefully sliced back the plastic protector on a length of old lifeline cable, put a nico‑press swage on the steel cable, replaced some of the plastic, looped the cable through the thimble, then swaged the cable together with the coated wire over the thimble. We now have a 5 meter cable painter for locking up the dinghy, with swages at each end.
Jon and Baw then mounted 6 of the 8 small rope leads on the cabin top (the 2 remaining leads need the roller gear in place). Baw also sanded and brushed on another coat of polyurethane to the nav‑station doors. By day's end he had 8‑9 coats (we've lost count) and is prepared to spray satin varnish on top tomorrow.
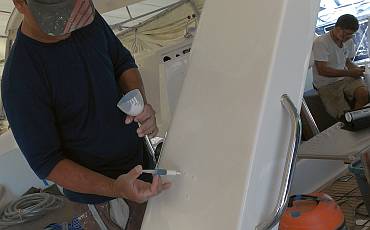 Pla gelcoating in HW's screw holes on the targa bar |
Pla joined us after lunch and worked diligently on the gelcoat spots on deck. We gave him a last‑minute job of filling the 8 screw holes in the targa bar where the old initials HW (for Henri Wauquiez, the designer) used to be. Since the stainless steel initials would need some bits welded on, we've decided not to spend the time or money on that, and just not mount them. Sorry Henri.
Once Jon and Heru had the new set‑screws in hand, they worked on the roller gear again. They had to drill and tap a few more new holes, but otherwise all went well. They got the final 5 (of the 8) extrusions assembled and joined on the headstay. Once we locate our notes on the exact length of the forestay we can finalize the roller gear with its top and bottom sections.
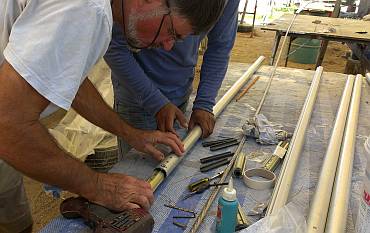 Assembling all the roller gear sections on the headstay |
Sue took Jon and Heru to the (rapidly‑emptying‑out) store room to find some more projects. We took brought back the cleats and bollards, and some hardware for the targa bar. Heru cleaned up the rectangular openings for the spinlocks and sheaves on the portside of the targa bar, where the mainsheet traveler control lines come through. Then he and Jon mounted the spinlocks and sheaves, which went really fast as there was no need for sealant of any kind ‑‑ both pieces of hardware are open to the rain and water themselves, so no point in sealing the bolts.
They also got the dinghy hoist cleat mounted on the starboard side of the targa bar, but the block for the dinghy hoist rope had broken ball bearings. Jon tried to open the sheave to see if we can replace the balls, but the through‑bolt sheared off. 20 years old. <sigh> It's a Harken sheave, and Rolly Tasker is the Harken agent, so maybe we can replace it.
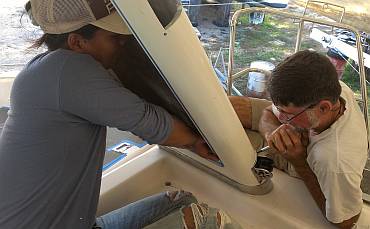 Heru & Jon bolt on the sheaves for the traveler control lines |
In the store room Sue found a bag with Andersen winch servicing pieces, including a plastic disk‑spring for the size 40 (our smallest) winches. The disk for the dinghy‑hoist winch on the targa bar is broken, so we were happy to discover that we do have a replacement, even thought it is an old, used one. Then Jon had the great idea to take the disk from the very rarely used mainsheet traveler winch on the other side of the cockpit and swap it with the one in the dinghy hoist winch, which we use daily.
Houa finished the headliners and the teak trim in the port forward cabin today. Then he finished routing, shaping, fitting and mounting the remaining 3 new snaps for the lockers in the heads. We thought he would move to finishing the plastic headliners in the heads, but he says that's a small job. He wants to attack the long headliners in the salon tomorrow. Fine with us!
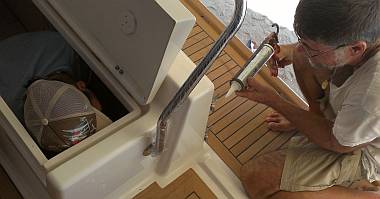 Mounting the portside aft cockpit door and its hinges |
Wednesday, February 5:
Wednesday snuck up, overwhelmed us, and moved on. So many things happening it's a bit
dizzying. But so exciting.
Knowing that a goal of today was for Houa to begin wok on the salon headliners, a lot of morning projects revolved around finishing things, picking things up, or at least moving them. Heru finished mounting the bits on the toilet seats and mounted the seats on the toilets. We can now sit on thrones. We'll spare you the pictures.
Another big thing hanging around was the second (starboard) aft cockpit door/gate. So Heru and Jon got that door checked out, silicone mounted and bolted home.
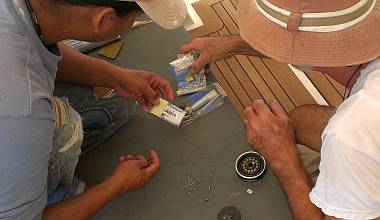 Rebuilding the dinghy-hoist block - sand in center is old balls |
Jon's morning project involved disassembling the dinghy‑hoist turning block below the starboard targa‑bar winch, to see if the block could be repaired. One of the bolts had to be ground out with the Dremel, but the others eventually succumbed to Jon's ministrations and he finally got the block open. The big roller bearings that take the bulk of the load were OK, but the small plastic balls on one side (only) of the block looked like so much sand. Luckily, this block is made by Harken, one of the few US manufactured blocks on Ocelot. We have a selection of replacement plastic ball bearings, but we could only get them in US (Imperial) sizes. So we can't repair our European (metric) blocks, a source of some frustration for us. With only a couple of mishaps, Jon and Heru cleaned up the block and installed new plastic balls where necessary. After a shot of light Teflon grease, they installed it back in the base of the targa‑bar.
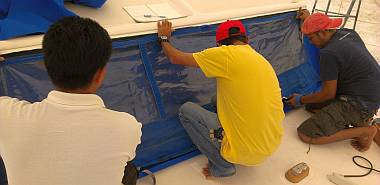 Fitting Ocelot for a new dodger (windscreen) and side curtains |
Jon was on a roll mounting things. Next on his list were the 2 medium‑sized cleats on the aft deck that we use for tying up the dinghy before hoisting. Luckily, Jon could still see where the old holes had been, despite the engine room having been painted. So he drilled outward from the engine room, then tapped each of the 8 holes. Jon and Heru had both cleats silicone sealed and mounted in no time.
Things got chaotic in the late morning when 3 men from Thai Sailing arrived to check measurements on the new dodger (windscreen) and side shades, and we suddenly had meters and meters of Sunbrella draped around the cockpit. They had created a continuous bolt‑rope, linking all 3 panels. This is probably stronger, and certainly makes it easier to know exactly where the neighboring panel is, but it also limits our flexibility. If we want to remove or repair one panel, then we have to remove all 3. When we discussed this with Jaray, the owner, he suggested that he keep the single bolt‑rope but add zippers just below the bolt rope so individual sections can be zipped on and off as needed. Since we're adding triangular sections between the dodger and the side panels, it is quite a complicated design, and we appreciate all the time they're spending working with us.
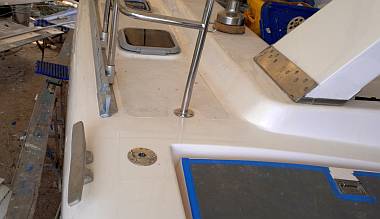 New location for our portside aft cleat, outboard of the toe-rail |
We've known for a while that we wanted to move our big aft cleats from their old locations above the aft cabins. Not only are they a trip‑hazard, any ropes have to go through a narrow gap in the toe‑rail, which tends to chafe our lines. So we moved the cleats back by the fuel fills, and located them out where the deck curves down to become the hull. This area is solid glass (no coring) so very strong. The curve down to the hull is gentle enough to mount the cleats, and they'll have great accessibility fore and aft without having to go through a fair‑lead. It sounds a bit goofy to have cleats that aren't mounted flat, but several new catamaran designs are putting them outboard like that.
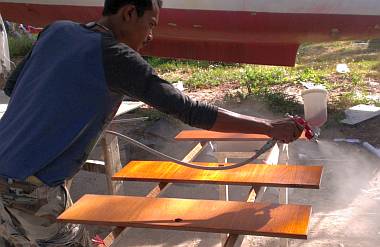 Spraying the 3 nav-area doors with satin varnish |
So Jon drilled the mounting holes for the aft cleats. Tomorrow Heru will sand the inside of the hull so we can mount additional solid glass backing, as well as stainless steel backing plates.
After much deliberation, we've decided to mount the bow cleats outboard of the toe rail as well. This area is complicated by the pulpit, which limits some access to the cleats. But the advantages of clearer rope leads and a cleaner deck for walking outweigh the slightly more difficult access. Baw cut out some additional solid fiberglass backing plates, and we hope to get a 4th stainless steel backing plate from the yard. With a bit of luck we should get all 4 cleats mounted tomorrow.
Pla worked on small gelcoat areas once again. Pla also did the extra special final sanding of the teak nav‑table doors to get them ready for their final satin varnish spray, which Baw got done in the late afternoon.
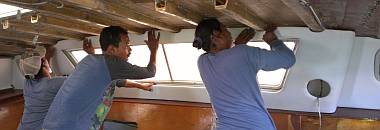 Mounting the first headliner pieces in the salon! |
Sue, Pla, Baw, and Houa traipsed off to the storage room 3 times to retrieve the long salon headliners, their plywood and Velcro mounting boards, and finally all the headliners for the salon edges. We are lacking a copy of a photo of the interior of the salon (we'll have to print some out tonight), so Houa was floundering a bit as to what went where. But once her realized that the edge pieces all go on first, and the overhead headliner acts as an anchor for those pieces, he got some good work done. Sue did a fast water/sponge wipe down of the areas to be covered to get rid of the accumulated fiberglass dust, grime and bird nest twigs that were everywhere. Together with either Heru or Baw, they checked and fitted the 3 main forward liners in the salon (the big one that surrounds the window, and the 2 that surround the 2 port lights on either side). Houa had to do a bit of trimming, chiseling and even sawing of the salon teak and plywood (all hidden!) to allow the thicker headliners to fit, but at least he didn't have to peel back the vinyl and foam and cut the plywood headliner itself, like he had to in the cabins. It is so cool to see the salon turning white and bright after 2 years of dull brown fiberglass interior.
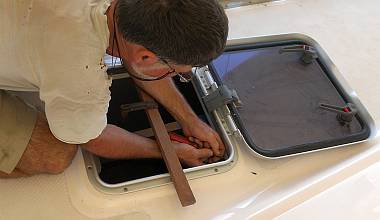 Screwing the new internal hatch trim to the hatch |
Jon had some minor wiring and wire tie‑wrapping to do in the salon. Then Houa told him the hatch trim in the forward cabins were ready to mount. Given that we seem to have become home to a half dozen Asian Tree Sparrows who think Ocelot has great nesting grounds, we thought it would be good to get those hatch trims mounted and thereby let the hatches close at night. Jon drilled small holes and using Tef‑Gel coated screws got the 2 new Lewmar hatch trims mounted, plus 2 more in the port aft cabin.
The days are getting hotter. It's time to get on the water! Count down: one month max. March 5 ends that run of high tides.
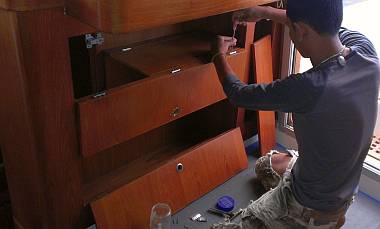 Baw installing the newly varnished nav-desk cupboard doors |
Thursday, February 6:
Welcome to the Ocelot Rollercoaster Ride. A crazy day of success, frustration, excitement and
progress. We knew the day would be interesting when we arrived at the yard to find our
favorite yard cat, Turtle, 30' up a coconut palm, harassed by mynah birds and treed by Rambo, the
guard dog. We shooed Rambo away, coaxed the cat down, gave her a cuddle, and got to work.
Baw began the day by mounting the nav‑station doors that he repaired and varnished for us. They match the surrounding wood much better now.
The main focus today was on our 4 big cleats. Having decided to move them outboard and mount them on the curve where the deck turns into the hull, we now needed custom fiberglass backing plates that would fit that inside curve and make it flat. We already had three 1/4" (6mm) steel backing plates to go on the fiberglass backing plates, and the yard made us a fourth from some scrap they had. We cut out thick plates of fiberglass from some scrap that was lying around, and Jon trimmed one down so it fit nicely under the starboard aft cleat. But Heru, who is usually very good at thinking ahead and grasping ideas, had no clue. He didn't seem to understand that he had to see where the plate was touching and only trim it there. Instead, he'd grind down the whole plate, and then wonder why it wasn't fitting any better. This was VERY frustrating for Jon, but eventually Baw took the project over and did a much better job of grinding the plates to fit the inside curves of the hull.
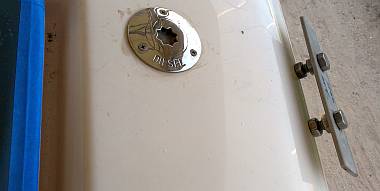 The starboard aft cleat-model, so we can extract the bolts |
We'd originally thought we'd epoxy the backing plates on as we mounted the cleats, all in one operation. But then we realized that epoxy would probably get on the threads under the cleats, preventing us from ever removing them. Time for another plan. Brainstorming with Baw and Heru we decided to build models of the cleats, using the steel backing plates and waxed bolts. We'd epoxy the fiberglass backing plates on using these waxed bolts (held at the proper spacing by the steel). We should be able to remove the bolts after the epoxy hardens. Then we'd re‑drill the mounting holes and mount the cleats with 5200 and the steel backing plates. So Sue was sent to the hardware store for some big 1/2" bolts and several nuts, so we could make up the faux‑cleats.
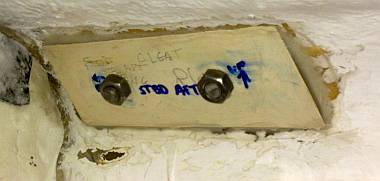 A fiberglass cleat backing plate, epoxied to the inner hull |
By 5pm we had 2 faux‑cleats assembled, and 2 fiberglass backing plates ready to epoxy in, so we quickly mixed up some epoxy mud, sploobed it onto the fiberglass backing plates, inserted the faux‑cleats into the holes for the 2 aft cleats, pushed the fiberglass backing plates onto the protruding bolts, tightened up the nuts, and wiped the extra epoxy into a nice filet around the fiberglass plates. Tomorrow we should be able to permanently mount the 2 aft cleats, and maybe the forward cleats as well if the epoxy cures quickly enough.
Houa, meanwhile, spent the day repairing various pieces of the salon headliner. One long piece no longer had its mounting strip of wood. Another had been water damaged and had to be stripped of its vinyl and foam and have the ply veneer peeled off, and epoxy brushed on. Another was determined to be too big so Baw helped cut it back. All together there are over 30 headliner pieces in the salon, 12 of which are 10' (3.2m) long, and several of the others have strange shapes. Houa likens the whole thing to a jigsaw puzzle.
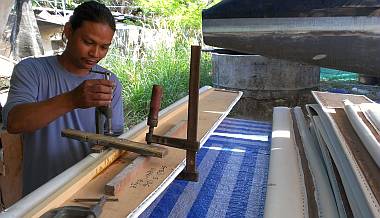 Houa working through his pile of salon headliners |
In preparation to mount headliners in the salon, Sue spent time cleaning the ceiling, trying not to stab herself on sharp fiberglass needles. She also took care of some of the yard bill, scootered up to TMT for 80 yards (72m) of Velcro to go on the headliner pieces, and did a stem to stern check of Ocelot to be sure we have all the little tasks documented and on the list, figuring out who can do what.
For a few hot and sweaty hours while the men labored over the cleat backing plates, Jon "escaped" into the starboard passageway to wire up the new shower sump system. It was worth the effort when we watched a bucket of water drain from the shower into the sump, heard the pump kick quietly into action, and we saw the water squirting out onto the sand. Another job checked off.
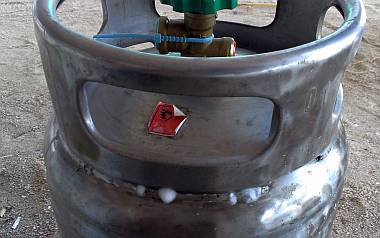 Foaming bubbles from pin-hole leaks at the welds |
Some more excitement was that we picked up our 3 newly filled propane bottles. It had taken lots of investigation and questions to figure out who could have our special bottles filled and returned, without our having to drive 20 miles north to the gas depot with 3 heavy bottles. We were happy to discover that a small local shop in Kotanod village would do it. The bottles have been gone a week, but we picked them up today, Heru driving, and Pla carrying one bottle at a time from the shop to the boat. $12 filled each of the 20 lb (9kg) bottles and we paid for a new valve on the stainless steel tank as we suspected the old one had a small leak.
Once they were back on the boat Sue smelled the acrid garlicky odor they put into propane, and she and Heru put their noses to each bottle. The smell was coming from the stainless bottle despite its new valve. We carefully removed it to the open sand behind Ocelot, and brushed on some soapy water to see where the leak was. Yikers! Foam bubbled up through numerous pinholes around the top weld and at the base. The new valve held tight, but the foam was ominous. Neither Lang, the yard manager, nor Manop, the owner, wanted the bottle or the (decanted) propane. They told us to release it onto the beach. Jon opened the valve and we got to watch propane gas escape in a forceful cloud, leaving behind a small ice stream where it had frozen. Jon removed the new valve to keep, and Lang washed out the bottle in anticipation of cutting it open to junk it.
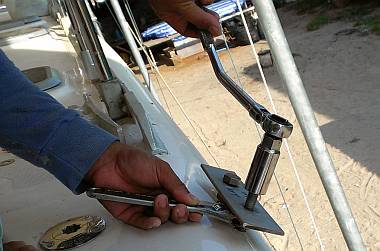 The waxed bolts broke out of the epoxy easily |
Friday, February 7:
A funny sort of day that felt like not much happened, but actually lots of little things moved forward.
Heru and Sue removed the aft deck cleat models (the epoxy release was a success!). Jon spent most of the morning grinding and fitting the new fiberglass backing plates for the forward cleats. He had hoped to give this job to Baw, who did well at it yesterday, but Baw was absent all day. Jon and Heru got the plates epoxied into place before lunch. In the late afternoon the epoxy was cured enough to removed the waxed bolts. None of the cleats were officially mounted today, but Jon drilled the excess epoxy out of the holes and made sure the cleats fit happily, so they're now ready for mounting.
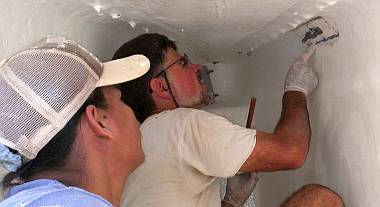 Heru & Jon installing the starboard forward cleat backing plate |
Houa carried on with the the salon headliners, removing old Velcro from the edges and replacing them with a wider strip on new plywood. Picture the salon headliners as 10' (3m) plywood strips each about 1' (30cm) wide, covered in foam backed white vinyl that's stapled to the back of the plywood. Each headliner piece has a thin plywood extension stapled along its long edge. Screws hold these extensions up to ribs in the ceiling, and 1" (25mm) Velcro‑backed teak strips cover the screws. The teak strips end up about the same height as the vinyl headliners, so the effect is a white vinyl ceiling with 1" wide teak accents every foot. These headliners were completely taken apart and recovered with new foam‑backed vinyl, and those are what Houa is working on refitting.
No headliners were actually installed today, but there was lots of sanding and cutting and staple‑gun sounds from the workshop. Heru and Pla both helped at times, removing staples and clearing the vinyl with alcohol.
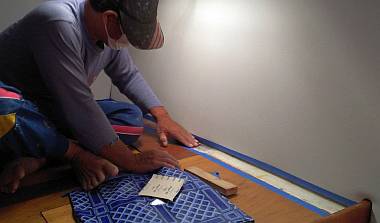 Pla sanded & primed some rough fiberglass in the port aft cabin |
Pla finished the fine sanding on the targa bar repair, then went to work sanding the fiberglass rough edges of the port aft cabin. This is the bunk that was damaged when the whale hit us off Mozambique in 2006, and some of the repairs left some sharp fiberglass. Once Pla had it sanded, he taped the area up well in blue tape, cleaned with acetone, and brushed on Jotun HB primer. Tomorrow it will get a coat of white enamel paint.
Jon and Sue had a successful scavenger hunt in the storage room for mast bits, and returned with the old forestay fittings, the mast steps, and more bits and pieces to mount. Sue and Heru got diesel manicures as they cleaned up the bolts and screws for all the fittings. Sue also wire brushed, picked, sanded and generally scoured a whole socket set that had rusted into disgrace. The wrench set is soaking tonight and tomorrow will get another swirl in diesel then soap and water, dried, and then sprayed with a preservative lubricant before being returned to its (now pristine) box.
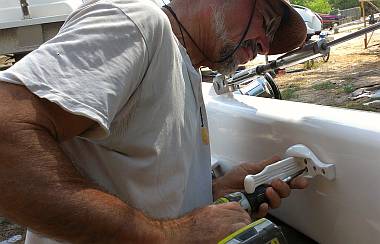 Jon installing one of our folding lower mast steps |
The most exciting forward motion was mounting the bottom 4 aluminum folding steps and 3 pad‑eyes on the mast. The bolt holes all had paint in them, so Jon gently ran a tap up each hole, to clean the threads. All were bolted to the mast with stainless steel bolts, with plenty of Duralac anticorrosive. A lot of time was spent planning where the new (aluminum) mast steps will go. They'll fit in the old holes, but some of the old steps are further apart than Sue is comfortable with. But Sue doesn't go up the mast very often, so we're debating whether to take the time to add more steps, or just putting the steps where they were, which would go much faster.
We retrieved our Profurl rollers from the storage room, only to find that the upper swivel is frozen solid. Profurl, in their infinite wisdom, uses bearings which can rust. We're hoping the rigger in Boat Lagoon can replace the bearings. The lower swivel was a bit stiff, but it consented to rotate happily after Jon took it to the workshop and explained matters to it.
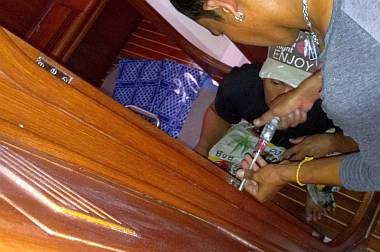 Baw and Heru replaced the 4 cabin doors |
Saturday, February 8:
A somewhat low‑key end to the week, but many small things accomplished.
Pla continued his work in the aft cabin bunks. On port, he put a coat of white enamel paint over yesterday's primer. Then he asked if we wanted the same on starboard. But in fact the trim of gelcoat was rough and cracked, so he suggested gelcoat instead. Okay by us, as it actually fills in rough gaps better than paint (and it's only 1 step!) So he sanded and applied white gelcoat to the rim of that bunk as well.
Last night we went to the local hardware emporium and bought the hand‑held shower heads and hoses that also form the faucets into the sinks in the heads. Jon began the day exploring how we would install these, as they have to pass through a collar mounted next to the sink that holds the shower heads upright. It took a bit of reverse‑engineering to pull the hose apart enough to get it through the collar, but he finally figured it out. Then came the question of whether the fittings were nice enough to install. Sue voted NO, as they appear to be metal with flaking silver paint. Baw took a look and declared them to be the same as the lights, brass or bronze! Therefore polishable!
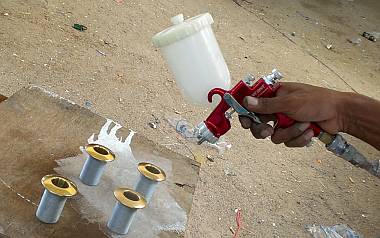 Baw sprayed clear-coat on the polished faucet holders |
So Heru and Baw took the collars away to sand off the old silver paint and polish the tops up. They came out a bright golden red bronze. With our supply of 2K clear polyurethane, Baw was able to spray on a clear finish that will keep them looking nice for a long time (we hope!) Monday we can mount the faucets and hoses and maybe even hook up the water!
Houa continued with preparing the long overhead headliner panels. He added strips of plywood and stapled‑on Velcro to many more pieces. Can't wait to see the installation begin.
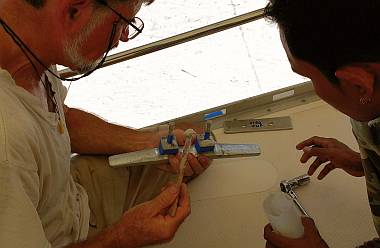 Jon and Baw put epoxy filler under the bases of our big cleats |
Jon and Baw set about mounting the 4 deck cleats. Since they're going on a curved surface, where the deck curves down to become the hull, Jon wanted to fill in the small gap under each cleat. Otherwise, a high load from the side could easily bend the mounting bolts. A bit of support under the bases would make them MUCH stronger. So Baw masked the cleats and around the holes with blue‑tape, and waxed the hulls where the cleats would go so the epoxy wouldn't stick hard to the hulls. Then they mixed up some epoxy filler, spread it on the bases of the cleats, and bolted them (lightly) into position. Next we'll release the nuts, shoot some sealant around where the bolts protrude (on the inside), put on the steel backing plates, and bolt them up permanently.
Baw and Heru conspired to mount the wooden doors to the cabins and were quite chuffed with the first one. Sue was pleased, and declared it Wonderful, but not so good. Why Madame? Because it's upside down! Everyone laughed and Baw exclaimed that it was not his boat! Anyway, they eventually managed to get all 4 cabin doors mounted. Somewhat surprisingly, they even opened and closed without a hitch! Many fiberglass boats sag a bit when left out of the water for so long, and we were wondering how Ocelot was doing, as she's ONLY supported under her keels. Since the doors still fit, Ocelot must be very stiff.
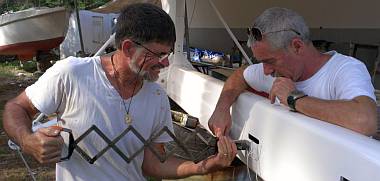 Jon and Werner pop-riveting mast steps to the mast |
We had 4 sets of friends drop by today, which is always fun, but always distracting. Visitor #4 was Werner, who will be with us for the weekend, and who helped out in a big way. He drove Jon to Rolly Tasker to search for bolts and pop‑rivets, and to check on our sail cover. The guy we need to talk to about our sail cover was still out sick, they had no bolts long enough, and their plain aluminum pop‑rivets were a pricy 10¢ each (they also have monel and stainless steel, which cost much more). Each of the 25 mast steps needs 6 rivets. So they hit a chain hardware store (Home Mart) on the way back and found a bag of the same rivets for less than 2¢ each. Score!
Then Werner helped Jon mount the first 8 triangular mast steps. As for where to place them, the path of least resistance was to mount them in the same places they had been. They're further apart than Sue is comfortable with, but she doesn't go up the mast very often. The steps between the 2nd and 3rd spreaders used to be plastic folding steps, so those holes will have to be re‑drilled anyway, which will let us space them a bit closer together.
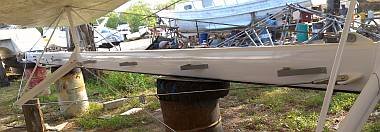 It's much easier to mount the mast steps when the mast is down |
Where was Sue for all of this? Going crazy keeping track of who was doing what and who needed what from the shops. Cleaning the socket set and remounting the pieces. Doing the bank run and payroll. Taking pictures. Finding things in the storeroom and on board. Discussing the projects to be done on Monday and next week. A pretty typical day.
At the end of the day we gave the men their pay, and dropped the bombshell. We have 3 WEEKS more to finish the boat! Mouths dropped open. Eyebrows lifted. When they saw we were serious, they all nodded sagely. Okay Madam. Can do.
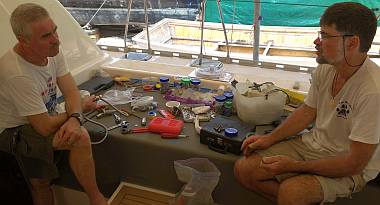 Werner and Jon discuss how to plumb the head faucet/showers |
But we may be in for some long days.
Sunday, February 9:
A day of half‑work, half‑play. A job accomplished, an electrical mystery, and a near
disaster at the yard. Then a swim in Ao Po, great friends, good dinner.
We relaxed a bit Sunday morning, went with Werner to Flints for brunch, then hit the yard. Jon wanted to put in a couple (uninterrupted) hours on the port engine electrics. We can't seem to get the electrical start and stop to work. After 2 hours of soldiering the wires of a corroded plug together, he wanted to test if he'd accomplished anything. He connected a hose from the tap to our raw (salt) water inlet and turned the key. Nothing. <sigh> So he jumped the starter to get the engine going and then pushed the Stop button. Nothing. <sigh> And the oil pressure gauge stubbornly refused to work. The only good part of the engine work was that the engine purred nicely (once started) and the gears worked when we checked them in forward and reverse, looking to see if the propeller shaft was turning. So Jon shut down the engine -- BUT, he forgot to turn off the water...
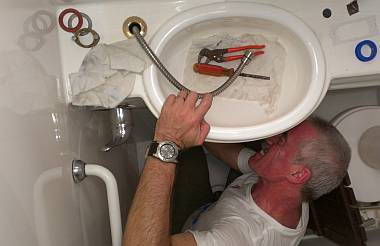 Werner installing the hoses for the faucet/showers |
While Jon was in the engine room, Werner was a star in the plumbing department. Our goal was to fit all 4 heads with new faucets and long, flexible hoses to be used when showering. But the hoses had to be disassembled to pass through the brass fittings on the counters by the sinks. Jon had discovered how to take the hoses apart and he showed Werner how to do it. So Werner pulled the hoses apart and threaded them through the countertop fittings before reassembling them. Then he mounted the polished brass countertop fittings and connected the hoses to the mixing valves under the counters. Jon connected the faucets (shower‑heads) to the hoses and then realized that the moment had arrived...
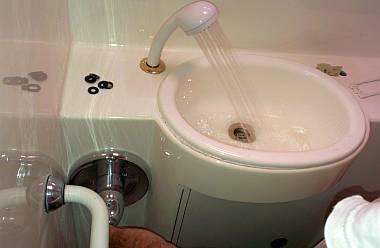 Testing our new faucet/shower system - it WORKS! |
Time to test the system. First Jon turned on the portside water pump, which comes to a slightly lower pressure than starboard (the pumps are redundant). The pump turned on obediently and the system pressurized with no obvious explosions. So he turned on the starboard pump, and it also started without a fuss and shut down a few seconds later when the system pressurized. Okay... So he went into one of the heads and reached under the sink to turn on the 2 valves that supply hot and cold water to the mixing valve. Finally he turned on the mixing valve itself, and water whooshed out into the sink, just as it's supposed to! He activated and tested each of the heads in turn, and they all worked just fine. We can now brush our teeth in our spiffy sinks with their designer colors, gold counter fittings, and silver faucet handles.
But as we were gathering up to go, Sue noticed water coming out of the portside engine exhaust pipe. What's that? Oh No! We've left the fresh water hose running into the engine, and now it's overflowing. Water must have gotten past the pump and into the "wet elbow", filling up the muffler and the big, high loop the exhaust hose takes to prevent seawater entering while we're sailing. But that meant that the water had also backed up into the engine exhaust manifold! We turned off the hose and Jon flew to the engine room to try starting the engine, but water had gotten past the exhaust valves and filled at least one of the cylinders, so the engine wouldn't turn over at all. Jon removed some hose clamps and pried open the joint at the wet elbow to let some of the water out, but there wasn't much more he could do at the time. With a sinking feeling, we realized we had just set ourselves back significantly, and possibly damaged the engine...
Jon called Hem, our diesel mechanic, and asked him to come to Ocelot on Monday morning. That done, we drove to Ao Po for a great time with Bruce and Alene, and learned that Bruce had twice drowned his engine (with salt water, which is much worse) and had the Nigel Calder solution at hand. With lighter hearts we all enjoyed an awesome Thai seafood dinner.
Thai Refit:
Ocelot Pages:
Top Level: Home | Destinations | Cruising Info | Underwater | Boat Guests | Ocelot | Sue | Jon | Amanda | Chris | Site Map | Make a Comment
|
If our information is useful, you can help by making a donation |
Copyright © 2000‑ Contact: Jon and Sue Hacking -- HackingFamily.com, svOcelot.com. All rights reserved.