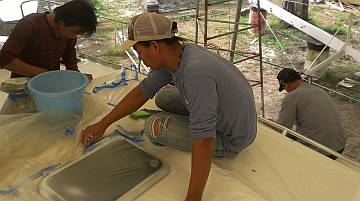
While Baw varnished below, the men polished gelcoat on deck
113 Cockpit Hatches
Summary: Another short week, as we're now down to 5 workers (Houa, Baw, Pla, Heru, and Yando) and several didn't show up around New Years. But we still made good progress, despite most businesses being closed. Most work centered around gelcoat touch‑ups and cockpit hatches. Team accomplishments this week include:
|
 While Baw varnished below, the men polished gelcoat on deck |
Monday, December 30:
The week began with a bit of trepidation, as we weren't sure how it would be to have fewer workers,
but it turned out well.
Heru, Yando and Pla all arrived about the same time, and Sue set them up sanding the latest coating of polyurethane in the salon. This was just what Baw wanted them to do, and he and Heru and Yando sanded and cleaned up for a few hours. By 10am Baw was brushing on another coat of gloss.
Pla moved right into the deck gelcoat project. He unveiled the plastic masking around each of the small deck sprays and started sanding them smooth. The color seems to match quite well. One bit of topsides (right near the toe rail) was still a bit thin, so Baw asked permission to spray again, but not today.
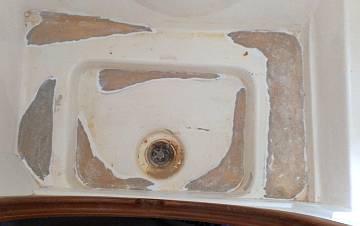 A shower drain with bad gelcoat ground back |
Pla also did more gelcoat repair, sanding, cleaning and then doing dit‑dot touch‑ups on more places, most notably on the old bolt holes (now epoxy filled) next to the new anchor support on the foredeck.
Sue began the day removing the old (now rusty) "stainless" shower drains in the 4 heads and found that the gelcoat in the shower bilges was chipped, buckled, and cracked. Baw suggested we grind it off and apply filler to make the rims (under the teak grate) slope inward towards the drain, instead of out towards the walls. So Heru and Yando together (one with grinder, one with vacuum) ground back the buckled gelcoat in all 4 heads.
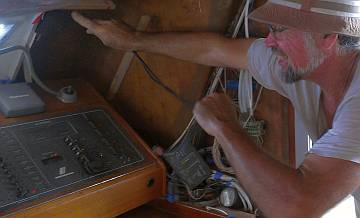 Jon pulling transducer wires to the nav-station |
Sue spent the rest of the day coordinating projects, learning who needed what, and trying to anticipate future needs from the hardware stores as some are closed already for the week, and others will close tomorrow for 2‑4 days. The needs list was long and varied, and sent her out on the scooter about 7 times during the day. Not always successfully, but with enough bolts and bits and silicone to keep us busy for the holiday.
Jon started off on the wiring project, as finishing that will let the men start on the headliners. He installed the depth transducers in their holders and ran the wires back to the nav‑desk. He installed a blank in the paddle‑wheel holder, as we don't want that damaged when we launch.
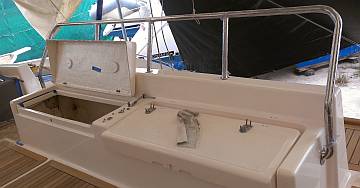 Jon got the backrest mounted and the hinges for both lockers |
Next Jon tackled the aft seats in the cockpit. First he mounted the newly strengthened backrest for the aft cockpit seat, which involved drilling and tapping 6 new bolt‑holes. The top of the seat was completely rebuilt, so it's not too surprising that none of the holes are very close to where they were before. It feels very sturdy now.
On the seats themselves, he decided to remount the hatch hinges first. Pla polished up the hinges while Jon squeezed down into the long narrow locker under the seats to drill out the bolt‑holes. This area got some gelcoat, but the holes were still a reasonably good fit, requiring only a bit of modification to the hinges to make everything go together. We've been wondering what sort of gasket to put under these hatches, but now we realize that they don't need gaskets at all! The backs of the hatches are supported by the hinges, the fronts actually rest on a fiberglass shelf, and the hatch skirts are tall enough that no water will ever get in there. It would be nice if all problems were that easy to fix!
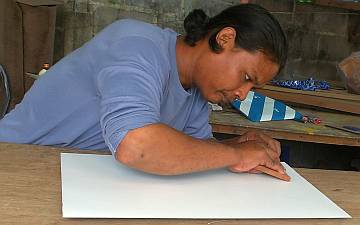 Houa epoxying formica onto a cabinet door for the heads |
Down in the heads, Baw got polyester filler (a mixture of polyester resin and micro‑balloons) artfully smeared onto the rims of the shower bilges. He was aiming to have them tip inward, so the water won't sit there and worry the gelcoat again. He finished both heads on starboard but did not get around to the much more damaged areas on port. Unfortunately, with the grinding (and despite the vacuum employed right at the dust source), the fine gelcoat dust drifted throughout he boat. We have a major cleanup to do tomorrow with damp sponge and water.
Houa worked on the new head locker doors. He stuck formica on the insides of the doors with Hartford epoxy glue. He cut the strips for the narrow edges and trimmed the newly glued pieces to the right size. We were surprised to see blue tape markings on each door, but Houa had checked the size of each cabinet and found that they're all different.
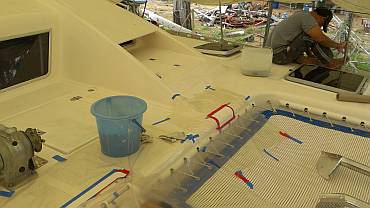 Pla spent the day working on small gelcoat repairs |
Tuesday, December 31:
A very quiet day on Ocelot, with only Houa, Pla, Sue and Jon. Must have been some
miscommunication with Baw, Heru and Yando about working today but not tomorrow. But we got
good stuff done.
Pla spent the day quietly working on the gelcoat repairs up on deck. He sanded some of the areas that were repair‑sprayed last week up to 1500, and he masked off with plastic some small areas that need more attention. It might have made sense to buy another 20 liter drum of Ocelot White gelcoat, as we have used 10 liters already since we ran out, although most of that has been interior so not important color‑wise. We are trusting Baw to be able to match the Thai gelcoat to our Ocelot White.
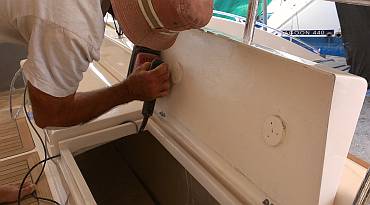 Sanding the edges of the lockers under the aft cockpit seats |
Jon began the day by using the orbital sander to thin down the gelcoat on the edges of the aft seats where they are sticking. It wasn't a big job, but nice to get it done so that it doesn't drive us nuts in the future. Plus it's always nice to get grinding and sanding done when on the hard, not at anchor and with upholstery and belongings to get dusty.
Next, Jon test‑mounted each of the big stainless steel bimini legs, using a handful of clamps to hold them in place. He was able then to mark where all the bolt holes are to be drilled. Unfortunately some are very close to intersecting, so he'll have to be very careful which way he aims that drill. We'd like to use 10mm bolts, not the 8mm ones we have, which means we'll have to wait for the holiday season to wind down and the chandleries to open up again.
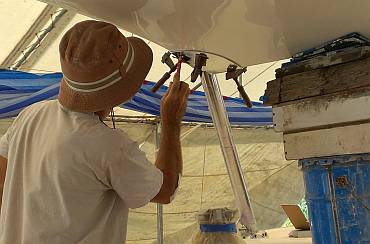 Marking the mounting holes for the portside bimini leg |
Under Ocelot, Jon drilled the final holes for the emergency hatch polycarbonate, and then tapped each of the 8 holes. So now we're ready to mount the polycarb, but we'll wait and do it when Top's Chandlery is open so we can get more Sika 295iUV if we need it.
Houa planed and rimmed the edges of the 4 under‑sink locker doors for the heads, and then he got the outside pieces of formica epoxied on.
The big job of the day was mounting of the first of 2 jib sheet tracks. When we retrieved them and their 5 lbs of nuts, bolts and washers from the store room we realized that they would need a bit of TLC before being mounted. Sue took the 66 bolts to the yard workshop and was able to put them on the polishing machine to clean them up. She followed this with some wire brushing and sometimes a touch of sandpaper to clean the threads a bit better. The washers she flat‑sanded, taking a bit of her own finger tips along with the corrosion or rust.
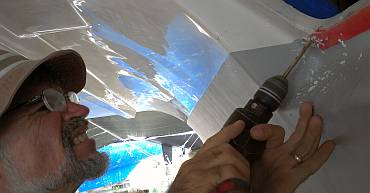 Drilling mounting holes for the emergency hatch polycarbonate |
Jon had to make sure all the moving parts of the track were behaving. He eventually got the stopper cars on both tracks sliding happily along, but both needed significant percussive maintenance, and one needed a trip to the yard's 25 ton press. Not that we've moved them in the last 12 years, but they appear to have been abused before we bought Ocelot. Now they're happy again.
Once everything was ready and at hand, Jon did a test run on the starboard track, drilling the holes for the fore and aft‑most bolts to hold it in place. Then he was able to drill through the new gelcoat and into the circular de‑cored, epoxy‑filled spaces in the deck. Sue followed with the vacuum to keep the epoxy and fiberglass damage to a minimum. This was a job we could only do on a day without men working inside, or brushing fresh polyurethane, so today was a perfect day for it. The bolts are only threaded for half their length, so Jon drilled a 6mm clearance hole for 2cm into the deck and then tapped the remainder of the hole.
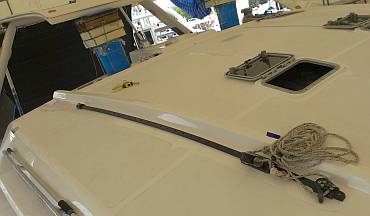 Starboard jib-sheet track mounted on the cabin-top! |
At 4:15 everything was ready so we decided to go for it. Jon laid down a bead of silicone around each bolt hole, then he and Houa put in the first and last bolts to hold the track to Ocelot's curved cabin‑top. Then Jon started at the bow and moved back, bolt by bolt, with Sue doing the inside work with the socket wrench. Yay! A great Ta Da! for the end of the year!
Wednesday, January 1: Happy New Year!
Sa wat di bi mai! Happy New Year from Thailand! Despite dining and dancing and staying
up for the midnight fireworks, we were up and at the yard by mid‑morning. Just Jon and Sue
today, for a quiet change.
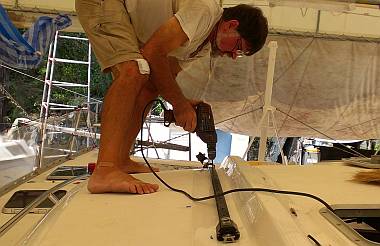 Using the sail-track as a guide for drilling the mounting holes |
We got everything organized to deal with the port jib sheet track and realized we had some hardware issues. On counting the bolts, we realized we didn't have enough to lay the track. We decided to carry on with preparation anyway so we can bolt it down as soon as the shops open and we can buy some bolts. Jon dry bolted the two ends of the track to the deck and drilled marking divots, using the holes in the track as guides. Then we removed the track and he drilled 6mm clearance holes 2cm down into the deck, with Sue spotting so the drill was always perpendicular to the (curved and sloping) deck. Next came the pilot drill and then the 6mm tap, so the bottoms of the holes are tapped.
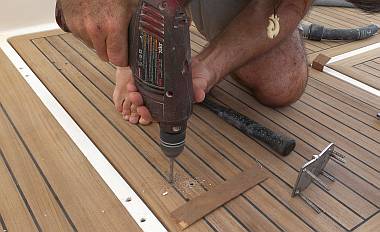 Drilling the hinge mounting holes through Houa's beautiful teak |
The other "gotcha" of the track was that somehow we'd managed (long ago) to miss de‑coring and filling the forward‑most bolt hole. So Jon used the power drill and an Allen key to shred the foam between the deck and the ceiling fiberglass. Later in the day he mixed epoxy with micro‑balloons and we syringed it into the gap.
The other big job of the day was to mount the hinges for the first of the 3 big cockpit lockers. The holes in the cockpit were already open, but the holes in the hatch were completely fiberglassed over. Jon centered the hatch in its opening and measured out from the existing holes as best he could. Bolting the hinge up went fairly smoothly but when we tried to close the hatch, the hatch rim interfered. We had to grind it back - a messy job - until the hatch would close without touching anything.
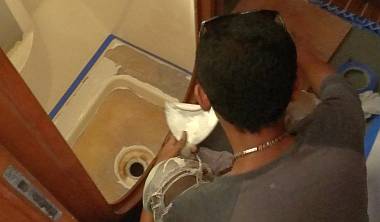 Baw spreading polyester filler in a ground back shower floor |
Thursday, January 2:
Second Day of the New Year! Everything is still moving along, but it all takes longer than we expect.
Baw was back, ready to play with polyester filler. He mixed up a big batch, cleaned the newly sanded portside head floors, and got them nicely smeared in goop. While he was doing that, Yando and Pla sanded the polyester filler in the starboard heads and got them ready for gelcoat. Baw surprised us by saying he wanted to spray the gelcoat on the shower floors (we'd thought he'd brush it on). We're OK with spraying as long as the masking is 100%.
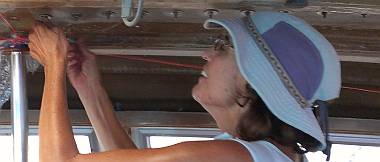 Sue tightening sail-track nuts in the roof of Ocelot's salon |
Baw's morning polyester was hard by early afternoon so Pla and Yando were able to sand those floors level and flat as well, so all 4 heads can be gelcoated tomorrow.
Baw sanded the polyurethane trim in the salon and brushed on coat number 7 (we think) mid‑afternoon.
Now that shops are starting to open up again we were able to buy the bolts to finish mounting the portside jib‑sheet track. Jon had silicone gun, screw‑gun and bolts up on the cabin‑top while Sue contorted down below with socket wrench, nuts and washers. More of Ocelot's jewelry going on!
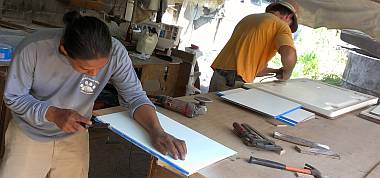 Houa shaping cabinet formica while Jon grinds hatch fiberglass |
The longer project was mounting the hinges on the big, starboard‑side cockpit hatch. It sounds so simple but it took over 6 hours. Although the bottom of the hatch was flat and it sat happily enough, the top was sloped relative to the hinge mounting surface, so we had to strip much of the gasket off the bottom and actually grind the glass down until the top was reasonably aligned with where the hinges mount. The hinges have fixed length studs welded to the hinge plate, and when we drilled the hinge mounting holes in the hatch we realized that the fiberglass was now too thick for the studs, so the hatch fiberglass had to be ground again until the studs poked through enough to get the nuts on.
|
Installing the big hinges on the big starboard cockpit hatch |
Actually installing the hinges was the easy part. We cleaned the teak and stainless hinges with acetone, then Jon smeared things up with silicone, and popped the hinges in. Once the washers and nuts were tightened down we thought we were finished, but no such luck. Just like the port hatch, the inner edge under the hinge was protruding into the rim that the hatch sits on and causing the hatch to snag as it closed. So the hatch fiberglass had to be ground back yet again, this time in the cockpit itself, which made lots of mess. And the grinding isn't finished, as one corner of the hatch now pops up a bit. Apparently the hatches all warped slightly when we reinforced the bottoms with foam and 2 layers of biaxial glass. We weren't expecting that, but we'll work something out...
Houa worked less than half a day. He arrived late due to a scooter problem and worked on the formica edges of the head lockers (again), but then said he was working only half a day. Not our choice, but not much we can do. Heru wasn't at work at all today, probably because of his new baby.
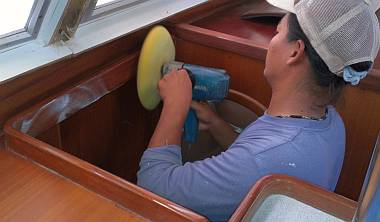 Heru polishing the new gloss polyurethane trim in the salon |
Friday, January 3:
A really good almost‑end‑to‑the‑week. And shops slowly opening up for business again, which is helpful.
Our inside Team of 4 split into 2 areas of work in the morning. Pla and Yando got all 4 heads masked and ready for their shower pan gelcoating. Of course they needed more plastic, more duct tape, more blue tape, and then more duct tape. Kept Sue busy on the scooter.
Meanwhile Baw and Heru wet sanded the 8 new layers of polyurethane varnish trim in the salon. This was followed by polishing with 3M 09374, a fast cut polish that they applied by rag, then buffed with the big polishing wheel. We are now shiny. Again. Let's hope no more epoxy bloom crops up on the areas they didn't re‑do.
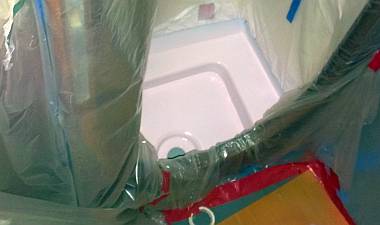 One of the sprayed shower pans, all masked in plastic |
In the afternoon the men set up the big yellow extractor fan, fired up the compressor, and Baw sprayed gelcoat on the floors of the showers. He did all 4, with breaks in between while the guys moved the extractor fan to the next shower. For an encore, he sprayed a few small places on the upper topsides and on the foredeck where the gelcoat was thin. We know there are still bits of gelcoat that will need dit‑dot repairs, but we hope this is the last of the spray repairs.
Jon found (to Sue's immense relief) and reassembled the bits for holding down the outboard cover, then he cleaned and siliconed on the rubber strip between the outboard and the cover. In the process he noticed a steel bracket on the engine that's starting to rust (why do they put steel bits in outboard motors?!?) but treating and reinstalling that should finish the outboard.
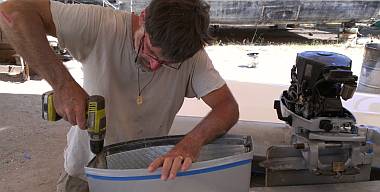 Reassembling the hardware to hold the cover on the outboard |
Jon's main job was to get the hinges mounted on the 3rd (central) big cockpit hatch. The area that the hinges bolt to had been completely rebuilt, so no previous holes were available, but he could find the original holes in the hatch itself. Using those he was able to compute where the holes for the other side of the hinges were supposed to be. But drilling them out revealed another shortcut by the builder - the original holes had not been de‑cored, and the balsa had rotted away when water got in. So Jon cleaned the area up from below, painted the remaining balsa with epoxy to seal it, and then smeared a thick epoxy paste into where the balsa had been. By early afternoon the epoxy had cured and he could re‑drill the holes and mount the hinges. Luckily, this hatch does not seem to have warped like the others, and only needed a bit of one lip ground down before it closed happily.
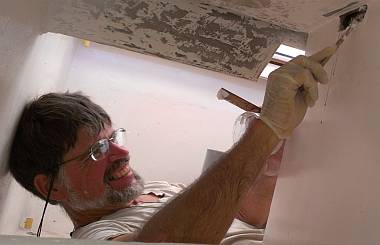 Groveling in the cockpit lockers to fill holes with epoxy paste |
Jon's final accomplishment was on a small patch on the port side of the cockpit where Pla found some glass that didn't seem to be stuck down. You couldn't see anything, but tapping on it made a distinctive hollow sound. Jon and Baw tapped it out and found that the problem area was actually quite small, about half the size of a hand palm. We decided it's probably a bit of balsa that never bonded to the fiberglass, like the much larger patch we found on the starboard cockpit wall. Instead of grinding the glass back, we drilled small holes at each end of the patch and Jon injected epoxy in one hole until it came out the other. Tomorrow one of the guys will sand it smooth and dab on a bit of gelcoat to hide the holes. A neat and easy fix to what could have been an ugly project.
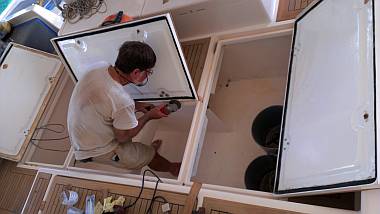 Trimming the central hatch so it closes, all 3 big hatches open |
Houa had a bit of a backwards day in that he tested the fully formica‑covered head locker doors and realized that the sharp formica edges protruded too much. So, with Jon's OK, he cut back one side of each door, again to 45 degrees angle, and got those edges epoxied. Tomorrow he'll be able to epoxy glue the last formica strips back on. Then he's looking forward to working with Jon to install the big hatch pulls in the cockpit lockers, and maybe start mounting the cockpit table and its supports.
Sue spent several hours in the apartment on the computer, collating the worker's pictures and starting a list of what each man has done on Ocelot's Refit. The goal is to give the men good letters of recommendation and we want to be sure we cover all the aspects of boat building that they participated in. A fun but sort of bitter‑sweet job, looking back on all the work and all the workers, some of whom have been with us for more than a year. Cris, the old yard manager, has generously agreed to translate the letters into Thai, so they'll be in both languages, with the workers' pictures at the top.
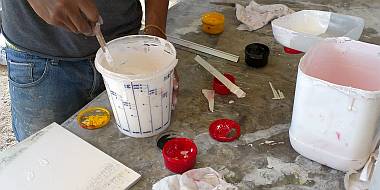 Coloring gelcoat - yesterday's batch, on the right, was too pink |
Saturday, January 4:
Strangely muggy for the dry season, and we had thunder and lightning last night with a good
rainfall. Climate change in action?
We're getting used to these 5‑men days, still keeping everyone busy, but not feeling hectic about it. The men unveiled yesterday's gelcoat repairs on deck, and after sanding them a bit it was obvious that the color wasn't right. It was too pink, so Baw spent about an hour mixing up a new batch and getting the colors just right. While the men re‑masked the deck, Baw added catalyst to a test patch to verify the color. Baw got everything re‑sprayed before lunch. Good, fast‑drying gelcoat meant that they could sand it in the afternoon, and Baw pronounced it Good!
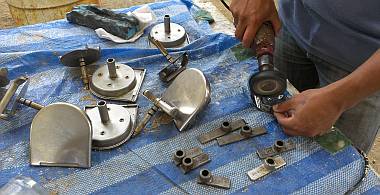 Heru polished up the big stainless hatch handles for the cockpit |
Heru and Yando began polishing the stainless steel hatch handles (big things, with rotating locking handles under covers). Pla worked on deck finding, marking, and sometimes filling little gelcoat blemishes.
Jon removed the rusting bracket from the outboard and started sanding it clean. Sue took over that job, treating the steel with phosphoric acid and painting it with a 2‑part metal primer. Monday we'll paint it black to match the rest of the engine and remount it.
Jon fiddled in the port engine a bit, trying to get the engine shut‑off solenoid to work, but no dice. Looks like we're up for a new one, come Monday when shops open again. Sue hopped down into the engine room and did some much needed cleaning after the oil leakage event last week. At least the new paint cleans up easily.
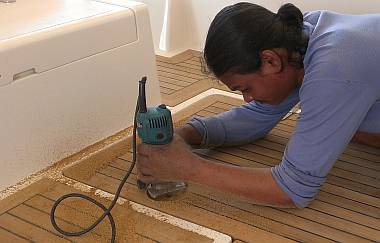 Houa routing out a cockpit hatch where a handle/latch will go |
So Jon returned to the cockpit to mark out where the big stainless hatch handles/latches need to mount. He bought a 5/8" (16mm) borer bit for the central shaft of each handle and drilled out the center hole for 1 of the 2 handles in each of the 3 hatches. Then he used his calipers to measure and scribe a 4" (10cm) diameter circle around each where the teak had to be routed out so the handles could be sunk into the the hatch‑tops.
Houa moved ahead with the locker doors for the heads, epoxying on some more bits of formica trim and cleaning them up. Then he brought his router to the cockpit and started working on the hatches that Jon had marked out. He removed 15mm of teak from inside the circles and used a chisel to dig out the Sikaflex underneath so the handles sit flush with the top of the teak.
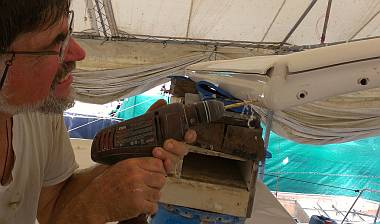 De-coring the port side of the bimini, where the leg bolts will go |
Jon's big job was to start de‑coring the bimini corners where the 7 bolts will mount to hold the stainless steel legs to the front corners. Problem is, we didn't build that area to be de‑cored, as we were originally going to build fiberglass legs, so there's lots of fiberglass and epoxy mud inside the corners of the bimini. But after several hours of drilling and using an allen‑key on a drill to shred the foam inside and removing the shreds with the shop‑vac and forceps, Jon got all but one hole de‑cored on the port side before the allen‑key broke and he decided to call it a day.
Thai Refit:
Ocelot Pages:
Top Level: Home | Destinations | Cruising Info | Underwater | Boat Guests | Ocelot | Sue | Jon | Amanda | Chris | Site Map | Make a Comment
|
If our information is useful, you can help by making a donation |
Copyright © 2000‑ Contact: Jon and Sue Hacking -- HackingFamily.com, svOcelot.com. All rights reserved.