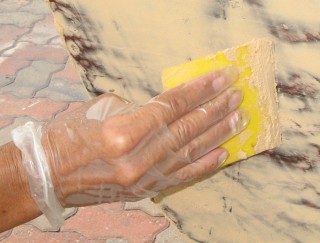
Applying fairing filler with a polyethylene paddle.
Wearing gloves for epoxy work is a good idea
|
Cruising Info Equipment Pages |
Epoxy Work
Virtually all boats, be they wood, fiberglass, metal, or ferro-cement, will use epoxy at some point. Epoxy is easy to use, very strong, bonds well to most materials, is relatively inert when cured, and is easy to form into almost any shape. This article will not attempt to chose the best epoxy and it won't tell you how to build a boat, but will instead attempt to give epoxy users some useful information, garnered from my almost 40 years (off and on) of getting stuck up in the stuff. (In the old days, bad sailors got tarred and feathered. The modern equivalent is to get fiberglassed and feathered!)
Subjects this article covers include:
 Applying fairing filler with a polyethylene paddle. Wearing gloves for epoxy work is a good idea |
Epoxification
Some people, especially those who use epoxy a lot, can become extremely
sensitive to it. They break out in a bad rash whenever they touch epoxy
resins. Therefore, it's a good idea to wear plastic gloves whenever you're
working with epoxy. If you get any on your skin, use
vinegar to clean it off you as soon as possible.
Effects of Ultraviolet
Unfortunately, epoxy is generally unstable in direct sunlight. The
ultraviolet will make it go milky in a year or so, and then it will begin to
break down as the ultraviolet rays break the internal bonds. If an epoxy
part is to be in direct sunlight, it must be well painted or covered in some UV
stable material (usually gelcoat).
Water Impermeability
Gelcoat, like most polyesters, is not entirely waterproof. Over time, it
will absorb water, causing the dreaded boat-pox, or osmosis blisters.
Epoxy, however, is pretty impermeable to water. It won't cure in the
presence of water, but it usually won't let water through. However, epoxy
is several times the cost of polyester, so most boat builders use polyester to
save costs. The reputable builders will then put several coats of epoxy
below the waterline of the finished hull, to seal the hull. If you end up
with osmosis blisters, the normal procedure is to grind off all the gelcoat
below the waterline, grind out all the big blisters and let them dry completely,
and then apply several coats of epoxy to the ground-off area. Since epoxy
won't cure properly in the presence of water, the hull has to be completely dry,
which can take a long time.
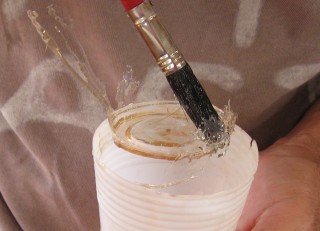 Fully cured epoxy is hard, and comes out of polyethylene cups like a rigid casting |
Underwater Patching Compound
Several companies sell products loosely called Underwater Epoxy or, more
properly, Underwater Patching Compound. It usually comes as 2 different
colored sticks of material about the consistency of modeling clay. These
are not true epoxies, but they work very well for making emergency underwater
repairs. Simply cut off equal amounts of each stick, mash them together
until they're a uniform color, and then work it into the area to be repaired.
Smoothing it down with your fingers will work the water out from underneath,
allowing a good bond. Pot‑life is pretty short, usually no more than
10 minutes, but that's enough for most small repairs, and you can always add
more later if necessary. The repair is usually very hard and durable.
Polyethylene
Polyethylene plastic is wonderful stuff because nothing sticks to it,
including epoxy. Even polysulfides like 5200 or Sika‑flex won't stick to
boards of high-density polyethylene - such boards must be screwed in place.
But this makes polyethylene very useful when working epoxy. For instance,
we use throw-away polyethylene cups to mix our epoxy in. Once we've
finished our job, we put the cup (and usually our paintbrush and mixing rod)
aside in a safe place. The next day we can pull the cured epoxy out of the
cup to see how it has set up. If it's hard and brittle, we know the epoxy
has cured well (and we can re-use the cup on our next project). If it's
still tacky, we know something went wrong and we'll probably have to do the job
over again.
Most plastic grocery bags are polyethylene, so we usually tape one down to our work surface, to catch drips and to provide a safe place to put paintbrushes and mixing rods down. If you have to clamp an epoxy job, cover it in a sheet of polyethylene first, to protect your clamping materials (boards, padding, etc). If you're wetting out fiberglass cloth, put down some polyethylene sheeting for your work surface and get yourself some polyethylene paddles to work the epoxy into the cloth and to spread the epoxy to the edges. Let the epoxy cure on the paddles and then simply peel the cured epoxy off the paddles the next morning.
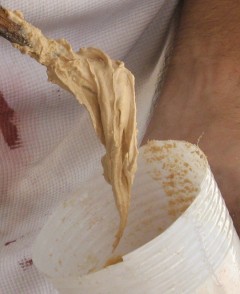 Fillers must be mixed to the desired consistency |
Fillers
Epoxy is strong, but it's expensive, runny, and can be brittle. If you want
to fill a volume, even a small one, you usually mix up your resin thoroughly
and then add a filler of some sort to bulk up your epoxy inexpensively, and
to get it to the consistency you want. The classic filler to
add is micro‑balloons. These are tiny spheres and they can produce
quite a strong putty. But microscopically, micro‑balloons tend to roll
over each other, so the putty tends to sag. So you usually also want some
cabosil to the mix. Cabosil has a long thin microstructure, which
prevents the micro‑balloons from rolling over each other and causing the putty
to sag. Talc is often used as a filler to make an epoxy glue. Fairing
fillers are light and very fine-grained. They're not very structural, but they
sand very easily and smoothly once the epoxy has hardened. They're very good for
producing a smooth surface, usually just before painting. I've even heard
of someone using cooking flour as a filler in an application where strength
wasn't critical. When adding fillers to your epoxy resin, you must add the filler
powder slowly, mixing it into the resin until you get just the consistency you
want. If it's too wet it will probably sag - Too dry, and it won't apply
well. Plastic supply companies often sell several types of
fillers, often blended with several components to achieve a desired effect.
You can also buy pre-mixed (thickened) epoxies, which are simpler but one more
thing to carry around.
Surface Preparation
As with painting, the surface to be epoxied must be prepared correctly for
optimal results. It's very important to remove all oils and water from the
area, as oil will prevent the epoxy from adhering, and water will prevent the
epoxy from curing properly. Detergents will also prevent epoxy from
adhering. In fact, detergents are often used in reusable molds as a
release agent for epoxy. In general, wiping the area with acetone or
alcohol or other non‑oily solvent on a clean rag just before mixing your epoxy
will do the trick. Make sure the solvent evaporates completely from the
surface, and try not to touch the surface afterwards (the oils on your hands
could affect the bond).
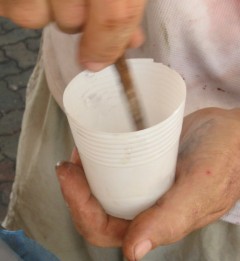 Thorough mixing is critical |
Mixing
Most people are used to polyester resins in all their many forms (like gelcoat
or auto body-filler). Polyester requires a catalyst (usually MEKP) to
start the reaction going. But epoxy is different. Epoxy doesn't use
a catalyst - it uses a hardener. For the chemical reaction to complete
properly, epoxy must be mixed much more thoroughly. This sounds easy but
usually involves much more mixing than most
folks are used to. You can't just mix it until it's a uniform color.
The trick I use is to mix my epoxy until I'm fairly certain that every molecule of
resin has contacted a molecule of hardener, and then I continue mixing it for
that long again. A bit of overkill, perhaps, but my epoxy sets up very
nicely, thank you.
Pot Life
One of the joys of epoxy is that it generally has a much longer pot-life
(how long your batch remains workable before it starts to
harden up) than polyester resins. If you don't get polyester resins where
you need them in 5‑10 minutes, you've got a mess on your hands. Epoxy
usually gives you 15‑30 minutes, even in the tropics (assuming you mix small
batches and use a "slow‑cure" hardener).
Note that both polyester and epoxy are exothermic chemical reactions as they harden. That is, they produce their own heat, and that heat will accelerate the curing process, sometimes dramatically. If you mix too large a batch, or allow a large batch to sit without spreading it out (typically over glass-fiber cloth) then it can kick-off by itself very quickly. In extreme cases it can generate enough heat to start a fire. I've seen it happen. Scary...
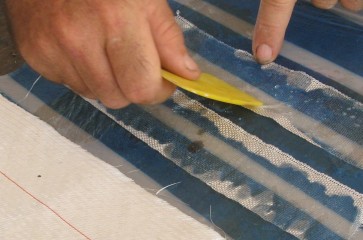 Wetting out fiberglass tape until fully transparent |
Vacuum Bagging
One very powerful technique for making light and rigid structures is to vacuum-bag
them. Make a mold of your part (usually a female mold) with small metal
tubes protruding into the work area. Apply some release material to the
mold so the epoxy won't stick to it. Wet out your (outside) cloth layers
and lay them in your mold. Use a small wire (like a straightened paper
clip) to spread the strands of glass around your vacuum tubes. Once your
outer layers of glass are laid down nicely, lay your foam (or other filler
material) on your glass. Then wet out and lay your inside cloth layers
over your foam. Cover the whole assembly with a sheet of polyethylene.
Use a sticky putty to stick the polyethylene sheet to the edges of your mold.
Then turn on your vacuum pump. For an even better cure, put the whole
assembly in a warm oven (or even some good sunlight).
The vacuum applies 15 pounds per square inch (1 Barr) to the entire surface, forcing the glass onto the foam. Since the vacuum is applied from the foam, the excess resin will tend to be sucked into the foam, providing excellent foam/glass adhesion. Some vacuum-channel slits cut in the foam will spread the vacuum more uniformly, and will also allow the foam to bend more easily to fit the mold. We used a broken bit of hacksaw blade imbedded in a block of wood such that it stuck down the exact depth we wanted our slits to be. Drawing our block over the foam cut perfect vacuum channel slits every time.
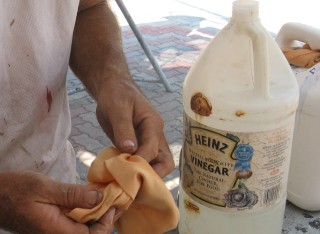 Household vinegar works well for cleaning up. |
Cleaning up
Most folks think that you need plenty of Acetone to clean up epoxy and to keep
it from hardening where you don't want it. Indeed, that's what we used at
the professional epoxy construction companies where I first started working with epoxy
back in the '70s. But acetone is actually getting hard to buy in some
places. Apparently it's an ingredient in the manufacture of certain
illicit drugs, so some countries don't like to sell it at all. More to the point,
we've now discovered that normal white vinegar works even better than acetone! Vinegar is
also cheaper, easier on your skin, doesn't affect some plastics the way acetone
can, and is far less dangerous to carry. In my felonious youth, I actually
created a pretty good fire-bomb using a plastic sandwich bag of acetone and a
firecracker - the image of the 15' (5m) fireball I created that night is still
etched on my retina.
Repairing deflatable dinghies
Most folks think that inflatable (deflatable) dinghies need to be repaired with
some form of contact cement, and that epoxy is too stiff and too brittle to use
on flexible material. But that's not true at all! Spread thinly, epoxy is quite flexible and often adheres to Hypalon and other dinghy
materials better than even fancy, custom contact cements.
For a small puncture, a patch is actually the worst kind of repair. Once air gets under the patch, it will create a little lens-shaped bubble there. The edges of that bubble will be the very sharp join between the dinghy material and the patch. This is exactly where the stresses will concentrate! Stress concentration goes as the inverse of the radius, so the very small radii at the edge of the bubble will produce the highest stresses, which will tend to pull the glue apart and propagate the bubble, eventually causing the patch to fail.
Instead, mix up a tiny batch of epoxy. Dip a sharp toothpick into the epoxy and then work the toothpick into your puncture. Wait for the epoxy to cure and then cut off the part of the toothpick that's still sticking out. You can then put a patch over the repair if you want, but now the toothpick is taking the stresses and holding in the air, while the patch is only providing physical (abrasion) protection. This is a much better (permanent) fix. (This is also similar to how tubeless tires are repaired.)
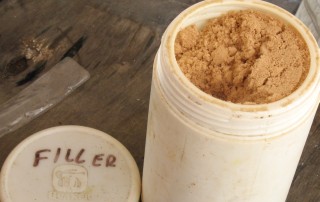 Epoxy fillers come in a variety of forms |
For tears and larger repairs, you'll need to place a pressure patch over it, so you'll need to find a place where you can clamp your repair. First, fasten some tape to the inside of the tear. Put the tape on one side of the tear, then bring the other side over and press it down on the tape to make it adhere. This tape is non-structural (of course) but it serves to keep the glue from seeping through the tear and fastening one side of the tube to the other on the inside. It also keeps everything nice and flat. Some books say to use a herringbone stitch to draw the edges of the tear together, but that will create a ridge under your patch, and make it difficult to keep the glue from seeping through the tear. Make your patch at least 4" (10 cm) bigger than your tear, so you have have at least 2" (5 cm) of overlap all around. Mark out where the patch is to go and clean both the patch and the repair area as thoroughly as possible, making sure there's no grease or oils present. Scuff the area with coarse sandpaper to provide a good mechanical key. Paint on a thin layer of epoxy to both the patch and the tear area - the epoxy will probably try to bead up. Sand through the epoxy with wet-and-dry sandpaper until you break the surface tension of the epoxy and it forms a thin, smooth layer without beading up. Put your patch over your tear, wipe off any excess epoxy, and cover the area with a polyethylene bag (epoxy doesn't stick to polyethylene). Then put down some padding and some boards on both sides, and clamp the repair solidly. The padding is to spread out the clamp loads, so the force is spread evenly. This method is very similar to what you have to do with contact cement, but epoxy is generally stronger and adheres better than contact cement, and it gives you more time, so you can position your patch exactly and make sure it isn't wrinkled.
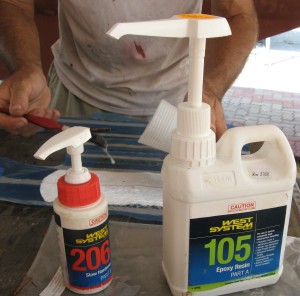 West's pumps make measuring foolproof |
In 1985 the French Franc plummeted and we could get 10 Francs to the dollar, so we bought a bright orange Zodiac deflatable and an 8hp outboard, so we could go zipping around in style. Imagine our surprise (and annoyance) when, after only a few months, the transom fell off! The rubber molding that held the wooden transom simply fell away from the tubes. Since it was still under warrantee and since we were in Martinique at the time (having a baby) we took it to the Zodiac people and they "repaired" it with their special glue. A few months later it fell apart again in exactly the same place, but by then we were in Venezuela with no repair facilities around. So I cleaned off all the old contact cement and scuffed up the area as best I could with coarse sandpaper. Then I painted on some Venezuelan epoxy (it was only $9/gallon!) and continued sanding the area (through the epoxy) until the epoxy didn't bead up anymore, but laid down in a nice smooth sheet. Then I wrapped some polyethylene bags around the outside of the rubber molding and bound it to the tube by wrapping ropes around the tubes (and moldings). Then I pumped up the tubes to full working pressure to get the ropes nice and tight, and let the epoxy cure. That repair was still perfect, showing no signs of coming apart, when we sold the boat (with the Zodiac) 2.5 years later. Even rolling it up for storage and re‑inflating it didn't seem to bother the repair.
Epoxy Pumps
For a long time, West Epoxy has sold pumps to go along with their epoxies. These are
extremely useful because they measure out the correct ratios automatically, without getting
any measuring cups or spoons all gloopy. One pump of epoxy into a polyethylene cup, one pump
of hardener into the same cup, mix thoroughly and you're ready to go. It's very surprising to us that other epoxy
manufacturers haven't worked out how good this marketing tool is, because once you use the pumps you
won't want to do epoxy work without them. Working with epoxy is messy
and sticky at the best of times, but these pumps minimize that wonderfully.
If you're laying up a whole boat, you'll be using large quantities and probably won't need such measuring devices most of the time (but I'll bet they'll come in useful for the fiddly bits at the end). But we usually only need small amounts of epoxy as part of some small project we're working on. The ability to measure out just as much as we need, without having to get any measuring cups or spoons all gloopy, is wonderful. We leave our pumps on the containers, so they're always ready to go. And now that West System has gone from using metal containers (which tended to rust) to using plastic containers, the containers themselves should last much longer on board.
Modifying West Epoxy Pumps for Other Epoxies
West Epoxy is very good, but it's expensive outside of the USA. In Thailand, we've found that
the local Epotek epoxy is also quite good, with no solvents, and it's much cheaper than the imported
West epoxy. But since the Epotek mixing ratio is 3.3:1 instead of West's 5:1, we thought we couldn't
use the West pumps with our Epotek epoxy. WRONG! West epoxy pumps can be easily
set to whatever mixing ratio you want, and they can easily be made to fit on whatever screw‑top containers
your epoxy comes in.
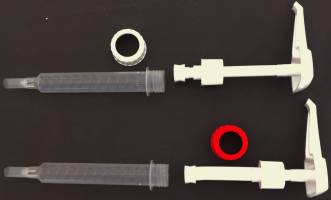 Disassembled epoxy (top) & hardener pumps |
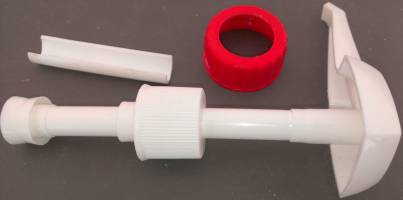 Hardener pump with clip-on stroke reducer removed |
These pump modifications work best with the larger pumps. Unscrew the collar just above where the pump screws onto the epoxy container. Be careful, as the pumps will be somewhat spring loaded. The pump will come apart into 4 pieces: the upper assembly, the lower assembly, the spring, and the screw‑top for the epoxy container. For the hardener pump, there should also be a bit of plastic clipped onto the shaft of the upper assembly. This limits the stroke of the hardener pump, providing for the correct mixing ratio. Adjusting the length of that clipped on plastic piece will adjust the mixing ratio to match whatever you need. If the pumps have the same diameter then the mixing ratio is simply the ratio of the pump strokes between the epoxy and the hardener.
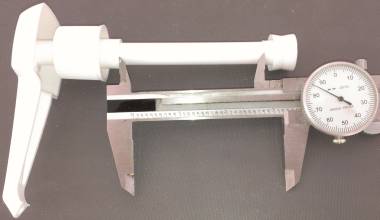
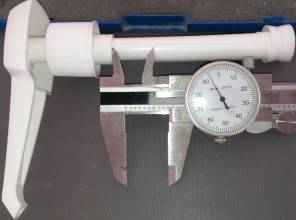 Epoxy pump stroke is 3.180" & Hardener pump stroke is 0.894", for a mixing ratio of 3.56:1 |
The pumps we bought had a nominal advertised mixing ratio of 4:1. However, actually measuring the pump strokes revealed that the actual mixing ratio was 3.18/0.894=3.56:1. So don't take the advertised mixing ratio as gospel. Measure it yourself and then adjust the stroke‑reducer on the hardener pump to achieve the ratio you need. For our Epotek epoxy, we need a mixing ratio of 3.33:1, so the hardener stroke should be 3.18/3.33=0.955". Cutting .955-.894=0.061" (1.5mm) off the stroke‑reducer should allow slightly more hardener in, making the mixing ratio exactly correct for our Epotek epoxy.
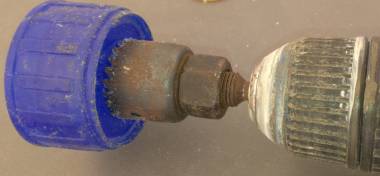 A small hole-saw cut the cap of our Epotek epoxy |
Fitting the pumps to a different screw‑top container is even easier. Simply measure the diameter of the hole in the cap that comes with the pumps, and make a similar sized hole in the cap of the containers of the epoxy and hardener you're using. The hole should allow the threads of the lower pump assembly to slide through it, and the cap should rest on the lip of the lower pump assembly. Then gently fit the upper pump assembly into the lower assembly and screw them firmly together. Leaving the pumps in the containers makes them ready to use at any time.
Sticking to Aluminum or Stainless Steel
The problem with both aluminum and stainless steel is that they oxidize almost
immediately after they're sanded, and epoxy doesn't bond well to that oxide
layer. The paint manufacturers would have you use a bewildering array of
different (and expensive) etch-primers and such, but we've found they're not
really necessary if you're willing to do a bit of work. As always, prepare
your metal surface well, cleaning it thoroughly of all oils and other foreign
substances. Then paint on your epoxy. Since the metal has already
oxidized (yes, even the stainless steel) the epoxy will tend to bead up, drawn
in by its own surface tension. Get some wet-and-dry sandpaper and start
sanding your metal through the wet epoxy! Since there's no
oxygen available under the epoxy, the metal can't oxidize, and the epoxy will
form a good chemical bond to the metal. The sanding will also provide a
good mechanical key for the epoxy to grab onto.
One problem with this technique is that some stainless steels require that oxide layer to remain stainless. If someone has a solution for this, please let me know and I'll add it here.
What we do on Ocelot
If we can get it, we tend to use West System
epoxies for our small projects, with their slow hardener. This is not only because it's good
epoxy, but because you can buy pumps for the containers that measure out the correct mixing ratios
automatically. This is extremely useful to us, as we've been spoiled by those
pumps. In Thailand in 2013 we gave Ocelot a major refit, involving a lot of epoxy. We
found that we could modify the West Epoxy pumps so they'd work for the locally produced (and quite
good) Epotek epoxy, which saved us a lot of money.
With Thanks
The sections on repairing of deflatables, and how to make epoxy stick to metals
like aluminum and stainless steel, we learned from a dear sailing friend of ours
in the Caribbean. Henry Chatfield was 75 when we met him and his
wife, Barbara, on their boat Trew in
St. Lucia in the mid '80s. Henry was a wealth of knowledge, and was
always seeking out more. He'd built a trimaran, then a catamaran, then an
"unsinkable" monohull (cat-rigged, with lee-boards, twin Sabb diesel
engines, and a 27 cubic foot (1,000 liter) deep freeze!).
Henry was building a trawler in Cumana, Venezuela when he died in
the early '90s, still pursuing his dreams and seeking out new answers.
Equipment Pages:
Cruising Info:
Top Level: Home | Destinations | Cruising Info | Underwater | Boat Guests | Ocelot | Sue | Jon | Amanda | Chris | Site Map | Make a Comment
|
If our information is useful, you can help by making a donation |
Copyright © 2000‑ Contact: Jon and Sue Hacking -- HackingFamily.com, svOcelot.com. All rights reserved.