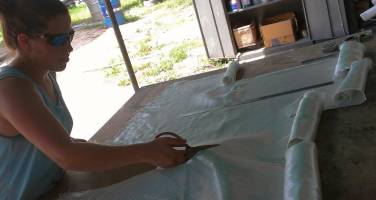
Biaxial fiberglass cloth REALLY doesn't want to cut
45 Cockpit & Bimini
 Biaxial fiberglass cloth REALLY doesn't want to cut |
Summary: Most of the activity this week centered on Ocelot's cockpit (for Golf's crew) and on our new bimini (for Team Hacking). On the bimini, we built up the back where it's going to bolt onto the targa‑bar with fiberglass, and we added 3 strengthening ribs - one on each side and one in the middle. These were built up with thin glass strips between each layer of foam (which required lots of cleanup with sanding grinders), carefully shaped so they look nice and are easy to grab, and then were covered with 2 thick layers of biaxial glass. Sue also filled in 9 reinforcing points where we have to bolt into the hulls - 8 for the grab‑rails to go on top of the sugar‑scoop walls and 1 for the portside prod pad‑eye up forward. Above the cockpit, the top of the targa‑bar was sanded and sprayed with gelcoat. In the cockpit itself, the process of preparing for the new teak was started. The borders where the teak will go were built back up with thin glass strips and then gelcoat. This process has a ways to go. This was a short week - on Saturday Amanda's university buddies Liz and Monica flew in so we spent the weekend showing them around Phuket.
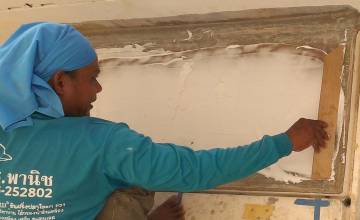 Houa filling the depression where the cockpit table goes |
Monday, September 10:
A sunny start to the week, which we are very grateful for.
Our day started above Ocelot's cockpit, working out exactly where we want the bimini to go and how we want it to mount on the targa‑bar. We'll probably let it come a bit further forward than our last bimini, and we'll need at least 3" (8cm) of pure fiberglass (no foam) at the back, to bolt into the targa‑bar. Since Amanda had the laser out, she also checked to see if the targa‑bar is level, and it is. Another indicator that Ocelot's probably pretty level (finally).
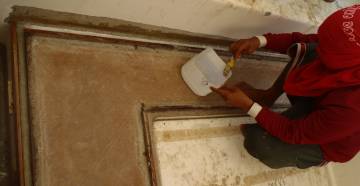 Mee laying thin glass strips against Houa's wood frames |
Jon spent the rest of the morning with a powerful sanding disk, getting rid of the rough glass edges sticking out from our layup last Saturday. Sue and Amanda retreated from the dust and went to the workshop in front of Ocelot, measuring and cutting the required 6 strips of fiberglass that will reinforce the back edge of the bimini and form the rigid glass through which we'll bolt the bimini to the targa‑bar.
Houa filled the slightly depressed area under the cockpit table with epoxy filler, then he laid 2 sheets of biaxial glass over that, the second overlapping the first, as we have taught them to do. This will strengthen the supports for the cockpit table tremendously, and provide a flat space for Houa to lay his teak.
Young Beng (who is looking more and more like his brother Baw) put in a good few hours of hand sanding and long boarding the gelcoat filler on the targa‑bar. He got it smooth enough that in the afternoon Golf mixed up a new batch of gelcoat filler and Baw paddled it on, so now the targa bar is looking very white!
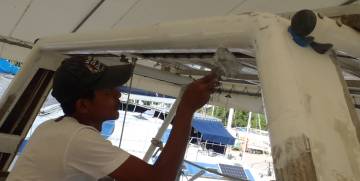 Baw smearing more filled gelcoat onto the targa-bar |
In an effort to reduce the amount of unprotected wood on board, we asked that the bare strips of wood forming the framework for our sliding entryway door be epoxied. Beng took on that small, detailed job in the afternoon, which was probably a welcome change from sanding the targa bar!
The cockpit was alive with activity all afternoon. After the frames for the teak were laid (Houa's exacting work) Mee filled the spaces between the frames and the vertical sides of the cockpit coaming with long skinny strips of biaxial and chop strand fiberglass.
Golf spent some time painting the boot stripe on a local powerboat across the track from us before joining in the cockpit work.
Sue took advantage of the newly arrived epoxy to beg small cups of it to continue working on glassing the bolt holes for the sugar scoop handrails, and (oh sweaty horrors!) the port fo'c's'l bolt hole for the new prod pad‑eye. It is so hot in there that the epoxy goes off super fast. If Sue has too much epoxy, or uses it too slowly, it gets hot and bubbly in the plastic cup. Then it's critical to throw it off the boat and onto the sand below before it gets hot enough to burn.
In the afternoon, Jon and Amanda, with the epoxy mixing services of Mee, laid 3 wide strips of biaxial glass on the aft edge of the bimini. Then they worked on the center rib.
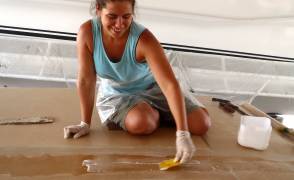 Smearing down epoxy mud to fill any gaps |
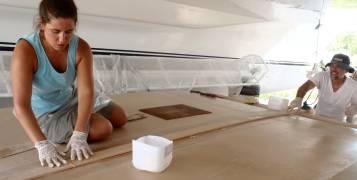 Laying the first strip of epoxy coated foam on the epoxy mud |
With Amanda up on the bimini itself, she spread epoxy mud while Jon rolled thin epoxy on the foam strips. They laid the foam strips in place, glassed and mudded their tops, then laid the next strip of foam on top. When they'd finished, they covered the rib with a sheet of polyethylene, put clamps on the ends to hold them down, and put weights down the entire length to hold it down. We now have a center rib that's 4 layers of foam high to give the bimini added rigidity. The plan for tomorrow is to get the 2 side ribs/grab‑rails on.
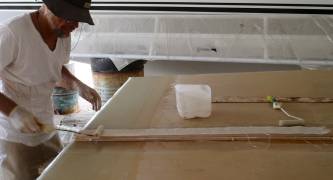 A layer of fiberglass went between each strip of foam |
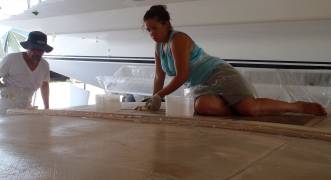 Repeat mud, foam, & glass until the rib is 4 layers high |
We were delighted to have a surprise visit by Daryl from Cool Bananas, who is up from New Zealand just for the week to check on his boat at the new Krabi Marina. It was great to visit with a fellow cruiser, and get all the wanderlust juices flowing again about wonderful places to visit, and fantastic diving and snorkeling areas to look forward to.
Tuesday, September 11:
Another day that shall live in infamy, but a good day for us.
The day started cool and a bit rainy, but ended with a light breeze, sunny skies, and a flurry
of new activity.
Jon spent the morning sanding down the edges of the center rib that we epoxied onto the bimini yesterday, making it into a nice pyramid shape running down the middle of the bimini. While he was creating fiberglass and foam dust, Amanda escaped to the workshop in front of Ocelot to cut 18 strips of engineering fiberglass in preparation for creating the port and starboard ribs.
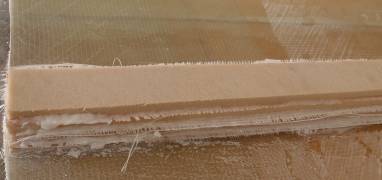 Lots of sharp glass & dried epoxy mud the next morning... |
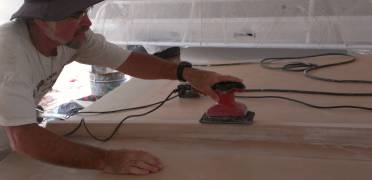 But it looks pretty good after several hours of Jon's TLC |
In the afternoon, Jon and Amanda, with Golf mixing epoxy and epoxy mud, set to work building the last 2 ribs on the bimini. For starboard Jon drilled holes every 6" (15cm) and inserted long tie‑wraps (cable‑ties) which were later used to pull the 3 layers of foam down tight to the bimini. As with the other ribs, they applied mud first, then epoxy‑coated foam, a long strip of engineering glass, more mud, and then the next layer of foam. Unlike the front and center ribs, these side ribs have only 3 layers of foam.
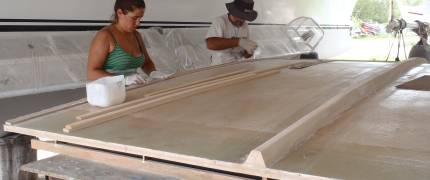 Jon & Amanda laying down the portside rib/grab-rail - note center rib |
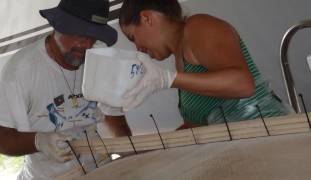 Finishing touches on stbd before fastening tie-wraps |
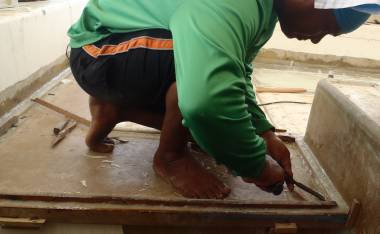 Houa removing his wood frames after the glass has set |
We made a tactical blunder by trying to pull the tie‑wraps tight with epoxy covered gloves - they wouldn't stay locked in position! The epoxy made them too slippery. It took a bit of persuading to spin them around until the locking end was away from the epoxy. Then Sue worked with pliers to finally pull them tight. On port, Amanda and Jon built an identical rib of 3 layers of foam, but they could use clamps and weights to press it tightly to the top of the bimini. Tomorrow we'll sand the edges smooth and shape the ribs so they're comfortable to grab, and possibly cover each side rib in 2 layers of biaxial glass.
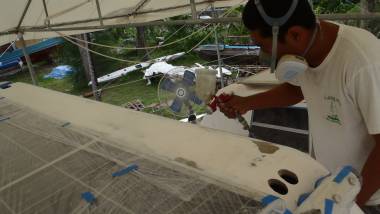 Golf spraying a primer coat of gelcoat on the targa-bar |
Houa spent much of the morning in the cockpit chiseling away the wooden frames that he and Mee had used to create the fiberglass trim for the teak areas. Sue brought in old photos of Ocelot's cockpit floor, to be sure we are all on the same page as to what we would like the teak layout to be. From what we can tell, it's going to be much the same, and will once again be beautiful!
We had some light rain at lunchtime which merely served to cool us all down and bring a bit of welcome breeze. Thank goodness the clouds cleared up, because the afternoon was filled with projects that really don't like rain, like Sue applying more chopped strand glass to the pad‑eye bolt hole in the port fo'c's'l.
Baw spent the morning doing a final sanding and long‑boarding of the upper targa bar. After lunch he wrapped the whole solar panel area and 3 GPS antennas in clear plastic wrap. The exciting event of the afternoon was the application of sprayed on gelcoat! Golf did the majority of the spraying, then turned the spray gun over to Baw to handle the awkward bits where you have to perch on the narrow scaffold and squat and twist while spraying - Golf's previously broken back won't let him get into some positions. This was just an undercoat, but it was still a pretty momentous occasion to see the bright shiny white finish on the targa bar! Tomorrow they'll sand it smooth and apply more (hopefully finish) coats. Golf wants to get the targa‑bar ready so we can mount the new bimini on it.
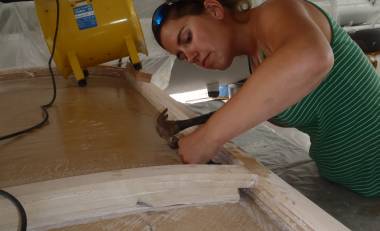 Amanda clearing the water hole between bimini sides |
Wednesday, September 12:
An interesting mid‑week slowdown, with a power outage all afternoon and big squalls. But we
still moved forward.
The morning was a dusty time in the yard, with Baw and his brother Beng up on the scaffolding over the cockpit, sanding yesterday's gelcoat layer smooth.
Under the neighbor's boat, Jon epoxied 2 small bits of foam onto the forward end of each side rib so the side and forward ribs will have the same height. Then Jon started sanding off the fiberglass fringe and extra epoxy from our layup yesterday. Unfortunately, the power went out when he was less than 25% done, and the power never came back all day.
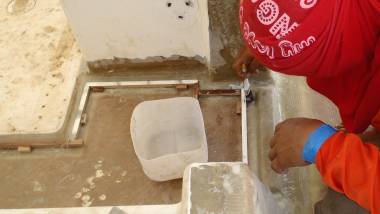 Mee epoxying glass strips against Houa's carefully placed frames |
Jon and Amanda worked out how much glass we need to cover the 3 foam ribs (2 layers) and then we all took turns cutting the long strips of glass back in the workshop area. Biaxial glass is very difficult to cut, and the glass makes the scissors go blunt very quickly, so it's frustratingly slow going.
Hoau and Mee were busy in the cockpit with the continuing work of making the small glass frames around the cockpit floor, against which the teak will be laid.
While the sanding went on, Amanda and Sue borrowed Golf's truck and headed to Immigration and Customs in Phuket Town to extend time for both Ocelot and for Amanda. It all went well - Amanda extended her visa for 30 days and Ocelot got another 6 months because she's being worked on.
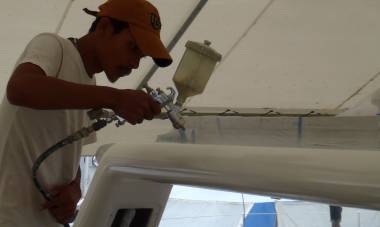 Baw spraying more gelcoat on the targa-bar |
The afternoon got really slow as there was still no power, and rain squalls and wind whipped through the yard. Amanda chiseled out the water tunnel on the front of the bimini, which will let accumulated rain water drain from one side to the other without flowing over the front edge. At least, this is theory!
Jon cut more glass, then set off for Rolly Tasker, the huge professional sail loft, to look at bolt rope track which we will probably use to hold our awnings on the sides of the bimini. We'll have to make a decision soon, as the track might need to be put on now, rather than after the gelcoating.
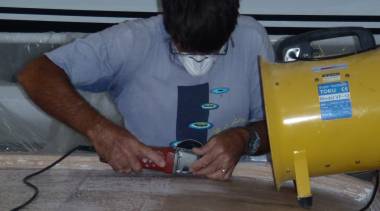 Jon using a sander/grinder in front of a big blower to trim glass |
The surprising event of the afternoon was that we got a new gelcoat layer on the top of the targa bar, despite the weather! Golf's little compressor, which they used yesterday, runs on electricity so he couldn't use it, but his big compressor runs on gasoline. It took 4 guys to haul the large compressor across the sandy lot to Ocelot, and with that air hose hooked up, Baw was able to give us a very smooth beautiful white top coat. All this while rain came down (outside the tent) and wind blew (through the tent)! We figure this is one advantage to having the new "paint job" be gelcoat rather than a linear polyurethane like Awlgrip which hates moisture while it's being sprayed!
Thursday, September 13:
A rainy, windy day with our Thai workers making jokes about hurricanes and tornados but the power
was on all day so we still got things done.
Team Hacking was working on the bimini through a marathon day of grinding, sanding, more sanding, and a bit of routering. It started with Jon grinding off the last of the sharp edges of cured fiberglass and epoxy from the bimini ribs, the job he was working on yesterday when the electricity quit. Once the sharp edges were off we could get down to more creative work.
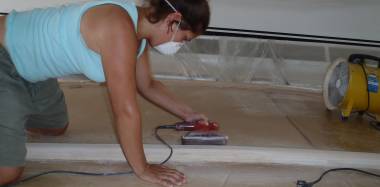 Amanda shaping/smoothing the central rib with her orbital sander |
Amanda used an orbital sander to smooth both sides of all 3 foam ribs. The sight of her using power tools always makes the Thais smile - perhaps it's not part of their culture. We also used the opportunity to shape the ribs a bit, making sure the side ribs had vertical walls and the central rib was more pyramidal. Then we rounded the corners of all 3 ribs, so they'll be nicer to grab and so the fiberglass lays on them smoothly - the thick biaxial glass we use doesn't like going around square corners.
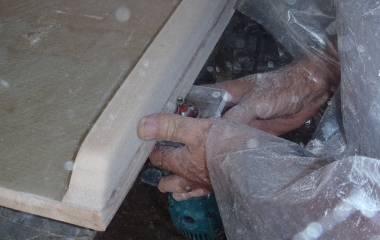 A plastic covered Jon using a router to round the bottom edge |
Late morning we asked Golf for some epoxy filler so Amanda and Jon could create a smooth transition from the 4‑layer‑high front rib to the 3‑layer‑high side ribs. We used some of the excess to put a filet in the forward corners.
About lunchtime a huge squall blew through, with fierce winds. Golf was concerned that our big tent might blow away, so there was a mad scramble to tie it down better. Several lines were added, tying the tent to various stable structures, and Golf found an empty 55 gallon (200 liter) drum which he filled with water and lashed to one of the few tent poles that doesn't already have a drum attached.
After a lunch spent huddled on Ocelot to stay out of the wind and rain, Jon used a router to round the lower edge of the bimini along the 2 sides. Since the bottom is already glassed, we needed more than just a sander, although Amanda sanded those edges smooth afterwards. The underside of the forward edge will get rounded when we take the bimini off its frame, and the back edge will get special treatment then as well, to prepare it for bolting to the targa‑bar.
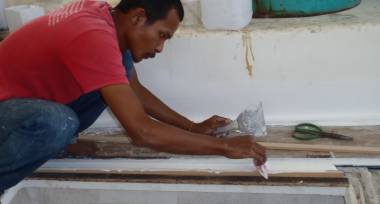 Baw spreading gelcoat on top of the new glass strips |
Sue got more chop strand glass put in the fo'c's'l pad‑eye hole but it was too rainy and windy to finish the job. Her latest project centers around our "adopted" dog, Shorty Legs, who has a rampant skin infection (which we amateurs have been calling "mange"). A quick visit to the local vet a few days ago resulted in a cheap purchase of antibiotics and antihistamines which Sue hides in the chicken bones we give Shorty (from our lunches). Sue also found some cheap hot dogs so she can dose him up twice a day. Don't know yet if the skin condition will improve, but we now have a very happy hound baying in delight when he sees us coming.
The wall between our battery compartment (under the helm seat) and the galley (inside) has a balsa core. We replaced some of the balsa with foam back in mid‑April, but the top of that wall has always been open and exposed, which is why water got into it in the first place. So today Houa glassed over the top of the entire wall, which should keep any more water out.
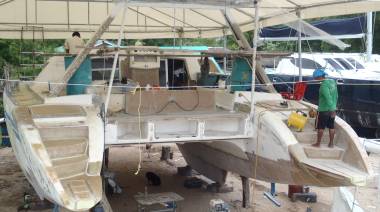 Ocelotion pandemonium, but projects are moving ahead |
Work on the floor of the cockpit continued, preparing it for new teak. Houa lays down meticulously straight and square wood strips, sticking them down with super‑glue. Then Mee builds up thin strips of epoxy glass against the wood strips, building up the walls around where the teak will go. Once the epoxy cures, they chisel away the wooden frames and trim up the inevitable rough edges of fiberglass.
The afternoon work in the cockpit was exciting with Baw putting white gelcoat filler over the new raw fiberglass edges, and fairing it to the old gelcoat. It's so fun to see the cockpit beginning to start to commence to maybe look like its old self, but brighter and newer.
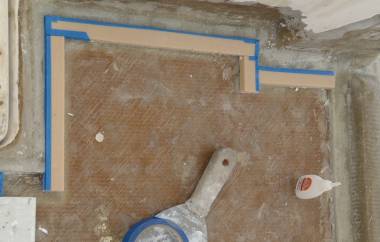 Gelcoat forms of taped foam against the new fiberglass ridges |
Friday, September 14:
A very up and down sort of day, both with weather and with projects. We had a huge squall
early in the morning, then it started to look clear and we thought maybe we could get some
fiberglassing done when another huge squall descended on us. But the afternoon was dry and
cool and we hoped we could tackle some fiberglass projects - except that first the fiberglass went
missing, and then Golf went missing! But it turned out well in the end.
In Ocelot's cockpit, Baw and Houa and Mee got more borders put down for the future teak. It's an interesting process, since the old frames for the teak have long since been ground away. Houa lays down wood borders with meticulous precision and then Mee lays thin glass strips against the wood, outside of where the teak will go. Then the wood is removed with a chisel and a strip of taped foam is put up against the new glass. Then gelcoat thickened with fillers is laid up against the taped foam. Turns out that gelcoat doesn't stick to the tape so once the gelcoat has cured the tape and foam are easily removed, leaving a bright, hard edge that's exactly the right height for the teak. Very cleaver, and it yields beautiful results.
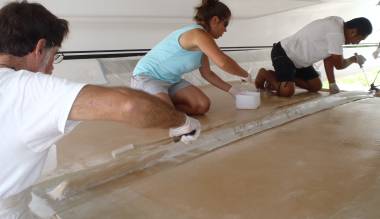 Jon, Amanda & Golf wetting out the first strip on the central rib |
Houa sanded down that last strip of newly glassed foam and balsa between the galley and the battery compartment. Then he spent most of the afternoon sanding and shaping walls on the outsides of the sugar‑scoop extensions, to get them in shape for the final glassing. This involved grinding down the rough cured fiberglass bolt hole circles that Sue has been laying down for the past week. We stayed far away from the blowing fiberglass dust! Houa wanted to put the first 2 of 3 layers of glass on starboard side this afternoon, but Jon always prefer that they work "wet on wet" - don't wait between epoxy layups if you can help it, as you get a better bond if you do it all at once. So we asked Houa to wait until tomorrow, when we'll have more epoxy hardener. He finished the day grinding and smoothing port side extension wall as well.
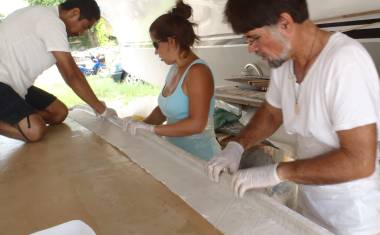 Making sure the glass lays down smoothly over the stbd rib |
Sue had the cool fun of kneeling in the accumulated water in the cockpit of our neighbor's boat, under which we're building the bimini. We've blocked up the forward cockpit drains so the water doesn't leak down onto our bimini, so each morning after the rains Sue goes up there and sponges up the rainwater. Sometimes there's enough for a small swimming pool!
Jon and Amanda spent the morning finishing all the sanding and rounding of edges on the bimini ribs. The day had been getting brighter so we thought we could do some glassing but then a huge squall suddenly came through. By lunch time it was looking better again so we went looking for the fiberglass we'd cut on Wednesday, but it was gone! So after a frantic search for our missing fiberglass we cut another 22 feet (6.5m) of tough biaxial glass into the 7 strips we need, an expensive and hand‑cramping process trying to get the scissors to cut through thick glass cloth.
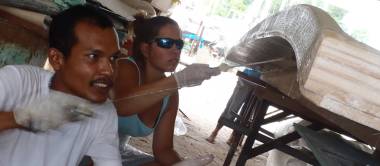 Baw & Amanda rolling epoxy into the glass under the bimini |
When we were finally ready with our newly cut glass and thinking that we might just have time to glass in the 3 foam ribs on the bimini, the guys said we didn't have enough epoxy hardener for the job. So Golf went to Phuket Fiberglass on the far side of Phuket Town and only returned at about 3:30. Golf claimed there was enough time left in the day so we quickly got ready, mounting a big project with Mee mixing epoxy resin and epoxy mud as needed, Golf, Amanda and Baw perched on the bimini, and Jon and Sue working from the sides.
Each of the 3 bimini ribs needed 2 layers of biaxial glass, one about 12" (30cm) wide and another about 17" (43cm) so we'd have sufficient overlap. It was tricky because the side ribs required that the glass start on the top of the bimini, go up the rib, down the other side, and finally along the underside of the bimini, where we had to work over our heads. But once we got going it all went pretty smoothly, with Golf and Baw spreading a nice filet of epoxy mud into the corners and then along the foam, so the glass would stick to the underside while we worked the epoxy resin into it. It was a marathon effort, with great teamwork and we finished at about 5pm. Even the weather cooperated!
A big day tomorrow, but not on the boat! We're looking forward to the arrival of Amanda's 2 university friends, Liz and Monica, with whom Amanda will be traveling around Thailand for the next month. Great fun for them. Great loss for us, in not having Amanda on the team for so long! But we've rented a car for 2 days to show them around, so Amanda finally gets her wish of a more "normal" 2 day weekend. Lucky her, it segue‑ways right into her month long adventure!
Thai Refit:
Ocelot Pages:
Top Level: Home | Destinations | Cruising Info | Underwater | Boat Guests | Ocelot | Sue | Jon | Amanda | Chris | Site Map | Make a Comment
|
If our information is useful, you can help by making a donation |
Copyright © 2000‑ Contact: Jon and Sue Hacking -- HackingFamily.com, svOcelot.com. All rights reserved.