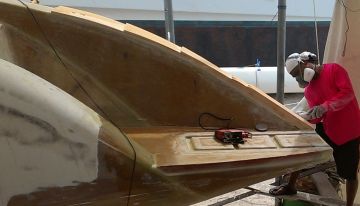
Houa shaping the new foam, raising the starboard wall
42 Level Ocelot
 Houa shaping the new foam, raising the starboard wall |
Summary: A productive week, despite lots of rain! The biggest gain was that the steps inside the sugar‑scoops were started - the step positions were laid out, the steps were designed, the foam was cut and shaped and then fiberglassed. The mast continued to get polished, and we arranged all the halyards where we want them. Both walls down to the swim platforms were raised and faired so they come down to the swim platforms correctly. The mounting areas for the swim ladders were routed out. Amanda measured up much of Ocelot so she could model some of our additions, like the sugar‑scoop steps and the new bimini, in her 3‑D modeling program, Sketchup. Mee made progress on the foredeck area, creating gutters for those new hatches. We used our laser to get Ocelot level, so we can mark out where our waterline is to go (an extremely frustrating project due to Ocelot's asymmetry). Finally, we started on the bimini project, cutting out 5 frames to shape the bimini foam correctly.
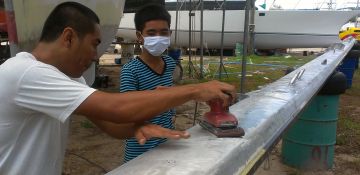 Newly shorn Golf shows young Jeng how to sand the mast |
Monday, August 20:
No rain today, so an auspicious beginning to the week! And, it was actually a really good day
at the yard!
We arrived to find Houa busy at work trimming the new foam on the top of the starboard extension outer wall. He's really an artist when it comes to giving things a nice shape. These outer walls are a study in complex curves, and (as Amanda can attest) really difficult to draw even using computer technology. So we are a bit at the mercy of the talents of both Golf and Houa. So far they have not failed us.
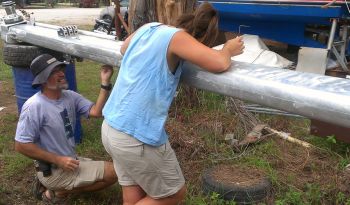 Jon & Amanda repositioning halyard lines inside the mast |
After the foam trimming, Houa moved on to the nastier work of grinding back the foam and epoxy filler. This is dusty, noisy work, but he stuck with it for hours. The starboard wall is now beautifully shaped, and will receive its final sculpting tomorrow (weather permitting) when he puts on the final epoxy filler.
Amanda started the day measuring Ocelot's bows so she can continue modeling Ocelot. We're especially interested to see how Ocelot will look with the new prod on, and where the new sails will come to. Then Amanda worked with Sue to lay out where the steps down the sugar‑scoops will go.
Out in the sun next to Ocelot, the bare aluminum mast was getting some attention. Golf had both his wife Mai, and our new young worker, Jeng (Kaw's little brother) taking turns with the orbital sander and 120 grit sandpaper, trying to sand out the marks left by the grinders when the paint was removed months ago. Our current plan is to coat the mast and boom and forebeam with clear Nyalic, a nylonic polymer‑based coating that was developed for the Apollo Space Program. Nyalic is not cheap, but it goes on without primer, is one part, stays clear, doesn't yellow even in our intense UV, and can be used to protect bare metal (both ferrous and non‑ferrous) either underwater or in the air. Preparing the mast for this clear coating starts with getting it all beautifully polished, as every mark will show.
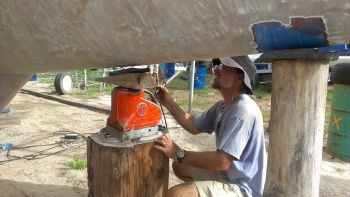 Using a 60 ton hydraulic jack to lift Ocelot's bow |
Up on deck and in the work shed, Mee made good progress on the "eyebrow" areas. Unfortunately, some of the work was undoing previous work. Amanda discovered that the epoxy filler used to coat the bare balsa on a side wall of starboard eyebrow was chewy -- she could stick a fingernail into it! Not good. This can happen if the epoxy ratios (resin to hardener) are incorrect, if the epoxy is not mixed well enough with the hardener, or if there is too much moisture. So Mee had to grind it all back. His forward progress was in making the gutters that will line the inside of the small hatches over the new lockers up forward. He is using sliced PVC pipe covered with polyethylene plastic as a release layer to make the mold for the gutters. Lots of meticulous, fiddly work, then glassing. We hope the humidity was not too high for his glass work today.
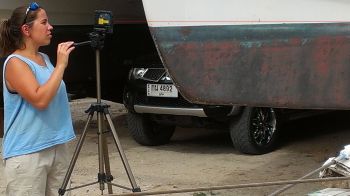 Amanda using a laser to level Ocelot's on her waterline |
Jon and Amanda spent much of the morning running new leading strings through the mast for the spinnaker halyards and the new jib halyard (the old jib halyard will become the screecher halyard). One would think it would be quick and simple to know where to pull the halyards and other lines through, but it takes some interesting planning to figure out which line should come out of the mast where, and on which side so that they don't tangle each other. We decided to move several of the halyards around so they'll be easier to use.
The biggest accomplishment of the day was that we rounded up a couple of 60 ton hydraulic jacks from the yard, scavenged some blocks of wood, and prepared to level Ocelot. What we couldn't find in the yard were any good wooden wedges, so first Jon, and then Houa, took turns sawing or cutting wood blocks into well-matched wedges that we can knock together under the raised hull to get it to the exact height we need.
To determine what that height should be, Amanda set up the new laser level on the tripod and she and Jon marked off points on the bow and stern on starboard side, using the ghost of the old boot‑stripe as our reference (everything else has been ground off). Then they jacked Ocelot up to get the waterline level. Once they were satisfied with the leveling on starboard they projected the laser all the way back to the end of the new sugar scoop extension and VOILA! The little red dot hit just at the base of the new transom! Yay! We may actually succeed in getting our backsides out of the water!
We also found out just how stiff Ocelot is - VERY. Lifting the port bow lifts the starboard bow as well, with very little twisting. Ordinarily this would be welcome news, but as near as we can tell, the port bow is a bit lower than the starboard bow. We thought we'd be able to take this twist out just by supporting her correctly, but apparently not. Confusing. We were still scratching our heads as we cleaned up and headed back to our apartments at 5pm. Hopefully tomorrow will bring some inspiration so we can get Ocelot level.
Tuesday, August 21:
Bit of a slow day, as we had rain off and on all day. Still, for some reason we arrived home
at the end of it completely knackered, as usual.
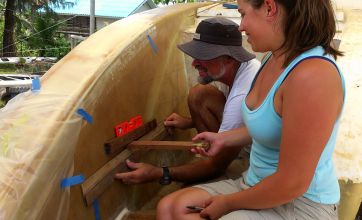 Jon & Amanda laying out where the steps should go |
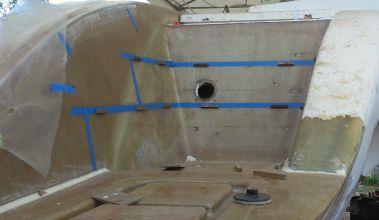 Blocks super-glued to the tape, ready for mock-up steps |
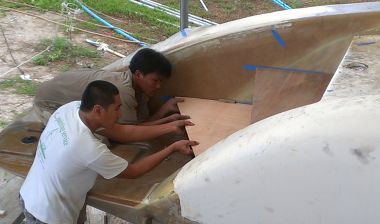 Golf & Kao try out straight steps first. OK... |
The big news today is that we started on the steps leading down the sugar‑scoops. Amanda and Jon started it off by laying out where the steps should go inside the port sugar‑scoop. First we projected the raised level of the swim platforms back to the (not quite vertical) engine room wall, so we'd have a starting point. Then we divided the vertical height of that wall into 3, for the 2 steps we want to put in. This gave us a "rise" of 9" (23cm) for each step, which is gentle but not silly.
Both the swim platform and the existing step above the engine room slope aft a bit, enough to drain water off. They slope by slightly different amounts, but the difference isn't enough to be visible. So when we drew the lines for the tops of the steps along the insides of the sugar‑scoops, we sloped them all the same amount. Projecting the lower (longer) step along the outer wall got a bit tricky, as the wall curves slightly, which confused our straight‑edge. But we got a pretty good line. Finally, we put blue‑tape just under our lines, to mark them.
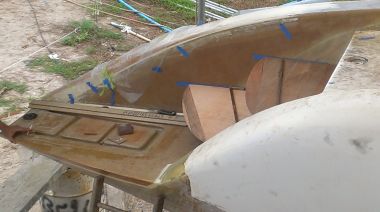 A first cut at rounded steps - nobody liked these much |
Then we did the same thing over on the starboard sugar‑scoop. Having done the port side first, the starboard side went much faster. The main problem was that where the new outer wall meets the old wall, there's a noticeable dip. This will have to be filled with epoxy mud and faired smooth before any steps can be fitted. The workers would have done it immediately, but the day was too wet to lay any epoxy. So we'll probably have to find those lines again after the area has been faired, but that should go pretty quickly.
Then Golf and Houa moved in. They used super‑glue to stick small bits of wood onto the tape we'd stuck down. Sticking the wood to the tape means that we'll be able to remove these bits of wood easily when the time comes. Then they cut out thin plywood forms in the shape of the steps. They tried straight steps first, and they looked OK, but a bit ... ordinary. Then they tried rounded steps that came to the inner and outer walls at the same place as the straight steps. These didn't look quite right where they met the outer wall. So they added another curve, to make the steps meet the outer wall more smoothly - an interesting possibility we hadn't considered before.
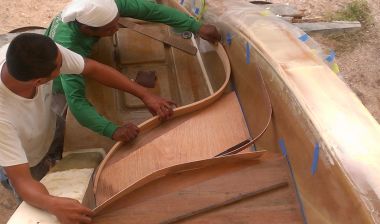 Golf & Houa try an interesting variant on curved steps |
Jeng put in some time sanding the mast, but didn't do much after noon. His brother, Kao, spent much of the day sanding the top of the salon, preparing it to get a new layer of gelcoat and antiskid.
Our old worker, Bow, came back, looking for work. Bow needed a bit of direction but was basically a good worker. Unfortunately he left under a considerable cloud, as he'd borrowed money from Golf, an advance against 2 weeks of salary, and then he'd run off. So he owes Golf 2 weeks of work before he should even get paid. Golf is a softie and is usually willing to cut his workers some slack, but this seems a bit too much. We Shall See...
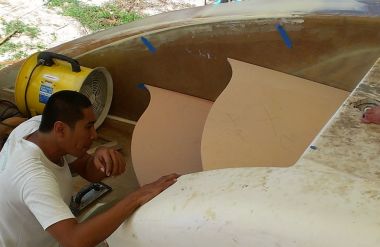 Golf examining foam versions of our sugar-scoop steps |
Jon and Amanda also worked on leveling Ocelot. We mounted the laser on its tripod and verified that the starboard hull is still nominally level (going by the old boot‑stripe). Then we wanted to see how stiff Ocelot was - that is, how much did we have to lift one hull before the other started lifting. We jacked up the port bow until starboard also started lifting, made a mark on both hulls, and then let port down until it was being supported only by the starboard side, and made another pair of marks. From this we learned that Ocelot's total flex is just under 1/3" (8.5mm). So we jacked the port bow up by half that amount, which should be where Ocelot floats on the water, with no twist at all. There's still more to do on this tomorrow.
Wednesday, August 22:
One of those strange days where it never rained, but we kept expecting it to, so not much epoxy work
happened. But that's OK because we got lots of other things done instead!
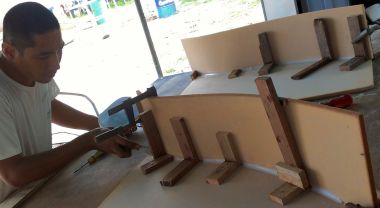 Golf epoxying the curved front faces onto our 2 steps |
The biggest job of the day was finalizing the port‑side steps down to the sugar‑scoops. After all of Amanda's solid modeling work and our posting a Facebook request for comments on the shape of the steps, we nixed both the straight and the simple curved steps, but we liked Golf's complex curved steps. Golf and Houa slipped plywood forms into the step positions and we all circled around, asking for a bit of curve shaved off here, and bit more curve there. We apologized to Golf for all the trouble, and he said, "No Problem - better to have trouble now, not later!" How true! The 2 steps actually have slightly different shapes, which allows them to blend into the complex curvature of the inner and outer walls of the sugar‑scoops.
Once we settled on the shapes, they were cut from structural foam and refitted for final approval. In the afternoon, Golf and the guys created bending, sweeping vertical fronts for the steps, and got those amazing shapes of foam epoxied onto the steps. Nice to see this moving along so quickly - Golf's goal is to finish the steps this week!
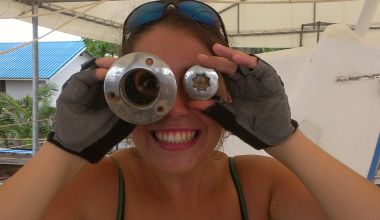 Amanda celebrating clearing the epoxy out of the ... left eye |
On the mast project, Jeng and Kao were wet‑sanding with 150 grit paper, which wasn't really getting rid of the grinder marks left over from removing the paint. They were putting in a lot more elbow grease with finer sandpaper than was necessary. Jon discovered that 60 grit paper on the orbital sander was necessary to get rid of the grinder marks, and then the 150 would get rid of the small circles from the orbital sander. A final quick swipe with 240 grit would leave the aluminum polished enough to be coated. Once Jon told them what to do, the mast polishing moved along better. But we're still not sure if we'll be able to get rid of all the old corrosion pock marks enough to make the mast look spiffy with a clear coating of Nyalic. Jon was actually talking about going back to paint! After all, paint covers a multitude of sins. We'll see how it goes.
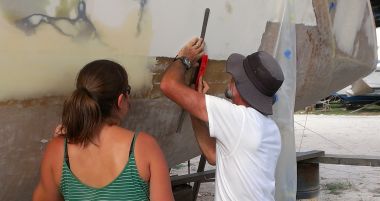 Amanda & Jon measuring Ocelot to level her |
On the transoms, Houa was meticulously grinding out the mounting areas for the ladders and sanding them smooth. Last week he'd filled in the areas where the ladders bolt down with solid epoxy glass. Now he has to grind away the excess fiberglass so the ladders can once again lie down correctly.
Mee was working on the new forward hatches and the area in front of the salon. He glassed the edges of the "eyebrow" foam which will extend out over the forward port‑lights and he's still working on the gutters for the hatch covers. Then he spent some time in the afternoon re‑glassing the inside rim of where the port‑lights go.
Amanda and Sue tackled the deck fill pipes that had been epoxied closed when those forward lockers/tanks were sealed off long ago. They used our Dremmel to remove most of the epoxy and then a hammer and chisel to get the fiddly bits in the corners, finally freeing the star‑shaped fill top that uses a winch handle to open. Yay! One of many small, but important jobs done! Sue went on to clean up the stainless steel fill pipes so they're all ready for reuse. Too bad they say "water", though, as we want to use them for diesel!
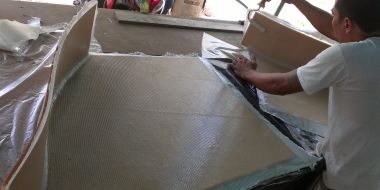 Golf glassing the undersides of the 2 portside steps |
The most frustrating job of the day was handled by both Jon and Amanda, who once again did battle with the laser and geometry to try and level Ocelot. When we leveled the starboard side using the old boot‑stripe, the port side was nowhere near level - the port bow was down by 1½" (41mm). The only conclusion we can draw is that Ocelot is simply not symmetrical. So the only thing we can do is average the points we have, to get her as close to level as we can. We took a lot more measurements of Ocelot, discovering, in the process that her waterline is now ~47' or 14.3m. Eventually we decided to raise both bows by 20mm (¾"). Tomorrow we'll take more measurements to see how that worked.
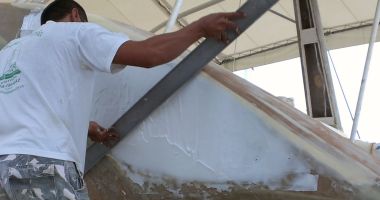 Golf filling in the hollow in the outside of the port sugar-scoop wall |
Thursday, August 23:
A busy but somewhat frustrating day as we had a few setbacks, and 2 hours of torrential rain in the
afternoon sort of ground things to a halt.
Work continued on the new steps for the port sugar‑scoop area. Golf got a layer of fiberglass on the undersides of both steps and the supporting risers, to lock them in place and keep them rigid. By late afternoon the glass had set well enough that the guys trimmed them to fit, and we got to see both portside steps in place, though not supported or glassed in yet. Golf also started filling in the hollow on the outside of the port sugar‑scoop wall with epoxy mud. He got it on just before the rain came, so we'll have to see if it set up correctly.
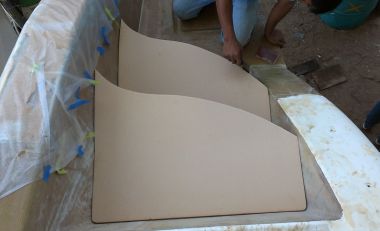 Initial foam steps being fitted in the starboard sugar-scoop |
Houa started the morning by test‑mounting our starboard swim‑ladder. But when he screwed it down, it bound up and wouldn't swing properly. We eventually tracked the problem down to the pivot holes in the tops of the ladders - they weren't aligned correctly. Since those pivot holes form a hinge that has to rotate through 270°, the holes need to be aligned with each other precisely. They weren't even close. Since the ladders are only tack‑welded together for now, it's not too surprising that they didn't bother to align the holes correctly, but it's a bit frustrating to have to drop that work until the ladders are fixed.
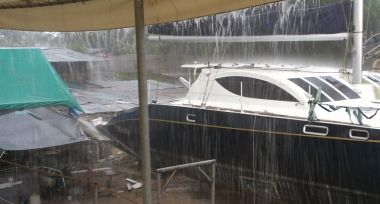 When it rains in Thailand, it can REALLY pour! |
Houa, Kao and Baw then started work on the starboard steps, first fitting plywood frames and models to get the shapes right, then cutting the foam. Jon and Amanda had drawn the lines for where the steps are to go on Tuesday. The inside wall on starboard has a bit of an imperfection to it where the old wall ends and the new wall begins. We were thinking that it would have to be mudded and filled to smooth it out before the steps were done. But in truth, the steps themselves will hide much of the irregularity so it will be less work once the steps are in place. Golf assured us that they would not forget to smooth things out before the final glassing. If the rain lets up and holds off tomorrow we may meet Golf's goal of finishing the steps this week, but the forecasts don't look good.
For the last several days, Mee has been working on the area in front of the salon, making gutters for the small hatches that we're adding. We've been watching the work and sort of wondering where it was going, as the gutters looked much bigger than necessary. Today he test‑mounted them, and they take up way too much of the small opening. Not only could people not fit through the hatch now, but we couldn't even fit our spare diesel jugs down the opening. <sigh> Time to fall back and regroup. Jon says he has some ideas on how to create smaller gutters to catch the water that leaks past the hatch. It's annoying that Mee has now wasted 3 days of work, and we're sure that he's not happy about it either. It also shows that we need to take a more active role in some of these new designs.
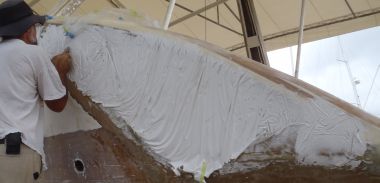 Sagged epoxy mud on the port wall - more was added later |
In the afternoon, Jon borrowed Golf's truck and battled rainy rush-hour traffic to take the swim ladders into Phuket town to be repaired by Luc Engineering. He also stopped by Rolly Tasker's rigging shop and sail‑making loft to pay $1,000 for our new headstay.
Friday, August 24:
A better day than yesterday - the winds were strong but the rain mostly held off.
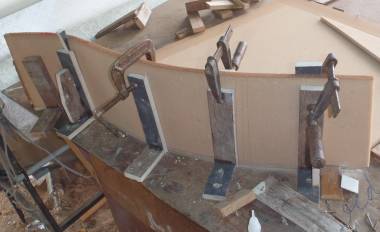 Bonding a new, curved step front onto a starboard step |
The majority of the work continued to be the steps for the sugar scoops. The new starboard steps got vertical front sections epoxied onto them, and the port steps got support beams of foam glassed onto their undersides. It's tricky to keep the curved aft vertical wall of the step (the rise) staying at 90 degrees to the step, as the foam has a natural tendency to straighten out. Golf assured us that it will all come right in the end.
The mud that Golf had put on our port flank yesterday evening did cure. However, Golf had used only micro‑balloons in his mix. Microscopically, the micro‑balloons roll over each other and allow the mud to sag. Golf should have added some Cabosil (exploded silica) which are like tiny rods. The silica obstructs the balloons from rolling over each other so the mud doesn't sag as much. The net result was that Golf's mud sagged and even dripped onto the ground, like white icing on a hot cake. Rather interesting, actually. The good thing was that it all sanded flat without too much ado (micro‑balloons sand easily). Then late in the afternoon a more thixiotropic (non‑sagging) epoxy mud was added to fill in the gaps and build the flank up even more. Even so, we still have to build that flank up a lot more. The original hollow was over ½" or 13 mm deep.
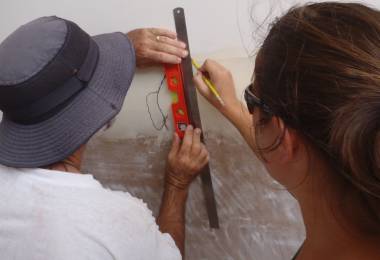 Jon and Amanda marking measurement stations on the hulls |
After the foul‑up with the forward hatches yesterday, Jon had a long talk with Golf and Mee about how he wants those hatches done, and specifically how he wants the drains around the hatches to be built. He drew diagrams showing how it could be done in fiberglass without having to use foam at all. Using foam is easier but foam is thick and takes up too much space, and those hatch openings are too small as it is. But later, Mee came to Golf, showing him a quick mockup he'd made - in foam. So Jon had to patiently explain all over again that foam wasn't necessary and that just fiberglass was better. We Shall See...
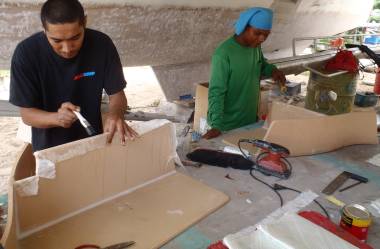 Golf & Houa glassing in the supports under the port steps |
Sue and Amanda marked off 1 meter lines on the top of the old boot‑stripe (guessing where it was when they couldn't see it). Then Jon and Amanda used our trusty laser once again to see how much the old boot stripe varied over the length of each hull (both inside and out), and how all of that varied from a plane. Amanda took the numbers home mid‑afternoon to crunch them on her computer in her air conditioned apartment. Life is rough for the brains of the family! She found that the port side is a bit low, but by less than 1/8" (~2 mm). This is probably less than our accuracy and is certainly less than anyone will be able to see, so we can safely ignore it. Amanda also found that the bows are still a bit low and have to come up about 3/8" or 9 mm. We'll probably do that soon so we can return the 2 hydraulic jacks we've borrowed.
On the more natural side of life, Kao reported seeing a large black snake behind the work shed yesterday morning. When Sue asked what it was, Golf said "We call it Cobra." Ah. Cobra. Yes we know what a cobra is. When she asked how big it was, Kao held his right hand around his left wrist. Big snake. We hope it is very happy living deep under the wood pile back by the fence.
Today, Sue was hanging out under a neighboring catamaran when our adopted kitty, a tortoiseshell kitten we've named "Turtle", jumped from the table and started attacking something. Snake! Not a cobra, luckily, but a venomous Golden Tree Snake. Crazy cat! She played with it like it was a toy, jumping up and down on it and biting the head. She finally did it in, and within 10 minutes the ants moved in and took over the decimation of the body. Food chain in Thailand! When Sue asked the guys how dangerous the Golden Tree Snake is, Houa replied, "It kill you only little bit!" Apparently it will kill frogs and lizards. Luckily, Turtle seems fine after her set‑to with the snake. But she's pretty feisty, chasing the local dogs when they bother her.
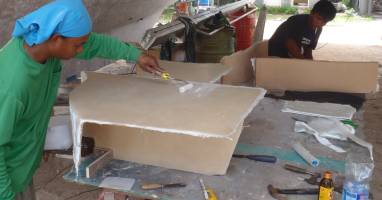 Houa & Kao fiberglassing the sugar-scoop steps under Ocelot |
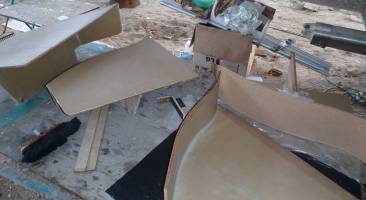 The 4 glass covered steps on the work table under Ocelot |
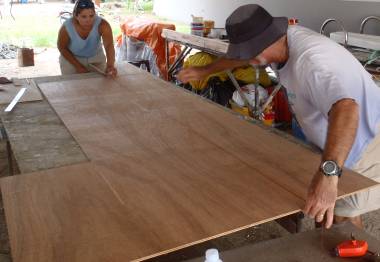 Amanda & Jon laying out a grid with a chalk snap-line |
A good day, despite Golf spending most of the day painting another boat. The day dawned sunny and hot, for the first time in a while, so we were hopeful about the potential for epoxy and fiberglass happening on the sugar‑scoops and steps. When we got to the yard, Kao and Houa were putting epoxy filler in the corners of the starboard steps in preparation for glassing. Golf was off in his truck, getting supplies for creating the new bimini, so we set our brains to the Waterline Dilemma once again.
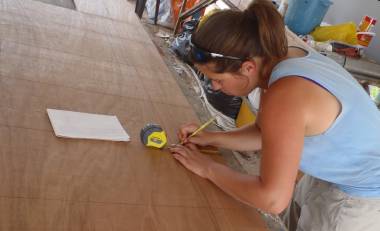 Amanda laying out computer generated points on the grid-lines |
The 1‑meter waterline data that Amanda crunched and analyzed yesterday suggests that our bows still need to come up a centimeter or so, but instead of blindly moving forward on that we thought about it. If we raise the bows too much, the paint line will be too low in the bows, giving Ocelot a bow‑heavy look when she sits on the water. However, if we leave the bows slightly down as we paint the line, it'll give her more of a soaring look (as opposed to diving, which we don't like our bows to do).
Pictures we have taken over the years show that the port hull needs paint higher than the starboard hull, based on our "old" waterline (actually the top of the factory boot‑stripe). They also show that the sterns have generally had paint too high! With these thoughts in mind, we might end up using the level we have now, putting the paint line about 3" (8cm) above our portside centerline reference point. We're getting a lot of pencil marks around the waterline, though, and want to be sure before we add a major mark, so we'll do that a bit later. Also, Golf arrived with our bimini makings!
Amanda has been creating a 3D model of Ocelot using Google Sketchup, primarily so we can see what the modifications to Ocelot will look like. One of the first parts Amanda worked on was the bimini (cockpit shade) which we are changing from a plasticized fabric lashed around 3 large aluminum bars to a rigid foam‑and‑fiberglass sandwich structure. We want to keep the downward‑curving shape on the forward side, for both aesthetic and structural reasons, which means that we'll need a rather sturdy and precisely made frame to lay the foam over. This can be created with a few ribs of plywood, cut to the curve we want the bimini to have, with boards in between to help them stay perpendicular to the bimini and parallel to each other. Since we're being particular about how we want the bimini to look, and don't want to pull workers away from other jobs, we asked Golf to get us the plywood and told him that we'd make the frames ourselves. With plywood and dimensions of the modeled bimini curve in hand, the three of us set up our workspace under a neighboring catamaran, out of the scorching sun.
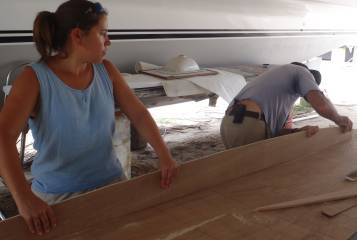 Trimming a frame so the foam lies on it correctly |
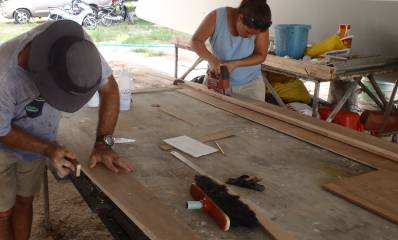 Amanda cutting frames with a jig-saw while Jon trims & smoothes them |
We were able to lay out 5 ribs on one sheet of cheap 10mm plywood, though laying them out took a while because the plywood was only 8' (2.4m) long and our bimini needs to be just over 10' (3.1m). So we extended one end of the board by fiddling around with some super glue (these guys use it for everything, so long as it's only needed temporarily). Then we gridded the board in 4" (10cm) intervals using Houa's chalk snap‑line, measured out the points that Amanda had calculated, and sketched out our first frame with a bit of bent foam.
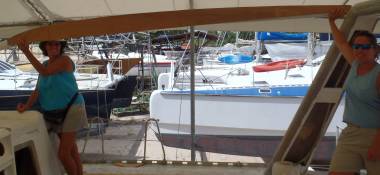 Sue and Amanda showing how the bimini should look |
Upon cutting it out we realized that the curve was a bit too sharp at the bow end, but a few minutes with a hand planer and some sand paper got it to a shape we all thought would do quite well. It's more curve than our previous bimini had, but as we're placing the forward end at the same height off the cabin top, it'll just give us more head room in the cockpit. Once we got the first one right, it was easy to trace and cut out the four other ribs, though time-consuming due to the shuffle of extending the plywood, clamping it, cutting it and then making sure the curves all matched. Jon relinquished the jig‑saw to Amanda halfway through the second rib, because he had a better eye for sanding out the final curve, and Sue played capable assistant to both.
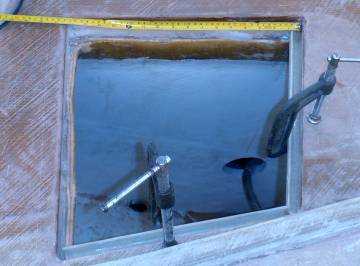 2 of Mee's new gutters around the stbd fwd hatch opening |
Meanwhile, work continued on and around Ocelot. Houa and Kao worked more on the new steps, ending the day with glass on all sides of the port steps and on the underside of the starboard steps. They also added a central support to all but one of the starboard steps. Hopefully the port side steps will be ready to mount early next week!
Mee spend the day working on the gutters for our forward hatches. He's created sweet little foam‑and‑fiberglass bits that stick under the rim of the hatch opening and protrude inwards only ½" (13mm) on each side. They're very sexy. Even sexier is that Jon can still fit into the hatch, which was part of the reason we wanted them accessible in the first place (to lock the captain in? ... No wait, that's not right). We'll have to remember to make sure the correct corner is lowest, and connect a drain to it. These compartments have hoses running through a wall into our forward cabins, so we want to be sure that the drainage system is as good as possible.
In preparation for the (most likely rainy and blustery) weekend, we usually put plastic over the exposed foam on the sugar‑scoops (especially port side, which receives the driving rain). This afternoon, however, the workers decided to actually epoxy‑mud the unprotected foam. Not only is this good protection, but it's also a step towards the final glassing of our new extensions. Work finished a bit late today, which we appreciate since it meant the guys wanted to get the job DONE instead of just slapping plastic over things and heading home. This delayed our end of the week beer‑and‑chips celebration by half an hour or so, which meant that we were all caught by the evening downpour at 6. Although inconvenient for Jon driving the scooter, it was refreshing and cool for Sue and Amanda walking home.
Thai Refit:
Ocelot Pages:
Top Level: Home | Destinations | Cruising Info | Underwater | Boat Guests | Ocelot | Sue | Jon | Amanda | Chris | Site Map | Make a Comment
|
If our information is useful, you can help by making a donation |
Copyright © 2000‑ Contact: Jon and Sue Hacking -- HackingFamily.com, svOcelot.com. All rights reserved.