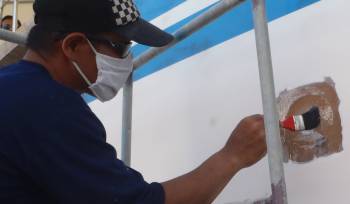
Repairing a small spot on Ocelot's starboard side
19 Fair Topsides
 Repairing a small spot on Ocelot's starboard side |
Summary:
A good week! The final 2 sheets of biaxial glass were laid down on
both the port and starboard side‑decks. We've been waiting for this for a long time! The
decks look and feel great. We also put down our 15th and (hopefully) final long
strip of foam behind the cockpit We got our headstay down from the tent rafters and Jon
started disassembling it. The replacements for our water‑damaged headliner pieces were cut out
and epoxy coated. The floorboards got their first coats of varnish. Both topsides were
sanded and several gelcoat cracks were ground back and explored before being glassed up and covered
over with epoxy fairing compound. Some hull‑deck joint‑lines at the bows were cleaned up and
glassed over to strengthen them. But we also found more wet balsa to replace in the floor
under the cockpit table and behind the aft cockpit seat. Nice to have more reconstruction than
deconstruction!
![]()
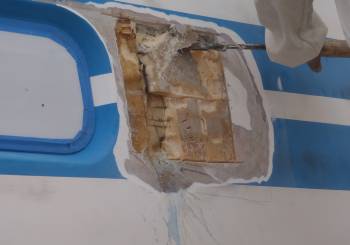 Chiseling out wet foam from Ocelot's flank |
Monday, February 27:
Another good day to start the week! The guys sanding the starboard topsides found some cracks
in the gelcoat that needed to be investigated. One was an old vent (or something) in the fo'c's'l
that had been poorly covered over. Two at the back were places where some of the underlying
layers of fiberglass were not correctly wetted out with resin. All 3 of these were ground
back, examined, and patched with a few layers of fiberglass and then covered with an epoxy filler.
It was great to see such a "find it and fix it" attitude!
Another area we've known about for some time - a circular crack in the gelcoat. But grinding it out and looking at it closely revealed a poorly done repair from Ocelot's SunSail days, before we bought her. When we ground through the thin layer of fiberglass, the foam underneath squirted water at us! Obviously this small crack has been letting water into the hull for some time. The outer skin of glass was cut back and much of the wet foam removed, but more will have to be cut back tomorrow, until we can find where the water ends. A bit unexpected, but good to find it now, when we're all ready to deal with it properly.
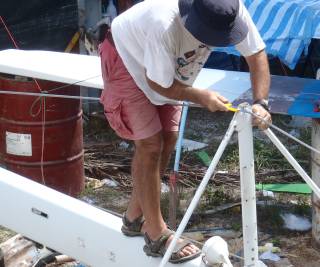 Jon stripping the diamond stays from the mast |
The guys also lifted down our headsail roller gear that's been hanging from the top of our tent since November. They found 4 big 55 gallon (200 liter) drums to rest it on while Jon works on it. We want to completely strip it down, service all the sections, check the bearings, etc. But we also want to see what size rigging wire it can fit over. The spec says ½" (12.7mm) but that size Dyform wire isn't available anymore, and Jon thinks we can get 14mm in there. The first step for today was just dosing the 30 stainless steel set‑screws with penetrating oil in preparation for trying to remove them from the aluminum extrusions.
Then Jon continued stripping the rod‑rigging diamond stays from the mast. We got 2 more removed and hung under a neighboring catamaran, but we also found 4 screws that were absolutely fused into the aluminum and had to be cut away to remove the forward diamonds.
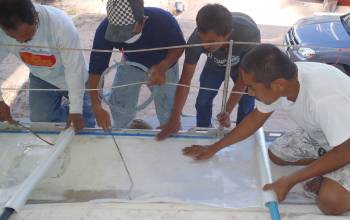 Golf's crew laying 2 sheets of glass simultaneously |
But the big news is that the guys got the starboard side of the deck sanded flat and ready for its final 2 layers of fiberglass! At first, Golf wanted to lay the 2 sheets individually, waiting for the first to cure before putting down the second, but Jon reminded him that the best adhesion strength is obtained when the second sheet is laid down immediately over the still‑wet first sheet. The trick was figuring out where the second team would stand while they were trying to roll the epoxy into the fiberglass, but Golf arranged a bit of scaffolding and we were all ready. The whole operation went very smoothly and took just over an hour. With a bit of luck we'll be able to do the port side tomorrow!
In the galley, Houa had a bit of a setback when some of the formica he put on his custom drawer started breaking. So he tore the whole drawer apart, ripped off the formica, and replaced all of it with new formica.
Tuesday, February 28:
We had a fairly torrential downpour last night, which may have slowed the curing of the epoxy that
we put down yesterday afternoon. So E‑U glued some tarps together to make a rain‑skirt for one
end of our giant tent.
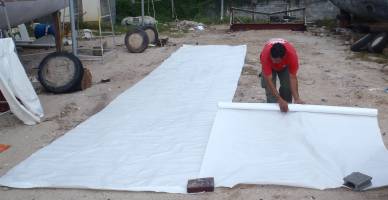 E-U joining 2 tarps together to make a rain-skirt for our tent |
While we didn't have much rain today, we had ominous looking clouds all around us, so we decided to postpone putting the final 2 layers of fiberglass on the port‑side decks until tomorrow. We'll try to do them early, as we've never had rain in the morning and only very rarely in the afternoon. This time of year we get some rain at night, but even that's not very often.
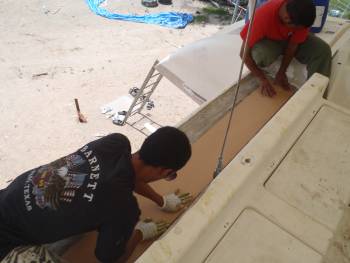 Max & E-U laying down the new foam aft of the cockpit |
Instead we decided to put down our final piece of foam, in the little shelf behind the cockpit. A layer of biaxial glass in the bottom, epoxy mud on top of that, epoxy resin on the bottom of the foam, put the foam in the trough and work it down until the mud squooshes up around the edges, wipe it off and spread it to where it's needed. Then cover everything with: a sheet of polyethylene, an inch or so of foam rubber, some wood, and then some heavy water jugs on top, to push down on the foam and make sure it adheres well to the mud and glass under it. In the morning the guys will grind off the lip around the edge that formed the edge of the teak, so we can lay more glass on top of the foam.
After dosing all 30 of the set‑screws holding our roller‑gear together with penetrating oil, Jon started trying to remove the screws. It's the old situation, with stainless steel screws threaded into aluminum and the 2 metals creating corrosion to lock the bolts in place. Luckily, it seems that we put Tef‑gel (an anti-seize compound) on the set‑screws when we last serviced the roller gear in Tahiti, but that was 8 years ago and they're still pretty tight. 20 came out relatively easily, 4 more only needed a new Allen key, and 4 more required that Jon tap a small Torx fitting into the hexagonal hole of the set‑screws to get a good enough grip on them to convince them to unscrew. Then his Torx fitting broke off - inside a set‑screw. <sigh> So we went into Phuket Town to get another Torx fitting, but that set‑screw will probably have to be ground out, with significant collateral damage nearby. Luckily, we've got a handful of new(ish) sections of the roller gear so we can replace that section if it gets too messed up.
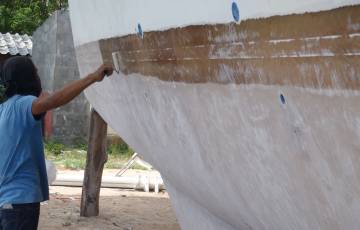 Painting epoxy resin on the waterline before the epoxy mud |
While we were in Phuket Town, we visited Bangkok Hardware, probably the best (and most expensive) hardware store for miles, to look at some of their laser‑levels. These draw vertical &/or horizontal lines and are often used in construction to make sure walls are vertical, windows and shelves are level, etc. For boats, they're good for drawing in the waterline once it gets ground off or painted over, and projecting that waterline out to new construction if you're extending your transoms, as we're planning to do next week. We looked at some in the US but couldn't find what we wanted.
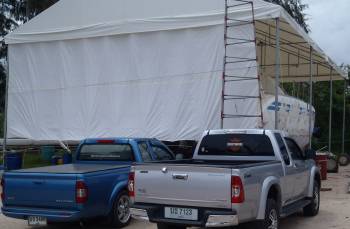 Ocelot's tent got a new wall for rain & sun protection |
Bangkok Hardware had a nice one that could draw horizontal and vertical lines no matter what its orientation, or the laser can be locked to be parallel &/or perpendicular to the supporting tripod. If a boat is put down with its waterline exactly horizontal, the first mode is wonderful and makes life fast and easy, but if the boat is not exactly horizontal then you need to use the second mode and fiddle around much more.
It looks like Ocelot's bow is about an inch down from her stern so we'd need the second mode. This laser comes with a reasonable (if slightly flimsy) tripod, but it's $400(!!) so we're having second thoughts. Golf would pay for half (and keep the system after we leave) but that's still a lot of money just to find our waterline. We could probably put something together with a powerful laser pointer and a tripod from a camera store for much cheaper, but it would be harder to use and might be more complicated than Golf could handle effectively. We Shall See...
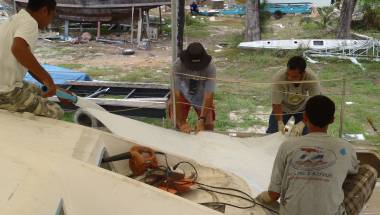 Jon pitching in to lay the 2nd layer of glass on port side-deck |
Wednesday, February 29:
Happy Leap-Day! ![]() It poured again last night with lots of lightning and thunder so we were concerned about the curing
of our starboard deck glass, but when we arrived mid-morning we were pleased to find the glass edges
were crispy/brittle, not soft and bendable like yesterday. Unfortunately the sky was pretty
much covered in clouds this morning and we were concerned about laying more glass. But Golf
and his workers all conferred on the weather and declared that about 1pm would be a good time to
start laying the 2 top sheets of biaxial glass on port‑side deck. So after lunch
Jon pitched in by donning gloves and wielding a roller along with Max and E‑U. They
checked the size by laying it out, and then epoxied the glass down from the stern forward to the
bows for the first layer. The second layer went from the bow to the
stern, which just had to do with the way the pre‑cut pieces were rolled up. After the
glass was laid, work pretty much slowed down for the afternoon as we didn't want grinding or sanding
to happen anywhere near the wet glass.
It poured again last night with lots of lightning and thunder so we were concerned about the curing
of our starboard deck glass, but when we arrived mid-morning we were pleased to find the glass edges
were crispy/brittle, not soft and bendable like yesterday. Unfortunately the sky was pretty
much covered in clouds this morning and we were concerned about laying more glass. But Golf
and his workers all conferred on the weather and declared that about 1pm would be a good time to
start laying the 2 top sheets of biaxial glass on port‑side deck. So after lunch
Jon pitched in by donning gloves and wielding a roller along with Max and E‑U. They
checked the size by laying it out, and then epoxied the glass down from the stern forward to the
bows for the first layer. The second layer went from the bow to the
stern, which just had to do with the way the pre‑cut pieces were rolled up. After the
glass was laid, work pretty much slowed down for the afternoon as we didn't want grinding or sanding
to happen anywhere near the wet glass.
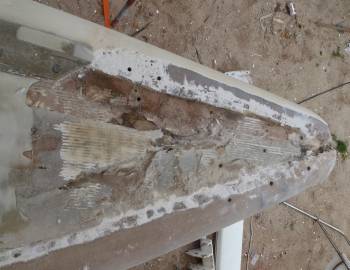 Not as bad as it looks, but port bow needs more attention |
Houa worked most of the day on the galley trim pieces, and it's looking very spiffy now. He braced the new stove/oven in place with a nice strip of teak that is removable with 3 screws should we ever need to slide it out. The Dickenson oven comes with a stainless steel bracket for underneath, but its purpose is only to keep the oven from jumping/rising off its surface vertically. We had to invent the bracket to keep it in place fore‑and‑aft. Strange.
Since January we have been Golf's one and only project and we were getting used to all the attention. But a couple days ago another cat was hauled and Golf has the contract for their painting job so we were sad to see Boy shifted to that project. With luck they will be finished in a couple weeks (that's the estimate, anyway) and we'll get our good worker back! Golf was on another boat in the harbor most of the morning preparing a quote for even another job. He has to keep his business going! And there's no doubt that as our project moves along it is good for him to get more work lined up and even to get the cash inflow from new work. We've just gotten spoiled!
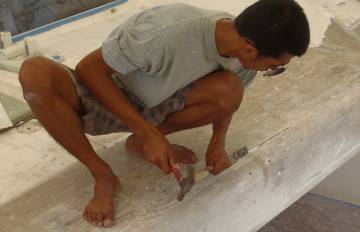 Max loves clearing gelcoat out of the joint seams |
With the side decks in hand we can now begin to pay attention to many smaller gelcoat patching jobs both on the cabin top and the targa bar. Up on the bows the guys uncovered the wide gelcoat filled seam that marks the transition between topsides and cabin/decks. Golf doesn't like all the gelcoat in there, so the guys are stripping it out and will put epoxy mud in the seam before covering those areas with fiberglass. We've noticed that many of the joint‑lines on Ocelot are glassed together on the inside, but often the outside is just covered over with gelcoat. This has led to some cracking of that gelcoat, mostly on the bows and the Targa Bar, as Ocelot flexes a bit. Golf's plan is to cover as many of those seams with strips of fiberglass as he can. Ocelot is already built stronger than many other cats, and this should make her even stronger and shouldn't add a significant amount of weight. It just takes more effort.
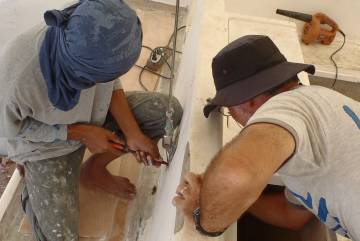 Jon & Rag-head Max remove the offending bottom plate |
Thursday, March 1: And one step back...
We were doing pretty well there for a while so I guess we were due. Max was grinding off the
gelcoat lip around the narrow area behind the cockpit and went a bit too deep and went through the
fiberglass. Normally this wouldn't be a big problem, but in this case water came out. We
opened the hole up a bit and found soaking wet balsa coring. <sigh>
Right above this point we have a 6' (2m) length of rod‑rigging that goes up to the middle of our Targa Bar and holds it down against the forces from the mainsail pulling up against its sail‑track. The bottom fitting for the rod‑rigging bolts through the fiberglass, and that's the obvious culprit.
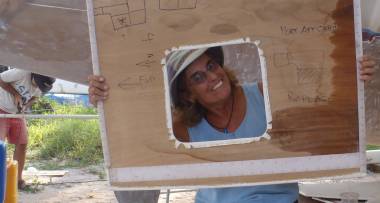 Sue getting goofy with some water-damaged headliner |
So we took the fitting off and found that, yet again, Wauquiez had made no attempt to reinforce this location, despite having bolts going through the balsa coring. Properly done, anywhere that you have to drill a hole into any coring, you dig out a much larger hole, fill it with epoxy mud (or similar material) and then drill through that. No coring likes to get wet (although the closed‑cell foam that we're replacing the balsa with is much more water tolerant than balsa). So far we've had to reinforce 6 areas: our 4 main cleats and 2 places where our pulpit comes down and bolts through the deck. None of these places had any reinforcing originally. Tomorrow we'll have to resort to some surgery, grinding out the problem area to find the extent of the water damage. Then we'll remove the wet balsa, dry the area, replace it with foam, reinforce the areas that need it, and glass the whole area up to seal it again.
The good news is that the full-length strips of fiberglass we laid down on the port deck seem to have setup just fine and weren't affected by the cloudy weather we had. We still need to lay down a bit more fiberglass up at the bows, but after that we should be into cosmetic work for the deck.
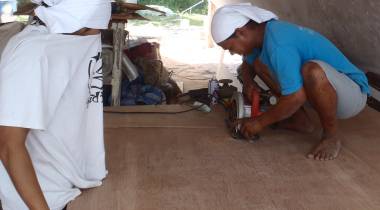 Houa cutting the new plywood for the headliners |
Sue has been working on the headliners. These are thin sheets of plywood with a foam‑backed vinyl wrapped around it and stapled to the back of the ply. Most of the sheets are held in place with wide strips of Velcro glued to the back of the plywood. Some of these pieces of plywood have gotten wet over the years, and several are desperate to be replaced, but we've had trouble matching our existing pattern.
This morning Sue went to Golf's workshop to get the headliners that need to be replaced. Then Golf found a guy who does upholstery and he's now found the right material for us. So Golf bought several sheets of 5mm (~3/16") marine plywood. Houa will cut these in the correct shapes to replace our broken headliners, and then the upholstery guy will fasten the new foam, vinyl, and Velcro to the precut plywood. We'll probably also paint the plywood in epoxy to seal it against future encounters with water.
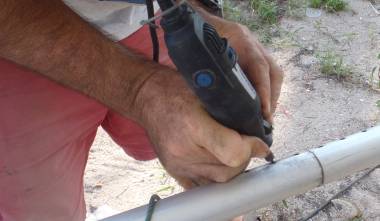 Jon performing surgery on the roller gear with his Dremmel |
Jon continued his battle with the roller gear. A couple of days ago he got 28 of the 30 set‑screws out of the aluminum extrusions, but then his tool broke off inside one of the set‑screws. Today he attacked that screw with a high‑speed Dremmel and a tungsten‑carbide grinding bit. After some delicate surgery, he thinks he's excised both the broken tool and the set‑screw from the extrusion. One down, one to go, but that one doesn't want to budge. Jon was going to hit it with some heat from his propane torch, but he hasn't used it in several years and the gas has all leaked out. Golf has promised to bring Jon a new propane cylinder in the morning.
 Sunrise from our apartment window |
We also talked to Golf about our big deck hatches. We have a total of 8 of these, 4 in the cockpit, 2 more over the chain lockers up forward, and the 2 engine hatches. These hatches were mostly solid enough with teak on top of them, although the gelcoat on the underside tended to crack on some. But the new teak won't be screwed down, just stuck down with Sikaflex, and the forward hatches won't have teak on at all. We don't want these hatches flexing (as they do now) so they need to be strengthened. We plan to remove the rubber gasket around the outsides (gasket material is easy to buy here) and grind off the gelcoat on the undersides of the hatches. Then we'll cut some thin foam sheets (10mm or about 3/8") and epoxy those to the undersides of the hatches. The edges of the foam will be tapered and the foam covered with 2 sheets of biaxial fiberglass, creating a foam sandwich under the hatches. Hopefully that will strengthen them and they won't flex anymore.
Friday, March 2: How far back?
This morning the guys were grinding off a lot of fiberglass, so we avoided the
unpleasantness and stayed in our apartment, swearing at the lack of promised internet connectivity.
Peter, the apartment manager, thinks that it's someone using torrents to download big files and
saturating his internet connection, despite signs asking folks not to do this.
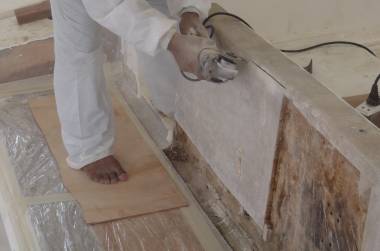 Boy cutting off the back of the cockpit seat with a grinder |
When we got to Ocelot in the early afternoon we found that the grinding was by no means over. Max was hard at work behind the cockpit and Boy was working on the bows. Someone had also removed the feathery edges of the long glass strips we laid earlier in the week, so the decks are looking pretty nice now.
They also feel good. We've been going around the deck doing "thump" tests in different places - standing on one foot while you thump down on the deck with the other heel. It's actually a very effective test. When we're standing over a bulkhead, there's no movement at all, like we're standing on a concrete floor. Predictably, the most movement is above the cabins, as these are the largest unsupported areas. Before we put down the final layers of fiberglass, these areas were pretty strong, but there was a noticeable movement. Now there's much less movement, and the deck feels (and sounds) like a tightly strung drum‑head. Very satisfying.
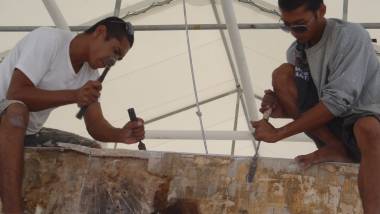 Golf & Max chiseling out the old balsa behind the cockpit seat |
Boy's work up at the bows is pretty much finished. He's been grinding back the area where the trampolines connect to the hull, on the inside edges of the both bows, and digging out some of the old gelcoat and any old mastic that he finds in the hull‑deck joints. The next step, which we hope to do tomorrow, is to fill the hull‑deck joint lines with epoxy mud, and then lay at least 2 sheets of biaxial glass from the decks and down the inside of the hull about a foot or so (30cm) to cover another joint line that we found by grinding off the gelcoat. We haven't had any problems with these joint lines, but they're currently only glassed on the inside. Glassing them on the outside as well will strengthen them considerably and prevent the gelcoat from cracking in the future.
Max pretty much finished grinding back the lip of gelcoat that surrounded the teak in the narrow area aft of the cockpit. Then he started cutting off the back of our aft‑most seat, where we found the wet balsa. This ended up by removing the entire back of that seat, as the hinges for the small doors apparently also leaked. Much of the balsa was actually fine, but it's easier to repair if we just replace all the balsa with foam. It will also give us a chance to do the job correctly, providing protected places for bolts to go through the coring without letting in any water.
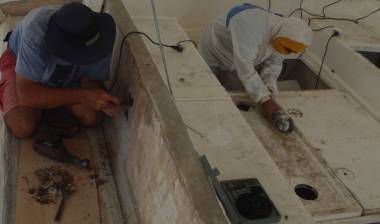 Jon drilling into wet wood while Boy cuts off a sheet of fiberglass |
With all the grinding going on, Houa moved his "woodshop" back to where he was earlier, under a neighboring catamaran. There he's almost finished cutting out the plywood panels to replace the headliner plywood that's been damaged by water.
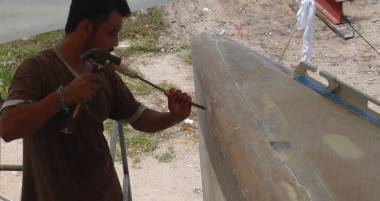 Boy chips gelcoat out of a hull-deck joint-line |
Saturday, March 3: The deconstruction continues...
Work on Ocelot is certainly progressing, but not always in the same direction. While the
reconstruction is accelerating, there's still some deconstruction taking place. At least the
pace of the former seems to be overtaking the latter.
The guys removed all of the balsa coring from the back of our rear cockpit seat, but the damaged balsa continues at the bottom, probably to the foam that we laid behind the cockpit on Tuesday. Max will probably explore what more needs to be done there on Monday.
Jon noticed that that there's a thick plywood backing plate for the rod‑rigging mounting plate that the bolts went through, and there are some rust tracks coming down from the bolt holes, which means that water has gotten into that plywood. So he started drilling out the bolt holes with a hole‑saw and found, as expected, more wet wood. After a bit of exploratory surgery, we decided to take the plywood off from the inside. This means that we'll lose the location of the mounting holes for that mounting plate, but we're pretty sure we can put it back where it belongs.
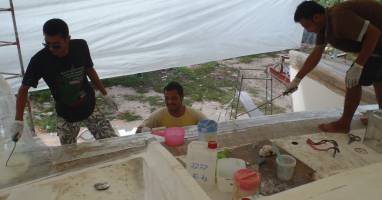 Our A-team - Max, E-U, & Boy epoxy glass strips on the bows |
Our search for other places where water could have gotten into the balsa coring led us to the big holes that the cockpit table mounts through. Sure enough, we found that this area had not been properly reinforced and that the balsa had gotten wet and started rotting. So Boy cut through the top layer of fiberglass and took it off so we could see what we're up against. Again, most of the balsa was fine, but there were large rotten spots as well. We'll remove the balsa on Monday so we can see how best to repair the area. This is a relatively small area, but making a repair that's both strong and cosmetic will require some thought, as the area is surrounded with opening hatches.
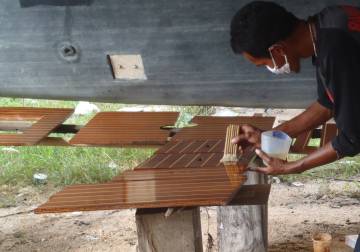 Floorboard getting their first coats of polyurethane varnish |
On the reconstruction front we made some good progress up on the bows. The guys chipped out the gelcoat in the 2 hull‑deck joint‑lines that go from one bow, around the front of Ocelot and out to the tip of the other bow. Then they filled the joint‑lines with epoxy mud and laid 2 strips of biaxial glass over both joint‑lines, all the way around. We haven't noticed any problems or movement in this area, but this should make it that much stronger.
There was also considerable activity in Houa's new woodshop under a neighboring catamaran. Houa finished cutting out all of the thin plywood shapes for the headliners that got water damaged. Even though we're using marine plywood this time, we decided to coat the plywood in epoxy, to make it absolutely waterproof. Now they're ready for the upholstery man to coat them with the foam‑backed textured vinyl. He's promised to use stainless steel staples, so they should be more durable than our originals.
Also in the woodshop, several of our floor‑boards were getting sanded and varnished. Golf likes to start out with 2 coats of a 2‑part polyurethane varnish on the raw wood and then move into a normal marine varnish for the following coats. He'll start off with glossy varnish for the underneath layers, but the top layer will be a satin finish. Jon's still surprised Golf doesn't use a spray gun for the varnish, but Golf's the painter and we're sure he knows what he's doing.
Thai Refit:
Ocelot Pages:
Top Level: Home | Destinations | Cruising Info | Underwater | Boat Guests | Ocelot | Sue | Jon | Amanda | Chris | Site Map | Make a Comment
|
If our information is useful, you can help by making a donation |
Copyright © 2000‑ Contact: Jon and Sue Hacking -- HackingFamily.com, svOcelot.com. All rights reserved.