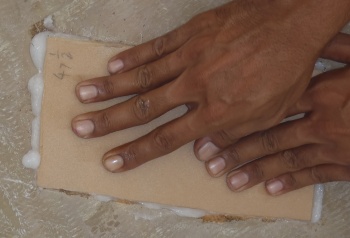
Pressing the foam in until the epoxy mud squishes up
15 Start Deck Repairs
Summary: Of the 15 deck patches that need to have foam cut to fit and epoxied down, we got 7 of them done, plus 4 smaller cockpit patches finished. Jon foamed the line to the fridge to keep it from condensing. Our carpenter finished building the drawer cabinet next to the fridge and started fitting our new stove and oven. This will be a challenge as the stove is 3" (7cm) deeper than our previous stove and oven, and we don't really have the room to spare. Jon got more of the mast disassembled, including removing our "diamond stays". Several of our floorboards got sanded at Golf's workshop, about 3 miles (5km) from the boatyard (and owned by the same family). Ocelot's bottoms got ground off until they're almost completely free of antifouling paint and gelcoat. A good week!
 Pressing the foam in until the epoxy mud squishes up |
Monday, January 30: PROGRESS!
We finally made some good progress today! Golf didn't show up until after noon, so Jon had to
pantomime and draw out what he wanted done. We decided to test our glass-foam-glass-plastic
bagging technique on 3 relatively
easy patches on the left side of the cockpit. All 3 are reasonably flat and rectangular,
with lots of space around them.
The edges of the holes needed to be ground back a bit, to give something for the fiberglass to grab onto.
The foam was already cut so Jon gave the guys dimensions for them to cut the fiberglass, with each layer
getting larger (more overlap).
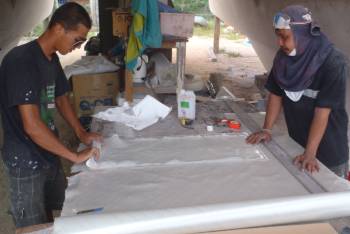 Fiberglass cutting operation under Ocelot's shade |
But we didn't want to actually start the operation until Golf showed up, as he's the only one who can talk to the guys easily. Houa, our carpenter, apparently understands a fair amount of English, and blithely talks back to us in Thai as if we should understand him, but we're never quite sure how far the understanding goes... Lots of smiles, though!
With everything lined up and ready to go, Golf quickly got to work. We epoxied one sheet of biaxial glass into the bottom of each hole, then smeared epoxy mud all around the hole, painted the foam with epoxy, and nestled it into its hole, pressing down and wiggling it until it was down all the way and the epoxy mud was squishing up around it. Clean up the excess mud, then lay 3 layers of biaxial glass down on top of the foam. Then place a sheet of polyethylene plastic on top of the fiberglass as a release (the epoxy won't stick to it), some foam‑rubber on top of the plastic sheet, a wooden board on top of the foam‑rubber, and finally some big water jugs on top of the wood, to press everything together.
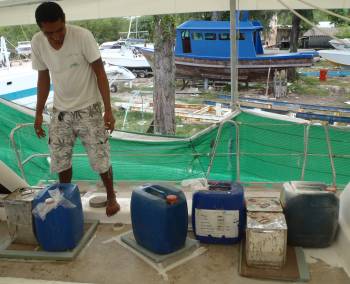 Golf & his garden of water jugs holding down epoxy repairs |
Jon had never worked with biaxial fiberglass before. Most of his fiberglass work was with "engineering" glass, which is woven and tends to hold its shape. biaxial glass isn't woven - it's simply strands laid one way, and then more strands laid at 90° on top of the first strands. This is much stronger than woven glass, as the strands aren't kinked by weaving them together. The 2 layers are then sewn together so you can work with them, but they tend to stretch when pulled, making a piece longer but narrower than you wanted. You can massage it back to its correct dimensions, but it's a bit of a challenge with wet epoxy all over the place.
Our first patch had a small hiccup in that the foam wouldn't lie down properly at one end. Jon had to hold it down with an aluminum bar and more water jugs. The other 2 patches went down without a hitch, except that we ran out of water jugs. So Golf gave instructions to the guys on what he wanted for the 4th patch, and then he and Jon went to his workshop to collect Ocelot's water jugs. We returned in time to do the 4th (and largest) patch before calling it quits for the day. We'll see how they turned out in the morning, but we're cautiously optimistic.
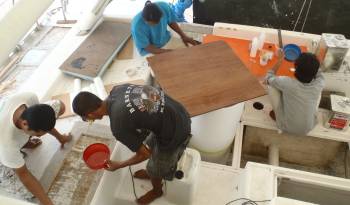 The pandemonium of Ocelot's cockpit during epoxy work |
Sue had been getting quite anxious about how things were going to work with the epoxy jobs as Jon and Golf didn't always want to do things the same way -- but with Jon getting involved and hands on, right there with Golf, it all went off without a hitch. Whew! She swigged back an iced Jasmine/Green Tea in celebration!
Jon and Golf also discussed how we want to proceed tomorrow, which areas of the deck we want to do and what special challenges they present. We'll probably work our way around the deck clockwise, starting from the port aft cabin. The main problem is that when Golf's workers cut the deck off, they cut a groove along the outside of the deck almost all the way through both the top and bottom layers of fiberglass. This groove is a near‑fatal stab to Ocelot's deck, as it destroys its structural integrity and allows the hulls to flex more. It's important that we get an excellent bond to what's left, but it's only about 1.5" (4cm) wide. That's not really enough overlap, but we decided that, since we can get to the underside of the deck where that groove is, we can reinforce it with additional layers of fiberglass from underneath. This should give us the strength we need, despite the groove. We also decided to simply lay 3 sheets of epoxy over where the hatches were, and cut the holes for the hatches out later. This should be a reasonably easy way to reinforce the areas around the hatches.
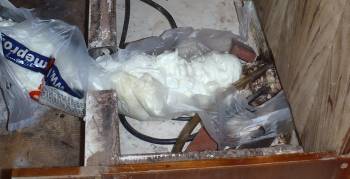 Foaming refrigeration line next to new fridge wall |
Tuesday, January 31:
After the big push yesterday, today was a bit slower. Jon went early and was able to
create a foam barrier around the refrigeration line that had caused some of the moisture problems
under the drawers by the companionway. There still isn't a drain in that mini‑bilge, so if
water does get in (like from rain, or from the galley) we'll have to sponge it out. But at
least the line won't be condensing anymore.
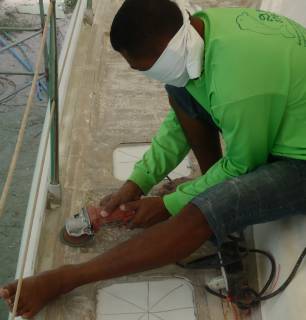 Grinding to prep the deck for fiberglassing |
The weights and plastic were taken off yesterday's patches in the cockpit, and most of it looks good. Unfortunately, one patch was still a bit chewy this morning as the epoxy hadn't hardened correctly. It was the first one we did, and we suspect that the epoxy mixer man didn't put in enough hardener, or didn't stir it enough. We'll have to see if it hardens up overnight. If not, we'll have to peel it back and see what needs to be reworked.
There was more fiberglass grinding, mostly preparing the deck for getting the new foam and fiberglass. Jon had to impress on Golf that this was fairly delicate grinding, and that a good man should be used. Grinding fiberglass is not a favorite job, as the tiny flecks of ground fiberglass get into your skin and can itch for days, so usually one of the lower-paid workers gets that job. Not this time.
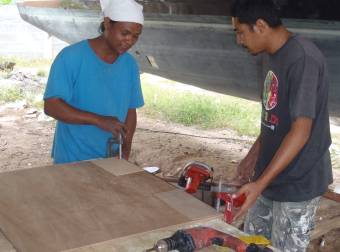 Carpenter's workshop under a neighboring catamaran |
On the carpentry front, Houa installed a new teak-faced wall next to the fridge, where the drawers go. He coated the marine plywood with epoxy before putting it in, so it should be more water resistant. Then he spent the afternoon building other odd wood pieces to rebuild the galley.
Our hull-grinder continued his slow progress along the outside of the port hull. It's taking a long time to grind off not only the bottom paint (5‑6 layers) but also the gelcoat. We give him encouragement whenever we can, since he's working alone on a dusty, dirty, and very tiring job.
It seems that a job that Golf worked on while we were away has turned into something of a debacle. The owner behaved like a wealthy yachtsman (certainly not a term we apply to ourselves) and was allowed to launch his huge power‑catamaran before paying his bills. Now the yard, the local chandlery, and Golf are all out several thousand dollars. The owner is back in Australia, where he says he's trying to sell a house to pay his debts, but we wonder. In the meantime, Golf is suffering a bit of a cash‑flow crisis, which we will have to help with if we want work to continue on Ocelot. [ed: This was all BS told to us by Golf so we'd pay him more money. The owner of Escape Artist had paid all his bills, but Golf is running low because he's spending too much on his personal life.]
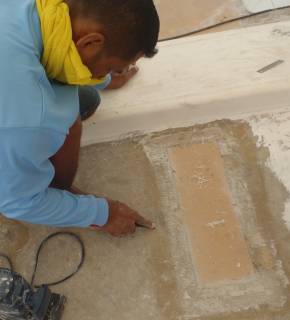 Scraping off the soft epoxy |
Wednesday, February 1:
Another good day! A few setbacks, but basically we made good progress. The day started
badly when Jon discovered that someone had been stealing beer out of our fridge (we store it there,
cold, for our Saturday after‑work parties). Golf made some inquiries and found that it was our
epoxy-mixer, Beng. Now this is a delicate situation, because some cultures do not like to lose
face, but Golf made him come up to Jon and apologize (in front of several other workers). We
hope that's the end of it but Jon's not happy with the situation. We have too many tools and
expensive bits lying around that could easily walk away. Theft of boat items has never been
reported as a problem by any of the yachties in the yard.
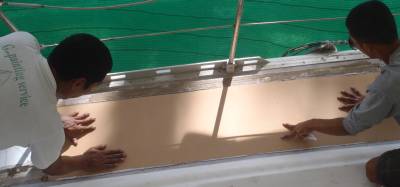 Laying in the foam for the deck, above an extra layer of bi-axial glass |
Then we found that our first patch, the one that hadn't hardened correctly, had not improved overnight. The fiberglass had to be scraped off and the area ground back so we could put more fiberglass down. This was also the epoxy-mixer's fault. Jon would have sent him packing for the theft alone but Golf simply reassigned him to help the carpenter. Maybe he's a relative or something. Another man was assigned to mix the epoxy, with firm instructions to mix it until every bit of resin had been formally introduced to several bits of hardener, and then to mix it again. Epoxy is not like polyester, where a little bit of MEKP catalyst will start the reaction and then it will continue by itself. Epoxy is stronger than polyester, and about 10 times more expensive, but it needs to be properly mixed.
Since the foam we're using does not have the compressive strength of the balsa it's replacing, we're having to strengthen the deck somewhat with more fiberglass. So we're putting down an additional layer of biaxial glass under the foam, and we'll end up with 5+ layers of biaxial glass on top of the foam before Golf puts down his anti‑skid. We'll also add some biaxial glass under the decks, especially along the line that Golf's workers cut, but also under where the foam is going. This should make our decks as least as strong as they were before, and significantly lighter as well.
Once we pulled the soft glass off the patch, Golf checked the foam underneath and reported that it was well set in, and that the epoxy under it had cured correctly. Apparently the problem batch of epoxy was only used for the top layers of glass on that one patch. After the area was ground back and prepared, we put 3 more layers of biaxial glass down to replace what we'd pulled off.
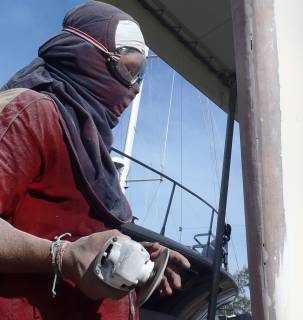 Grinding Ocelot's bows to expose the joint line |
Earlier in the morning the workers had finally been able to get all of Golf's peel‑ply off the 2 foam patches he'd put down last week. The peel‑ply doesn't stick to epoxy (in theory) so it can be peeled off when you're finished with it. In this case the peel‑ply didn't peel off! It took a tedious amount of time for the workers to scrape it all off, and the patches looked terrible afterwards, but more fiberglass covers a multitude of sins. They sanded the patches, prepped the edges, laid 3 more layers of biaxial glass on top, and they look fine (and should be structurally fine as well).
 View from Ocelot of other boats being worked on |
Golf wasn't happy with Jon's technique of putting glass/foam/glass down in one operation. He wanted to put some glass in the bottom of the foam trough, add some epoxy mud, and then stick the foam down and leave it like that for the night, putting the top layers of glass on the next day. OK, not much loss of strength with that, as long as the top of the foam doesn't get dirty. So we did one of the long patches along the port side that way, and it looks good. Score for the day: 3 patches repaired, and 1 more half way finished.
Inside, our woodworker continued rebuilding the area around our fridge. The floor support under our drawers is in, and the wall above it for the aft side of the shelves is ready to go in as well. But before it does, we need to fiberglass the bottom of the fridge foam, under the drawer cabinet.
Our lonely hull-grinder is almost done with the outside of the port hull, but was told to go work on the bows, to keep the dust down at the back of Ocelot while we were doing the fiberglassing. Ocelot's hulls were made in 2 pieces and joined on the inside, but not the outside. This has resulted in a small crack in the gelcoat down the very fronts of our bows. The cracks have been there since we bought Ocelot and they haven't gotten any worse, but they don't look good. So we've asked Golf not only to reinforce the bows with some fiberglass on the outside of the join line, but to sharpen the bows as well, to make them slice the water better. We saw a boat he'd done this to and it looked very good. This obviously requires removing all of the gelcoat from both bows, which our hull‑grinder did this afternoon.
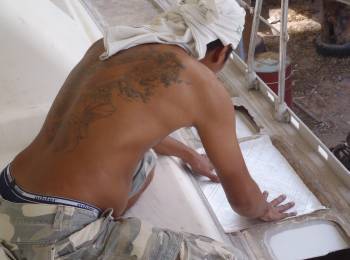 Golf starting the repair work on starboard side! |
Thursday, February 2:
Another good day! Our workers are getting on a roll. The patches we did yesterday afternoon
looked good, so Golf and his team put 3 layers of biaxial down on the one foam patch, and then laid
down 4 more sections of foam, one more on port side and 3 on starboard, our first repairs on that side.
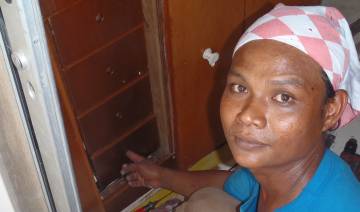 Houa, our carpenter, showing off the drawers he fitted |
Inside, our carpenter fitted our drawers back where they belong, on new roller slides. So nice to see Ocelot returning to her old familiar form. He and Golf were examining the teak around our entryway and have decided that it should really all be replaced, as it's just a teak veneer on top of plywood. Since this is the land of teak (which is oily enough that it lasts very well in a marine environment) they decided to replace all of the entryway wood with new, solid teak. They'll also extend the rain‑gutter "eyebrow" above the entryway so it spills its water further away, and re‑engineer the support for the grating just outside our entryway so the water drains away better. All of this should help preserve our entryway wood in the future.
Jon has been working on our mast when he's not directing fiberglass work. Most of this now involves taking off our "diamond" stays, which are done in rod‑rigging and have never been taken off before. We started by measuring the turnbuckle distances carefully so we can tighten them back up exactly where they were. There are 8 of these stays, and getting them and the mast correctly tuned with the mast straight is quite difficult. Hopefully, putting them back where they were will make the job simpler. We put lots of penetrating oil on the turnbuckle threads to make sure they turned easily, without galling. The split‑pins are all out now so we can start removing, cleaning, checking, and storing the rods under a neighboring catamaran.
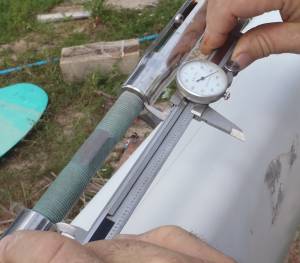 Measuring the rigging turnbuckles exactly |
These rods are a bit of a problem for us. A special hydraulic machine is needed to form the "heads" at the ends of the rods (where the turnbuckles can hold onto them) but the closest machine is in Australia. And the rods can't be bent - they have to be rolled into BIG circles, so shipping them can get expensive. Rod rigging is supposed to last much longer than the 8‑10 years of stranded ("normal") rigging wire, but when rod fails, it goes catastrophically, not just a few strands at a time. If it's going to fail, it usually fails at the heads, where the end has been formed, which is usually inside the turnbuckle and impossible to examine. Having the mast out is finally giving us the opportunity to carefully examine our rod‑rigging, and especially the crucial heads, but if we have to replace any of it we'll have a problem...
 Our drinks lady & her amazingly loaded scooter & sidecar |
One delightful surprise came in the late afternoon when our drinks‑lady arrived on her amazingly loaded scooter and sidecar. She hasn't come around for several days and we've been a bit worried about her. Apparently she's been attending her stall over by Wat Chalong, a nearby temple. We made sure she knew that her drinks were VERY appreciated. She makes the most amazing "soda manao" which is fresh squeezed lime juice, a bit of sugar syrup, a generous pinch of salt(!) and soda water poured into a big cup of crushed ice and sold for $0.60. When you're parched, it's heavenly! When she shows up, we usually buy a round of drinks for our workers.
Our biggest setback occurred back at our apartment - Sue was happily working at her computer in
the evening when the air‑conditioner right above her head suddenly started drizzling water all over
her. She quickly moved both computers out of harms way, but the stream of water coming down
meant that we couldn't work anywhere near there, and that nook is really our only desk. Peter,
the apartment manager, was most apologetic and quickly setup another room for us. OK, but it
meant we had to move computers, toiletries, and some of our clothes and food into the new room
across the hall, and then move back again in the morning, so they can make up the room we slept in
while the air‑conditioner people repair our leaky unit. All fun and
games. ![]()
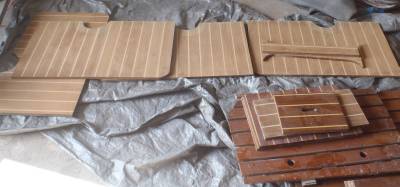 Ocelot's floorboards being prepared for varnish in Golf's workshop |
Friday, February 3:
This morning we went to Golf's workshop to see what progress was being made by the sander as he
prepared our floorboards for varnishing.
Golf was absent for the last half of the day so we didn't get much fiberglassing done.
Luckily, our carpenter is very much a go‑getter and needs little direction. He's been having
all sorts of fun tearing our galley apart, just so he can put it back together again better.
Today he started out by fiberglassing the fridge insulation that's below the drawers he's been
working on. Then he attacked where our new stove and oven is going to go. In the process
he found a floor support that needed replacing so he ripped it out, and another cabinet next to the
stove will probably get replaced as well. Not sure we'll recognize
Ocelot when he's finished! ![]()
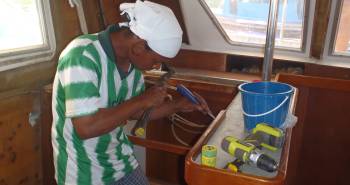 Houa attacks the galley for the new stove & oven |
On deck, the foam patches that went down yesterday looked good, but Jon decided that the top layers of fiberglass needed more contact area with the cabin for optimum strength, so he brought the matter up with Golf. Golf, in his ever cheerful and helpful attitude assured Jon that some more gelcoat could be ground off so the fiberglass could have more surface to grab onto, and that he could smooth it all out to look fine afterwards. You gotta love that sort of attitude! So the guys got out the grinders again and cleared a wider strip for us to epoxy to.
Jon also continued removing the diamond stays from the mast. Today 2 more came off, to be hung under a neighboring catamaran with care. We also removed the upper spreader, although one of the 4 pins holding the spreader together refused to come out, so we'll have to have a serious chat with it later.
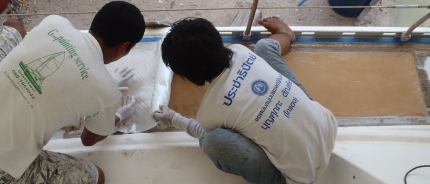 Golf and Beng laying bi-axial fiberglass on a long foam patch |
Saturday, February 4:
More good fiberglassing progress on the deck. We should explain this a bit more.
When the top of Ocelot's deck came off, the balsa coring was in depressions in between our deck
hatches. There are 7 of these depressions on each side of Ocelot, with the ones above the
forward berths being much larger than the others. There's a long, narrow 15th
depression behind the cockpit as well, and 4 much smaller depressions (cut‑outs, really) next to the
cockpit that we used as practice spots. What we're doing is replacing
the balsa coring with structural foam, one depression at a time. Since the foam isn't quite as
strong as balsa, we're also beefing up the fiberglass somewhat, so the decks should be at least as
strong as they were. Using foam instead of (biological) balsa means that the decks should last
much longer, even if a bit of moisture gets in.
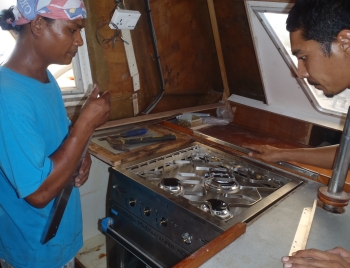 Houa & Golf discuss how they're going to fit the stove in |
Golf starts out by coating the bottom of a depression with epoxy and laying a sheet of biaxial fiberglass in the bottom. Then he coats the top of the glass with a thick layer of epoxy mud (epoxy resin mixed with silica to thicken it), paints some epoxy onto the bottom of the pre‑cut foam, and fits the foam into the depression. The foam is wiggled and pressed down until the epoxy mud squooshes out around the sides. The excess mud is removed, the foam is covered with plastic, and weights are placed on top to insure that the foam and glass adhere well to each other and to the existing fiberglass at the bottom of the depression. The next day, when the epoxy has cured, 3 layers of biaxial glass are laid over the patch, extending for several inches on each side of the foam. At least 2 additional layers of biaxial glass will be laid over the entire deck, and strips of glass will also be laid under the deck from the inside, to strengthen specific areas.
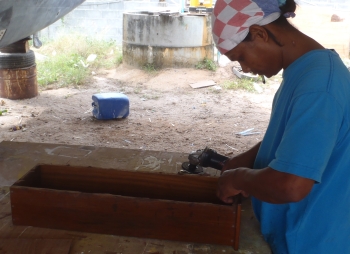 Houa in his "workshop" repairing a drawer for us |
Today we laid 3 layers of fiberglass over the 4 patches of foam that were put down yesterday. So we've now finished 7 of the 15 patches (plus the 4 cockpit patches) -- 4 on port side, and 3 on starboard. It's so nice to be able to walk on more of Ocelot's deck! Of course, these are the easy patches. One more on starboard is relatively easy, but the remaining 6 present special challenges; 2 are very large, and the other 4 have cleats going through them. We don't want foam where the cleats are going, so that part of the foam will have to be removed and the holes filled with a mixture of fiberglass and epoxy mud. Part of the reason we're having to replace the balsa is that water got in where the cleats bolt through the deck and rotted out the balsa -- something we want to avoid in the future.
Inside, our carpenter started fitting our stove and oven! We brought the unit from our apartment to the boatyard this morning, unpacked it, re‑fitted the door that we'd removed for shipping, and Houa immediately started working it in to where it's supposed to go. It looks like it will just fit in, with less than ½" (12mm) of clearance to the drawers that open in front of the oven door. He also remade the bottom of one of our drawers that had suffered some water damage.
 Our crew: Boy, Beng, Jayap, Jeng, Houa, & Golf |
Jon spent much of the day battling recalcitrant bolts. Golf wants our 2 pushpits removed (the rear supports for our lifelines) and they're stainless steel set into aluminum, with stainless bolts holding the aluminum feet to the aluminum toe‑rail. Putting different metals in contact with each other and then adding some seawater results in fairly significant corrosion. There was no removing the stainless tubes from their aluminum feet, and Jon had to battle just to get the bolts out. We have some anti‑corrosion goop we'll use when we put everything back together again, but evidently it wasn't used when Ocelot was originally built.
Being Saturday, when the guys knocked off at 5:30 we brought out beers, sodas, and chips to wind
down the week. Golf backed his truck up to the party and unleashed his massive sound system.
The French Canadian boat across from us also threw their workers a party, but Golf's truck was the
center of attention. ![]()
Thai Refit:
Ocelot Pages:
Top Level: Home | Destinations | Cruising Info | Underwater | Boat Guests | Ocelot | Sue | Jon | Amanda | Chris | Site Map | Make a Comment
|
If our information is useful, you can help by making a donation |
Copyright © 2000‑ Contact: Jon and Sue Hacking -- HackingFamily.com, svOcelot.com. All rights reserved.