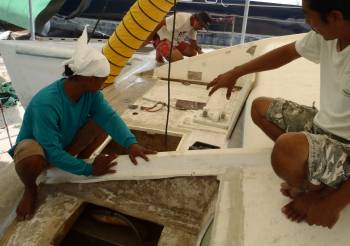
Houa & Golf discuss how to repair the new compartments
27 Foredeck Repairs
 Houa & Golf discuss how to repair the new compartments |
Summary: Both of the newly discovered forward compartments got their walls repaired and their insides gelcoated, then Max started replacing the balsa above them with foam, getting 3 good pieces of foam put down on each side. Max also replaced a plywood backing plate in the cockpit with several layers of glass and epoxy mud. The starboard‑side wall going down to the new swim‑platforms got entirely foamed and shaped. The port‑side wall got a bundle of foam epoxied into the outer edge so it can be shaped correctly. Our rudders were taken to Luk Engineering to be reworked, and the sail‑drive lower gear‑cluster was given to Hem to be reworked. The steering gear was remounted at the helm, marking our first reassembly. The battery area had the rotten wood removed and work has started rebuilding it, marking (hopefully) the last of the disassembly. Jon serviced the autopilot drive but found it needed some cracked parts replaced.
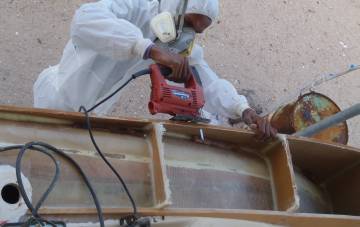 Baw cutting down the starboard wall to match port |
Monday, April 23:
Golf committed another tactical blunder - he paid his workers on
Saturday. ![]() So nobody really showed up until about lunchtime...
So nobody really showed up until about lunchtime...
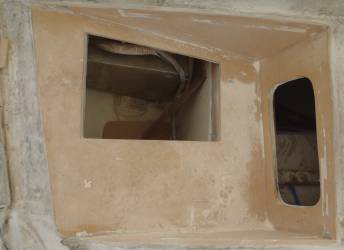
Houa was working in our new compartments up forward, grinding off a useless skin of fiberglass and filling in the edges with epoxy mud. Tomorrow they'll lay 3 layers of biaxial glass over the sheet of plywood that forms the wall between this compartment and the forward cabins.
We talked to Golf and Houa about how we want to access these compartments. What we decided is that Houa will maximize the size of the hatches accessing these compartments by building the hatch frame on the existing fiberglass. Then they'll build up the rest of the area with foam and glass (this is an area where wet balsa has been removed). The hatch will probably be fully removable, not hinged, as we'd like to put a cover over part of that area.
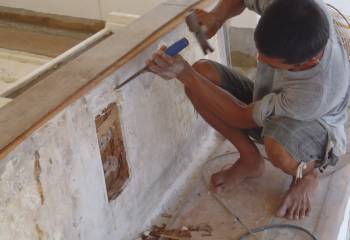 Max removing old wood from a targa bar support |
Speaking of plans, we are planning to be back in the US for our daughter's graduation in June, and a good friend's wedding in July. So we talked with Golf about what we'd all like to have completed by that time. What we came up with was:
| 1 | The area in front of the salon all foamed and glassed in |
| 2 | The aft deck and cockpit seat all foamed and glassed in |
| 3 | The sugar-scoop extensions all foamed and glassed in |
| 4 | The new steps down to the swim platforms all foamed and glassed in |
| 5 | Finish our welding projects so the mast, boom, and spars are ready to paint |
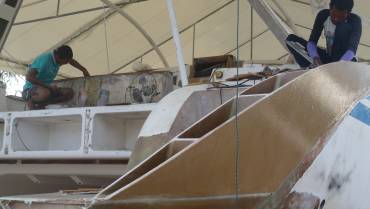 Max glassing the targa support while Baw works on stbd wall |
This will be a bit of a tall order, as we leave at the end of May and the steps haven't really
been started yet. In fact, only today did we decide on how many steps there will be.
Thais believe that it's bad luck for staircases to have an even number of steps, but putting 3 steps
down to the swim platforms would mean that the steps wouldn't be big enough for Jon's size 12 (45)
feet. So we tried to convince Golf that the platform at the top was a step, but the engine
hatch wasn't. He laughed and agreed, but wants Jon's foot as a model when he designs the
steps. ![]()
After lunch, Jon and Golf loaded the rudders into Golf's truck and took them to Luck Engineering, the best machine‑shop in Phuket (and the folks who made the rudders in the first place). We want Luck to extend the bottom of the rudders aft a bit, and also beef up the bearing area just above the blade. We have a host of other welding projects that we want done in both aluminum and stainless steel, but Luck is often too busy to come to the boatyard. Now that he has some of our equipment, they've promised to send a man to the boatyard Real Soon Now to pick up the other components.
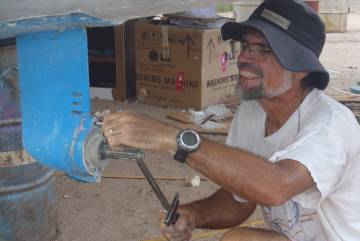 Jon opening the sail-drive to remove the lower gear cluster |
Jon and Sue remounted part of the steering gear on Max's new wall in the battery compartment, but when Jon went to mount the autopilot motor and reduction gear, he found a bit of rust on the motor that we'd like to deal with before putting it back.
Max was waiting for Jon to finish, as he'd like to start work on the battery box (removing the old wood and replacing with with foam and fiberglass) so we had to find him something else to do. That ended up being the back of the cockpit seat and the aft deck. This aft deck has been foamed for several months, but not glassed on top. It's usually covered with sheets of thin plywood, but even so the foam is getting damaged. The only thing that goes back there is our storm anchor, which is so big it needs special chocks. So Jon measured where those chocks should go and took out a large chunk of foam there, to be filled later with epoxy mud.
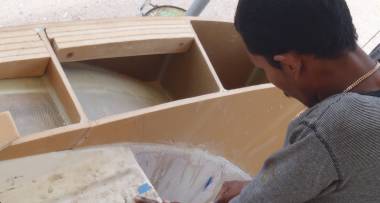 Baw gluing foam blocks into the outside of the starboard wall |
The damage to the back of the cockpit seat came from a support that comes down from the targa bar and bolts through the back of the seat. The bolts had leaked and water had got in. The balsa was stripped out long ago, but not the plywood backing plate for the support bolts. So Max removed the plywood backing plate and started filling the hole up with sheets of fiberglass, alternating biaxial with chopped‑strand mat. The support needs to be bolted into something fairly solid, and we didn't want to put wood back in there.
Jon decided to replace the oil in our port sail‑drive, but when he drained it he didn't like the slightly milky color, indicating some water had gotten in. Time to replace the shaft seals. So instead of refilling it, he removed the propeller and anode and removed the lower gear‑cluster. Jon's replaced these seals before, but it requires some special tools and our mechanic is probably better at it, so we'll give Hem the job of stripping the gear‑cluster, replacing the seals, and reassembling the gears. Then Jon will reinstall it.
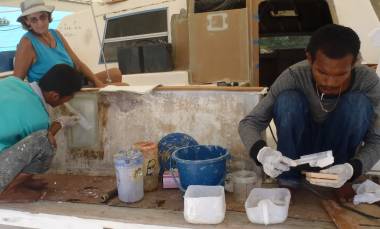 Max laying epoxy glass while Baw glues foam blocks together |
On the transom extension walls, Baw was cutting down the starboard wall to match the port side, preparing to put the top on the wall. He's doing starboard a bit differently from port, filling the outer edge with strips of foam that he'll shape later. This is all a learning experience for us.
Tuesday, April 24:
Down to only 3 workers these days, Max, Houa, and Baw, but they're our A‑Team so good things are still
getting done.
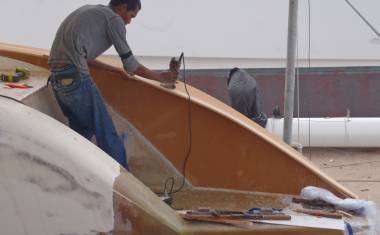 Baw trimming foam for the top of the starboard wall |
Several years ago Golf says he fell off a boat and broke his back [this is probably another lie]. Ever since he's been unable to stand up straight or even walk very well. The hospital doctors want to operate (of course) to relieve pressure on that nerve, but Golf's friend had the operation and now can't walk at all, so Golf doesn't like that option. The last time he saw a physiotherapist at the hospital he was told to see a chiropractor. We've been trying to convince him to see a chiropractor for months, and we recommended a US trained one here in Phuket. He's finally going, and hopefully getting good things done, but he's often pretty wiped for the rest of the day. Today he left after lunch for an appointment and never returned. So we hope it's all working out! It would be wonderful to see him walk without pain.
Max worked most of the day filling the reinforcement point for the targa bar with fiberglass and epoxy mud. He couldn't work very quickly because sometimes the epoxy would get too hot (the chemical reaction of epoxy curing generates heat). But by the end of the day he'd filled the area where the old plywood backing plate had been. Now he can work on putting some foam on the back and sides of the cockpit seat.
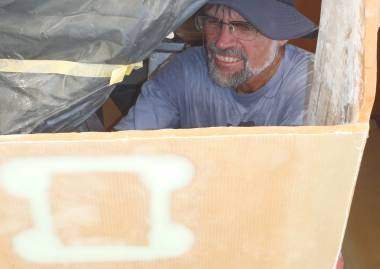 Jon mounting steering gear - note white epoxy mud areas |
Baw made good progress on the starboard wall going down to the transom extensions. He's doing it quite differently from the way he did the port wall. Instead of grinding off the outer wall to start the rounded transition, this time he's cut both the inner and outer walls to the same height, so the top can go on easily, but he's stuffing the outer edge with lots of foam, so when he grinds it off to give us rounded corners, there will still be some foam there. So today he went around the boat collecting bits of foam and then fashioning them into blocks and installing them in that outside edge. After filling the outer edge with foam, he cut more foam for the top of the wall, and started trimming it down to fit. We love it when they think about the job, and try to learn easier or better ways to do things. Baw has certainly been doing some thinking.
Jon met our mechanic, Hem, and gave him the lower gear‑cluster from our port sail‑drive so he can
replace the seals. In turn, Hem gave us back the steering gear we'd given him, with the
2 rusting seals replaced. So Jon set about reinstalling it. This involved cutting a
square chunk from one of the walls that Max repaired, and then drilling out the mounting holes.
We'd planned for this, of course, so all the cuts and holes were through epoxy mud because we'd cut
away the foam. The shaft that the steering wheel bolts onto has to fit pretty exactly through
a preexisting hole in our instrument console, but Jon feels he got things lined up pretty well.
This is a bit of a historic (hysteric?) occasion, as it's the first bit of the boat to be
reinstalled. ![]()
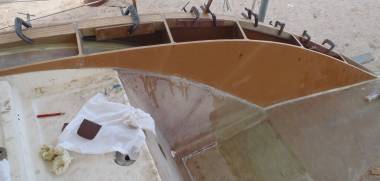 Foam blocks being epoxied into the outside edge of stbd wall |
Houa has had to split his time between Ocelot and Katani 2, but he managed to measure and cut some biaxial to glass for the plywood wall in our new compartments. Late in the day he conned Max into epoxying that glass onto the wall on port side, but starboard will have to wait for tomorrow.
Wednesday, April 25:
Baw took the foam blocks he'd fiberglassed yesterday, trimmed them down, and epoxied them into
the outer edge of the starboard wall that he's building. Then he took the 2 long sheets of
foam that will be the top of the wall and epoxied a sheet of biaxial glass on top of each one.
They're quite long, so he had to extend our work table to give himself enough space. Hopefully
we'll be able to stick them on tomorrow.
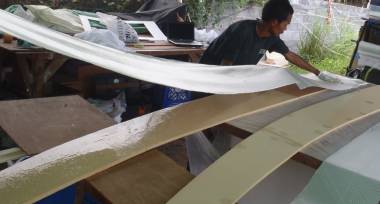 Baw glassing the long foam strips that will become the wall tops |
Max's brother Lek is still out sick, so we only have 3 workers. Apparently a famous Thai fortune teller has prophesized that Phuket will break off and sink into the ocean this Saturday, leaving only Big Buddha on the hill. The media has been playing up the story so much that many workers are staying away until after then. Not sure if this is affecting us or not...
Max and Houa were working up forward on our new compartments. They finished glassing in the plywood on port side that they hadn't been able to get to yesterday, then Max mixed up a batch of gelcoat and painted it onto the new fiberglass that they'd laid last night.
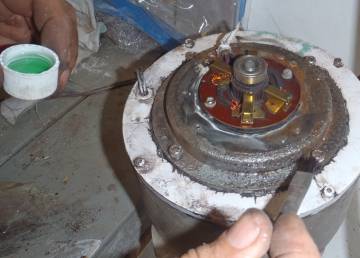 Jon painting phosphoric acid onto the autopilot motor |
Jon was busy with the autopilot motor. For some crazy reason, Whitlock made the motor with a mild‑steel case (ya gotta wonder sometimes...). About every 3 years, Jon has to strip it back, treat the inevitable rust, and repaint the motor. This time he bought some special rust‑inhibiting epoxy to try. But first, he decided to check the brushes on the motor, as they've never been changed in 16 years. When Jon opened the brush‑compartment, it was full of black powder from the brushes, but surprisingly, the brushes themselves were in pretty good shape, with about 30% left. We'll carry a spare set of brushes, but we'll leave the old ones in for now.
Treating rust starts with phosphoric acid (H3PO4), one of the strongest acids made. It's also the acid in Coca‑Cola, and a glass of Coke will easily dissolve a tooth overnight. Phosphoric acid turns rust (iron oxide) into something else, which looks black but isn't supposed to rust (oxidize) anymore. So the outside of the motor got painted with phosphoric acid for several minutes, and then the acid was washed off. Tomorrow we'll reassemble the motor and paint the outside in this fancy new epoxy. While we're at it, we'll grease the reduction gears just above the motor.
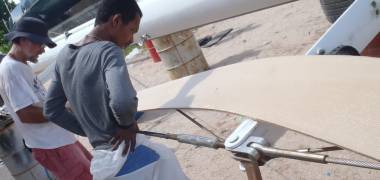 Jon & Baw examine the poorly cured epoxy on the wall tops |
Golf has been spending most mornings at the chiropractor, and it seems to have helped. Already he's mostly out of pain, and the X‑rays say that his spine is moving back towards where it belongs. We are cautiously optimistic...
Thursday, April 26:
Max's brother Lek was back today. He speaks no English at all, so we're not sure what was
wrong with him, but we're glad he's back.
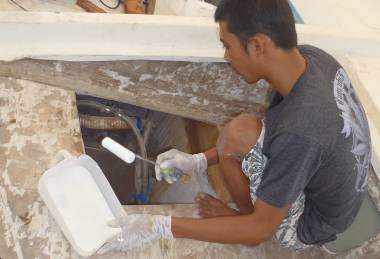 Max painting gelcoat inside our new compartments |
We had a bit of a setback today. The epoxy/glass that Baw put on the long strips of foam that were to be the tops of the walls going down to the new extensions didn't cure correctly. Probably the epoxy wasn't mixed well enough - epoxy must be very thoroughly mixed. Baw had a lot of time and effort and pride in those pieces of foam, and now he has to start over. He was understandably annoyed, but we tried to tell him that it wasn't his fault, as someone else had mixed the epoxy incorrectly. At first, Bow didn't want to tackle cutting down the new foam and instead started shaping the rounded edge of the wall, but in the end he was cutting out more foam, using the original pieces as templates.
Since Golf was gone all morning with a chiropractic appointment, we talked to Houa quite a bit about how we're going to reconstruct the area in front of the salon, examining the edges of where the glass and balsa have been cut back and talking about how we can repair it and still retain as much strength as possible. The guys will have to feather the edges of all the fiberglass around the edges of the repair, but it's not too different from what we've done before.
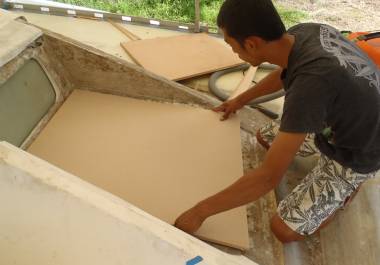 Max fitting new foam forward of the salon |
Max will probably do most of the work. He started by gelcoating as much of the insides of the new compartments as he could reach, so they look nice and new. Then he started cutting and trimming foam to replace the balsa that was removed. Ya gotta love a guy who jumps in like that.
Jon continued refurbishing the autopilot drive system. He reassembled the autopilot motor, sealing the top down with Sikaflex since there wasn't any decent (non‑acetic) silicone around (ours is still in storage). Then he painted the outside of the motor with the special epoxy he bought yesterday, designed for (possibly rusty) steel. All this seemed to go pretty well.
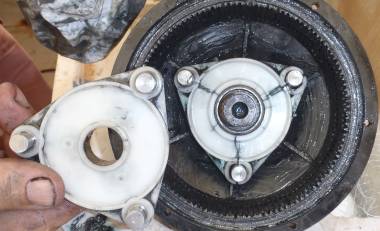 Part of our autopilot reduction gears - Cracked orbit on right |
While the epoxy was curing he stripped and cleaned the reduction gear that slows the motor's output down to the very slow speeds our steering needs. The first stage is a double‑planetary reduction gear, and it's mostly plastic. While cleaning the grease off everything, Jon noticed that one of the (crucial) plastic parts was cracked in 3 places. Yikes! We depend on our autopilot, so we'll need to replace this ASAP.
It's a Whitlock steering system and a Whitlock drive, but Whitlock has no website of their own that we've found, and the company was bought up by Lewmar some time ago. The whole drive unit retails for about $2400, but we certainly don't want to have to pay that much just to replace one cracked plastic part...
Friday, April 27:
A GREAT day! Not only did we have a full crew (well, our 4 usual guys) but they achieved
several major milestones.
Max was working on the area in front of the salon. The existing fiberglass here is very weak, especially after he'd ground it flat, so first he put down several biaxial strips to reinforce some of the worst areas. Then he laid down a sheet of biaxial glass over the area in front of our salon port‑lights, smeared it with some thin epoxy mud, and put down our first sheet of foam up there, holding it down with 2 big water jugs. WOOT! And then, for an encore, he did it again on the starboard side! Several more sheets of foam will be necessary, but it's great to see real progress being made here.
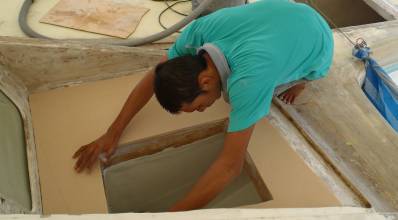 Max fitting new foam on port side |
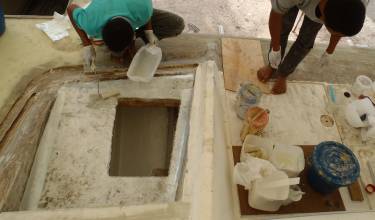 Max & Lek laying new glass to go under the foam |
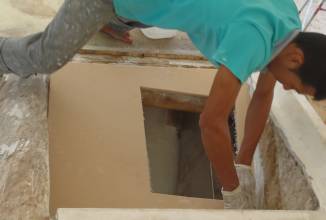 Max squooshing the foam into the glass & epoxy mud |
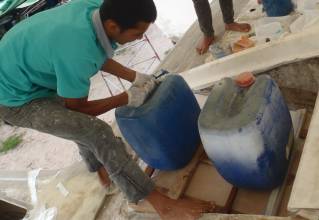 Weighting the foam down with big water jugs |
Houa wanted to work in the battery compartment, but first Jon had to put the autopilot reduction gear back together and make sure everything was dust‑tight again. If Lewmar ever gets back to us we're hoping to replace our reduction gear and possibly the motor as well, but we haven't heard back from them yet. So Jon greased all the gears and put everything back together so Houa could get to work.
Our battery area seems to be a thin sheet of plywood with some wooden trim around it and then most of the area glassed over. What wasn't glassed was covered in gelcoat, which doesn't have any strength. When the gelcoat cracked, water got in and started rotting the wood. So Houa first pulled out the wooden trim and then ripped off the fiberglass covering and the plywood underneath. When he finished we were back to bare glass all around, and Houa could start rebuilding.
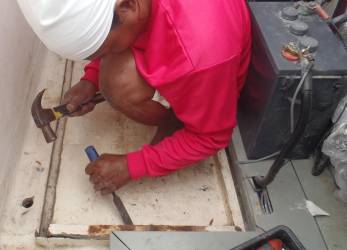 Houa starting work on our battery compartment |
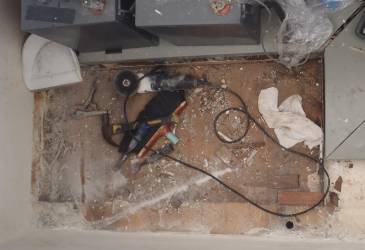 Battery box after all rotten wood & glass have been removed |
What marks this as such a momentous occasion is that we think (actually, we desperately hope) that this is the last bit of Ocelot that needs to be taken apart. Keep your fingers crossed! The rest of the work should all be reconstruction, which is much more fun to watch happening.
Baw and Lek were working on the starboard wall going down to the transom extensions, where they've been working all week. We checked the fiberglass that hadn't fully cured yesterday and one of the two sheets was actually hard enough to use. So they only needed to remake one of the strips that will form the top of the wall. They quickly cut the foam out, shaped it, and put a layer of biaxial on what will be the underside of the foam. Then they mudded up the top of the wall and stuck the good sheet down. After lunch, the epoxy on the new sheet had cured enough to stick down, so more mud was mixed up and the second sheet of foam was stuck down, held in place by screws driven through strips of wood and 4 big water jugs. So the starboard wall is now completely sealed and has almost all of its foam installed!
The outer edge of the port‑side wall is still open, as that was built a different way. Baw thought about it and eventually decided to cut off some of the existing foam top so he could stick blocks of foam in that outer edge. It needs a fair amount of foam, as the curve from vertical to horizontal goes through a pretty big curve.
Saturday, April 28:
Bit of a wet day today - it drizzled for much of the morning and we got a shower in the afternoon as
well. This meant no laying of fiberglass, but other work could progress under our big tent.
Max was a foam‑cutting fiend today. First he used a grinder to smooth out the old fiberglass where the balsa has been removed in front of the salon on port side. Then he cut and fitted several sheets of foam to go in that area. By the end of the day he'd finished trimming and fitting 5 new pieces of foam. The rain precluded epoxying them down (epoxy hates water and won't cure if it's too moist out) but it's nice to see how quickly that area is coming together. It's been open and staring at us nakedly for a long time. Unfortunately, there was a small lack of communication which led to Max cutting a chunk out of our cabin‑top than he didn't need to, but it should be easy to repair.
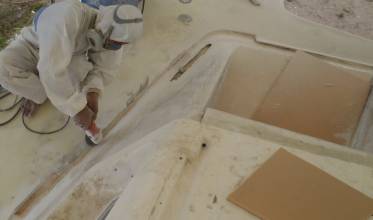 Max trimming and cleaning up the fiberglass forward of the salon |
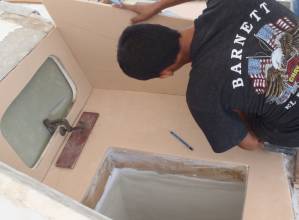 Fitting foam onto a side wall |
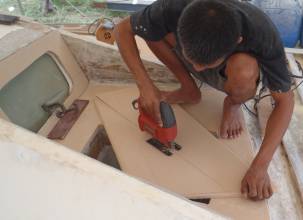 Max cutting down foam for the side wall |
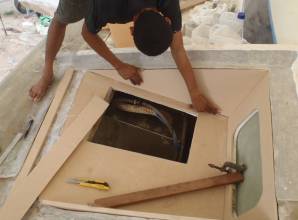 Max fitting foam, port side |
We had 2 new workers today, grinding the paint off our boom so it can get some welding attention and then get repainted. Golf is now supplying workers for 2 other boats here in the yard, so some of them get shifted around as needs change.
Baw and Lek were having an interesting time with the starboard wall down to the extensions. Although this wall has been topped, there's a gap on the upper outside edge. This area is supposed to be a big rounded corner, with about a 2" (5cm) radius, going from the topsides (hulls) to the top of the wall. Now this area has to be filled with foam, so it can be shaped to the correct curve and radius. So Baw and Lek put together several strips of foam into a tapered bundle. They had to build some elaborate clamps to form it to the right shape. Somewhat surprisingly, they epoxied the bundle of foam together, but they didn't bond it to the wall. They formed it on the wall, but they put plastic between the wall and the bundle, and didn't put epoxy there. Perhaps they thought doing it all at the same time would be too much. Presumably they'll epoxy their foam bundle to the outer edge of the port wall on Monday.
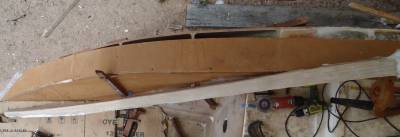 Thin glassed in foam strips for the outside of the port wall |
Houa finished cleaning up his destruction of the battery box and started putting it back together again. First he sealed the edge of the box with a fillet of epoxy mud, then he made and stuck down a wedge shaped bit of foam in the outside edge to fill the dip caused by the bridge‑deck dropping away to the hulls. This should make the space flat (actually there's a slight slope to cause any liquid to flow towards a drain‑hole). On Monday he should start building a raised floor and walls to hold the batteries in.
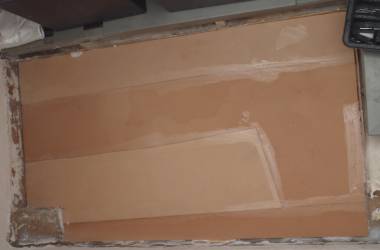 Houa's new foam floor for the batteries - still needs fiberglass |
Sunday, April 29:
We were told that nobody was going to work on Sunday, so we didn't come in to the boatyard.
But in fact, our 4 best workers did come in (probably because next Tuesday is Labor Day here, and
nobody works). So a fair amount was accomplished.
Over engineering is better than under engineering. Baw and Lek took the bundle of foam strips that they'd epoxied together and put a skin of fiberglass on 2 sides. This wasn't strictly necessary but it certainly didn't hurt. The foam bundle is for the outside edge of the port‑side wall going down to the extensions. That edge will be getting a fairly large radius curve put in the top by shaving away the foam, so it needs a fair amount of foam to start with. But the whole thing will get glassed over and it's not structural, so it doesn't really need any internal fiberglass. Oh well...
 3 new sheets of foam epoxied in by Max |
Houa was working in the battery compartment. He trimmed up several bits of foam into a floor for the batteries. This, too, wasn't strictly necessary, as the batteries could have just sat on the existing floor, but the old battery area had a raised (plywood) floor so now we're getting a raised foam floor. Again, not strictly necessary, but it certainly doesn't hurt.
Up forward, Max got a lot of work done. He epoxied in the 3 foam sections he'd been trimming down on Saturday, with a sheet of fiberglass behind them to beef up the existing (very thin) fiberglass. By the time we got in on Monday morning, he had ground off all the extra little bits that inevitably squoosh out, and it was looking very nice. Max does very nice work!
Thai Refit:
Ocelot Pages:
Top Level: Home | Destinations | Cruising Info | Underwater | Boat Guests | Ocelot | Sue | Jon | Amanda | Chris | Site Map | Make a Comment
|
If our information is useful, you can help by making a donation |
Copyright © 2000‑ Contact: Jon and Sue Hacking -- HackingFamily.com, svOcelot.com. All rights reserved.