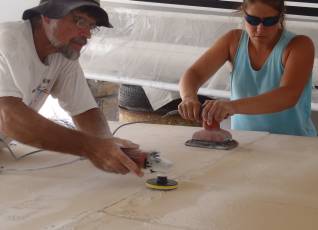
Grinding the epoxy off & then sanding the foam smooth
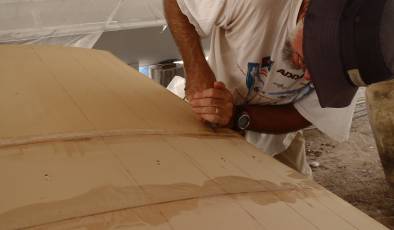
Slicing the foam with a razor blade to make it bend more easily
44 Scoop Steps
Summary: A good week! On the bimini, we mounted one foam panel to our wooden frame/mold, leveled the mold, slit the front of the second foam panel so it would bend, and epoxied the second foam panel on top of the first, using tie‑wraps (cable‑ties) and weights to hold the 2 panels together. Then we trimmed up the edges and put on the first of 4 reinforcing rails, this one across the front. Golf's team got the shelves for the starboard sugar‑scoop steps mounted and then installed the steps themselves, fileting the edges and glassing them in. Then they turned their attention to the cockpit, where they glassed in some small bits of exposed foam before starting to rebuild the rims around the teak decks. Golf started on the targa‑bar, applying gelcoat and filler and then long‑boarding it until it's smooth. Houa foamed and glassed both of our engine room hatches, which are much stiffer now. Jon and Amanda measured out where the reinforcing pads for the sugar‑scoop rails need to go and then drilled out 3" (8cm) holes, which Sue then started filling with epoxy and fiberglass. They also determined where the pad‑eyes for the prod need to go in the bows, and Jon ground out the port side so Sue could start filling it with epoxy and glass reinforcing.
Monday, September 3:
Man, did that shower feel good at the end of the day! We wanted to join the 2 layers of the
bimini together today, but we actually never got closer than just talking about it.
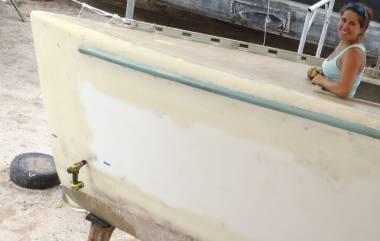
Every epoxy layup has a cleanup phase, and that's what we did for most of the day. When we epoxied the fiberglass onto each sheet of the bimini foam last week, a fair amount of epoxy resin and even some epoxy mud leaked down through the joints between our sheets of foam, and stuck to the back side of the foam. This all had to be gently ground off, and then the foam sanded smooth. This sounds easy but it takes lots of time, especially when you can't quite reach the middle of the sheet of foam...
 Grinding the epoxy off & then sanding the foam smooth |
 Slicing the foam with a razor blade to make it bend more easily |
But we did make significant progress. We laid the thicker of the 2 layers of foam glass side up on our work‑tables and positioned our frame/mold on top of it. Then we drilled holes through both the foam and the frame, and tied the 2 securely together with electrical tie‑wraps (cable‑ties).
When we flipped it all over so the frame was under the glass/foam layer, we made 5 slices in the foam near the leading (forward) edge. This is where the bimini has the most curve, and we wanted the foam and fiberglass to follow the curve of the frame as closely as possible, to give the bimini a nice shape. When we looked at the gap between the glass and the frame, we could see that the glass and foam was following the curve of our frame very closely.
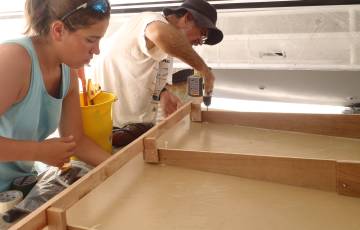 Drilling holes through both the glass/foam & our wood frame... |
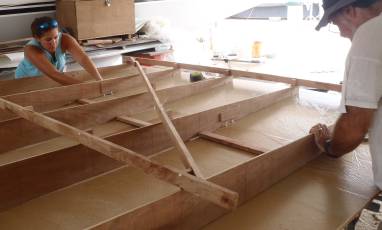 ... and joining the frame to the foam with tie-wraps (cable-ties) |
We also tapped the tie‑wraps down into the foam, so they don't stick above the level of the top of the foam. This will allow the upper sheet of foam to lie down on the lower sheet snuggly.
Tomorrow we will also slice the leading edge of the upper sheet, before epoxying it onto the lower sheet. This is a bit more complicated than simply slicing the foam with a razor‑blade, as we did with the lower sheet. The upper sheet will have its upper side glassed already, so trying to make it bend will put the foam in compression. To make that layer easier to bend, we actually have to remove some of the foam. So Jon built a small tool with a block of wood and a broken hacksaw blade that we can use to make thicker slices in the upper sheet of foam.
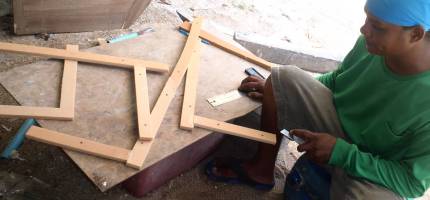 Houa making the shelves that the steps will attach to |
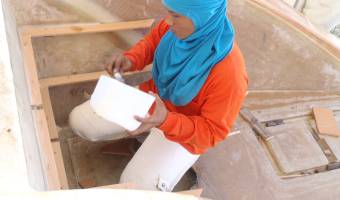 Mee epoxying the shelves into the starboard sugar-scoop |
Houa and Mee also made progress. The starboard upper sugar‑scoop step that Houa has been working on had its outer edge glassed. Then Houa built some shelves to hold the edges of the steps to the inside of the sugar‑scoops, and they were correctly positioned and then stuck in place with epoxy mud. Tomorrow they'll get a bit of fiberglass top and bottom, and then the steps can be epoxied onto them.
Tuesday, September 4:
Another Double Milestone Day!
In the morning, Mee and Houa glassed in the small shelves that they'd installed yesterday. Then they gooped them up with epoxy mud and plonked the new steps on them! So now we've got new steps installed in both our sugar‑scoops. WOOT! They've got a filet of epoxy mud around the outside now, where they join to the sugar‑scoops. Tomorrow they'll get strips of fiberglass over those filets.
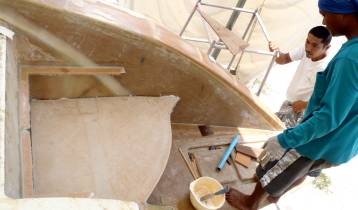 Golf watches Houa put in the lower step first |
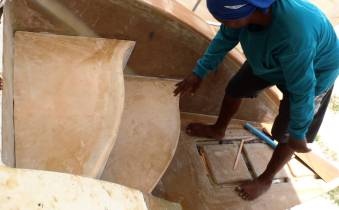 Then the upper step goes into the starboard sugar-scoop |
We also made excellent headway with our bimini. In the morning, Jon trimmed both layers of foam/glass so they were exactly the same size. Then he placed the upper sheet correctly on the lower sheet and marked the sides, so we'd know exactly how to join the sheets.
The top sheet was a bit too stiff at the front to easily bend to the shape we want, so Jon borrowed Houa's router and cut 11 grooves in the foam, 9mm (3/8") deep by 3mm (1/8") wide. These cuts were ¾ of the way through the foam, but didn't touch the fiberglass. So the strength was unchanged, but the cuts allowed the foam to bend more easily.
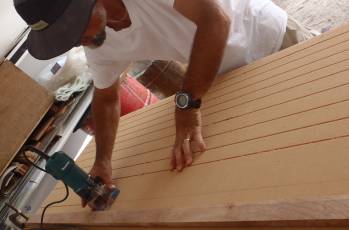 Jon cutting slots in the foam to make it bend more easily |
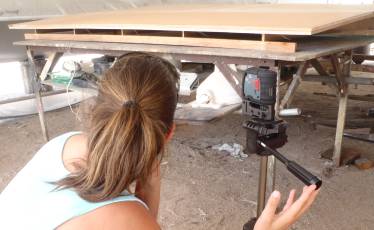 Amanda using her trusty laser to level up our frame/mold |
Then Amanda setup her laser level and we leveled our form/mold. The bimini will probably be able to twist a bit when we take it off the mold, but we want to make sure that it starts life in the right shape.
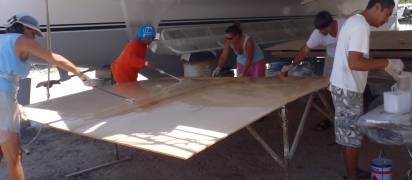 Epoxy coating what will become the upper sheet of foam |
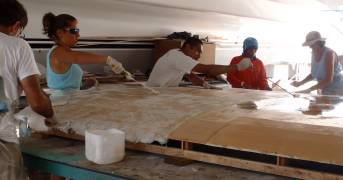 Fiberglassing the lower sheet, tied down to the mold |
After lunch the work started in earnest. We wanted to join the upper sheet of the bimini to the lower sheet. The lower sheet was securely tied to the mold, but the upper sheet was pretty floppy. First we epoxied both sheets, then we smeared epoxy mud into all of the grooves, cracks, and tie‑down holes. Then we put a layer of biaxial glass on the lower sheet, and spread some mayonnaise‑consistency epoxy mud on top of that, just to fill any gaps that might develop. Then we took the (gooped up) upper sheet, flipped it over (a neat trick for a floppy bit of foam 10' or 3m on a side), aligned it precisely on top of the lower sheet, using the marks Jon had placed on the sides, and lowered the top sheet onto the bottom sheet.
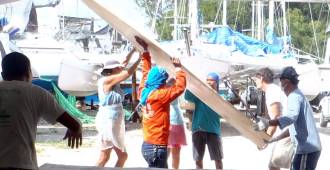 Flipping over a large, wet, sticky, floppy sheet of foam |
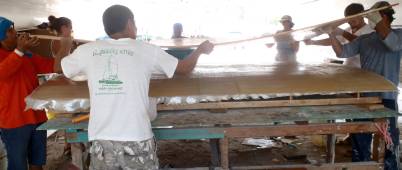 Settling the upper foam sheet gently onto the lower sheet, on mold |
The curved section at the front, of course, still needed to be pulled down. So we drilled a series of holes through both sheets of foam and used tie‑wraps (cable‑ties) to pull the top sheet onto the bottom sheet, tying the tie‑wraps to the frame so we didn't bend the lower sheet of foam. We also clamped a straight wooden bar across the aft end to keep that end together. Then, while Golf and his crew put large planks and heavy weights on top to push the 2 layers of foam together, Jon and Amanda drilled holes around the edges and tied them together with more tie‑wraps.
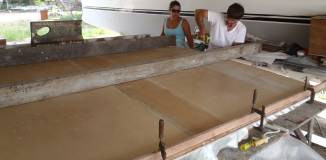 Aft end clamped while Amanda & Jon apply tie-wraps |
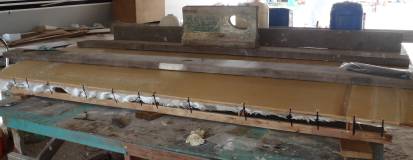 Forward end tied to shape, & many weights to hold the layers together |
Tomorrow we'll remove the weights and some of the tie‑wraps and trim off the excess fiberglass sticking out from between the sheets. Then we'll start adding a series of strengthening (and water gathering) ridges around the outside of the bimini.
 Amanda about to check the hole for 1 of the new pad-eyes (drill) |
Wednesday, September 5:
Bit of a slow day after all of yesterday's achievements. Not only was Mee not at work, but
after a week of wonderfully clear weather, the rain returned with a vengeance - a huge squall in the
morning, spitting now and then throughout the day, and another big squall chased us home at 4:30.
But we still made some headway. Our biggest achievement was deciding where to put our bow pad‑eyes for our new prod. The prod sticks out from our forebeam but it's hinged so it can swing up (or down). It needs cables holding it down against the (considerable) loads from the sails that get flown from the end of it. These cables need to attach to pad‑eyes mounted as far forward in our hulls as we can get them, and just above the waterline. Ocelot has glassed‑in foam "crush spaces" in her bows to prevent water from coming in if we hit something hard enough to smash the bows in. The problem is, only from the inside do we know where those crush spaces end, and only from the outside do we know where the waterline is!
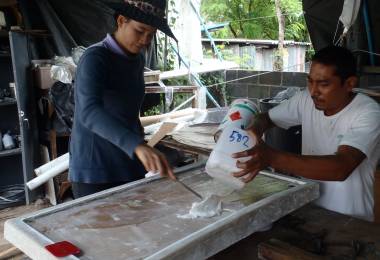 Golf's wife Mai helping spread epoxy mud on the engine hatch |
The first thing we had to do was draw in where we want our antifouling paint to go. We decided some time ago that we want the paint line to be 3" (7.5cm) above the true waterline, and we think we know where that will be. So Amanda setup her laser and we marked where we want our paint line to go. Since these lines will probably be ground off in the future, we only marked the insides of the hulls for now, which is actually more than we need for figuring where our pad‑eyes need to go.
After much measuring, tapping the hulls to hear where bulkheads are, scratching of heads and drawing of lines on our bows, we drilled a test‑hole from the outside. When we measured it from the inside, we found we could move the hole about 2" (5cm) further forward, which we did. Then we duplicated that hole's position on the starboard bow. Now we have to remove foam and fiberglass from the inside, and then build it back up with solid fiberglass and a steel backing‑plate.
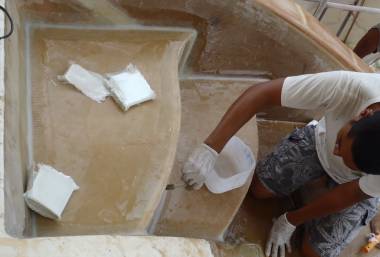 Golf glassing in the joints of our new starboard sugar-scoop steps |
Golf's team has been cleaning up our engine hatches for the last few days. These used to have teak on them, but they're in the sun too much so we've decided to fill in where the teak was with foam and then put a gelcoat antiskid on top. So today they epoxied the foam into the engine hatches.
Unfortunately, that was our last sheet of foam, so we couldn't cut the strips to go around the bimini as we'd planned. Instead, we trimmed off the fiberglass "feathers" from yesterday's layup (about as soft as razor blades, and just as cuddly) and planned out exactly how we want to do those strips.
The strips around the edges of the bimini serve several purposes: they're a place to grab as we enter or leave the cockpit, they strengthen the bimini (which will only be supported at the 2 front corners and by the targa‑bar at the back), and they direct rainwater towards drain‑holes for us to harvest.
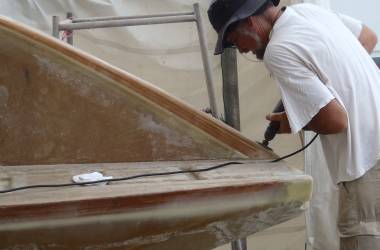 Drilling holes in the new raised wall - the railing will bolt down here |
We eventually decided on 4 of these ridges - one down each side, one across the front, and one down the middle. The side ridges will be about 4cm (1½") high and wide, with rounded tops to make them comfortable to grab. The front piece will be a bit higher and will get thicker towards the middle of the bimini, both to improve strength and to create a slope so water runs towards the drains at the forward corners. The middle ridge will be trapezoidal, with the base wider than the top, and at the forward end it needs a way for water to get from one side to the other. Ocelot doesn't heel much when sailing but she does heel a bit, so we need to provide a channel for the water. Tomorrow we hope to buy the foam so we can start making those ridges.
In the afternoon, Golf and Houa put some glass strips over the epoxy filets they'd put where the starboard steps join to the sugar‑scoop. This completes the structural aspects of those steps.
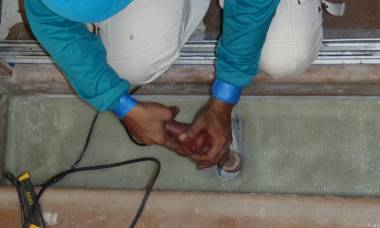 Mee cutting open the drain in front of Ocelot's entryway |
Thursday, September 6:
A strange day full of many little jobs. Weather was overcast (cool!) but only 1 short
sprinkle.
Our main accomplishment was to mark out where we need the grab‑rails to go on the outsides of the sugar‑scoops. We'd marked them out before, but then we raised the floor of the swim platform, so we had to raise the wall as well, covering our work. Once we knew where to drill, Jon used a 3" hole‑saw to cut big holes into the foam. These need to be filled with fiberglass so we can bolt the grab‑rails into them. In the afternoon, Sue and Amanda cut lots of disks of fiberglass mat and epoxied several of the holes full, but then the epoxy got too hot so much of their hard work had to be ripped out. They'll try again tomorrow but filling the holes more slowly so the epoxy curing reaction doesn't run away again.
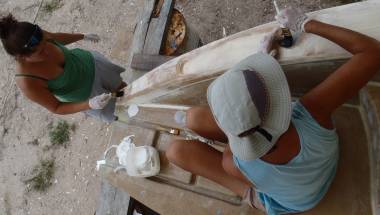 Amanda and Sue filling the newly cut holes with epoxy glass |
The morning was slow, as Golf had to make two trips to town to try and find a chuck the right size and right thread to put on Houa's grinder so that Jon can cut big holes for the prod pad‑eyes. When Golf is away, the workers tend to slow down. Amanda and Jon spent some more time designing the railing/trim that's to go on the bimini, but because of the rainy weather we still haven't been able to get the last sheet of foam that we need to cut the trim. Sue spent a few hours on her "clean up the old tools and tool boxes project", discovering some long-forgotten tools and small tubes of useful lubricants.
Houa got both engine hatch covers foamed and glassed so it will be nice to have them back aboard to make the footing easier as we troop around doing all the little odd jobs here and there on Ocelot.
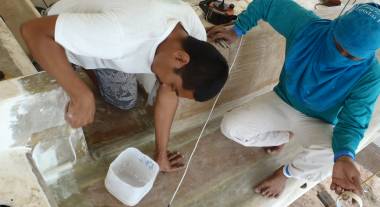 Golf and Mee glassing in 2 areas of the aft-deck |
Mee, together with Houa, took the sliding door out of the companionway (again!) in order to work on the final details in that area. Mee carefully cut through the fiberglass floor under where the companionway grating lies, and re‑opened the big oval drain hole.
In the afternoon, Mee and Golf spent a few hours prepping (read: power sanding), then mudding and glassing in the last strange hole near the aft deck. It was one of the little jobs that got ignored in our rush to get things glassed over before our trip to the States in May because it was an area facing aft (away from the wind and rain) and that didn't lead anywhere. Anyway, it's nice to have it finished up. They also worked on glassing in the floor of the small entryway from the aft deck to the cockpit. We hope they got the slope right, as we used to have water making a puddle there.
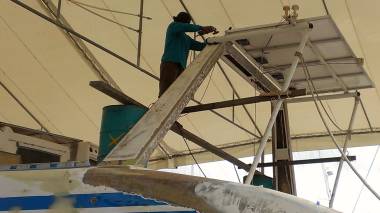 Mee preparing the targa-bar for gelcoat |
A few days ago we asked Golf if he could finish off the targa‑bar so we can mount the solar panels and the mainsail track and the bimini. This afternoon the guys brought up several big drums and set a board across them all ready to begin work up there tomorrow. Jon climbed up this afternoon and repositioned the solar panels so the guys will have better access to the targa bar. Jon also drilled out the mainsail track mounting holes - they'd been mudded over when Mee reinforced the area under the mainsail track.
Finally, Jon started reassembling the autopilot drive motor. It had been left partially disassembled when we left for the US because some nuts had been misplaced at the last minute, but we recently uncovered them again. Finding things is good - now where is the Dremel?
Friday, September 7:
Wow! A loooong day. But it was cool (overcast), we got to the first step of cosmetic
improvements, and we got lots of other things done as well.
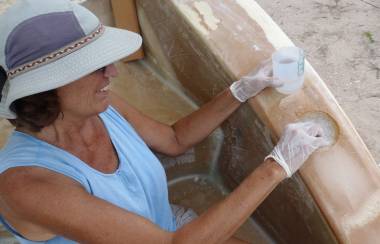 Filling reinforcement holes in the sugar-scoop wall with fiberglass |
The big job of the day for the Thai team was the targa‑bar. Yesterday Jon had repositioned the solar panels to get them out of the way. It's difficult to disconnect them, and they're supplying power for the fridge, which we've left running. This morning Mee hopped up on the boards supported by metal drums to begin sanding the top of the bar. While the grinding and sanding was going on, Golf worked under the work tent mixing the gelcoat with micro‑balloons to create a gelcoat filler for the bar. After lunch Golf was up on the supports applying our first exterior beautification: white gelcoat! Ok, it was just a filler/primer, but it's the final color (bright white). It still has to be sanded and have a topcoat applied, but it was fun to see the grey/brown glassed over targa bar begin to look white again.
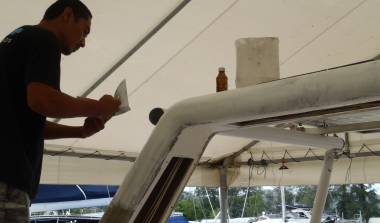 Golf working his gelcoat magic on the targa-bar |
Jon gets kudos for the nastiest job of the day: he was down in the port fo'c's'l, way up in the nose, grinding a 3" (75mm) hole, tapered out to 6" (150mm) thru at least 1½" (40mm) of glass and foam. This is to create a really strong place to bolt our new prod pad‑eyes. Jon emerged looking like the Abominable Snowman, er, Fiberglassman. After the grinding he vacuumed the area, and Sue had the pleasure of being the next in the port pit. Since she was already working with a brush and epoxy to fill the sugar‑scoop handrail bolt holes, she didn't mind hopping into the fo'c's'l to lay a couple layers of biaxial glass over the raw hole. Laying epoxy and glass is nowhere near as nasty as grinding it away!
So, yes, Sue got about 5 rounds of 100 grams of epoxy and handfuls of chop strand glass put into the reinforcement points where the handrail bolts will go on the sugar‑scoop walls. Lesson learned from yesterday -- lay about 5 layers of glass with epoxy and then move to the next hole. Wait 30‑45 minutes before hitting the same hole again. Touch wood, at the end of the day none of the holes had bubbled up with over‑heated epoxy like they did yesterday. More work to come tomorrow on the same project.
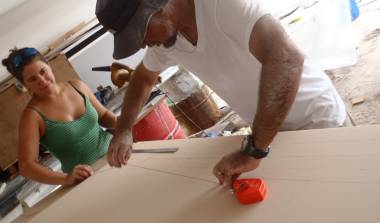 Amanda and Jon laying out cut-lines on the new foam |
Things moved along on the bimini as well. Jon and Amanda measured the bimini and eventually trimmed a bit off the front and off the back, to square everything up. Then Jon long‑boarded all the edges to make them straight and smooth, an extremely tiring job.
We had enough of a break from the rain to risk taking Golf's truck to Latitude 8 (about 5 miles or 8km from the yard) where we buy our structural foam. On the new 12mm foam sheet (the 7th and last sheet for the bimini) Amanda marked out some very neat, tightly spaced lines to designate all the varying widths we'll need to make the 3‑4 layer high rims around the edges of the bimini. Then Jon cut out the strips with a razor knife, making horrid squeaky noises that set eyeballs vibrating, like fingernails on a chalkboard. Amanda left the area to check on progress elsewhere.
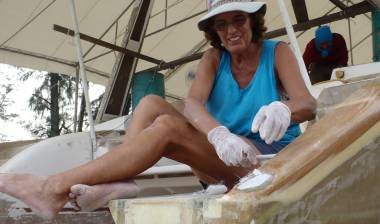 Sue filling in reinforcement holes with fiberglass & epoxy |
In the cockpit we had a beehive of activity. Golf was overhead putting gelcoat on the targa bar. Houa was on the floor with metal rule, T‑square, tape measure, super glue and strips of wood, marking out the placement of our new teak flooring! We had a bit of consultation on the desired width of the teak strips, the width of the caulking between, and the placement of a teak trim pieces. We've tentatively decided on 4 cm (1.6") strips of teak with 4mm (just over 1/8") caulking between the strips. Houa says with 4mm caulking we can increase to 5mm sometime many years in the future if need be, and it will still look good. "Bigger than 5mm not look so good," he says. The wood strips he put down had been coated in mold release so that he can build fiberglass edges which the teak will butt up against.
Also in the cockpit, Mee worked on the companionway door frame. It needed a bit more sanding and prep to have its rim glassed in. He finished the prep work and cut the strips of fiberglass that will surround it. Epoxying the glass in place is a job for tomorrow. Hopefully they'll start work on the teak door‑frame soon as well.
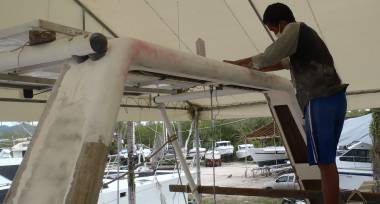 Beng long-boarding the top of the targa-bar |
Saturday, September 8:
A sunny, busy day again, with 5 major projects going on all day.
Work continued on the targa‑bar, with first Golf, then young Beng long‑boarding the gelcoat primer/filler. They sprayed pink paint on the gelcoat so they could tell where they had sanded. This was a hot, dusty job, so they had the big floor fan setup on the side of the cockpit to blow onto the targa‑bar workers.
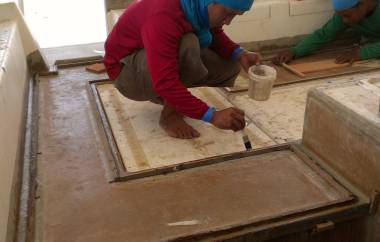 Mee laying glass strips against Houa's small wooden frames |
Mee spent the morning working on the rim of the companionway, glassing in small sections that had not been glassed back in May. When we left for the States in late May we had requested the sliding door be reinstalled so that the boat was secure. It did get put back, but we've always known there was unfinished business under there. It's nice to see it moving along again. The epoxy and glass was still wet when we left the yard at 5:30, and Golf said Houa may return tomorrow, Sunday, to install the door once again. In preparation to reinstall the door, Sue put on the work gloves and attacked the aluminum frames with fine sand paper, soap, water and a scrubbie. Goodbye greasy fingerprints, epoxy smudges, mini spider webs, and fiberglass dust.
Houa was very carefully laying out edging around each cockpit area. It will be used to give us a nice white gelcoated fiberglass rim around the new teak. This is a painstaking job, but right up Houa's alley. He seems happy to be working with wood again after all the weeks of fiberglass work he's had to do for us. In the afternoon Mee joined Houa, laying thin fiberglass strips against Houa's bits of edging to build up what was ground off so long ago.
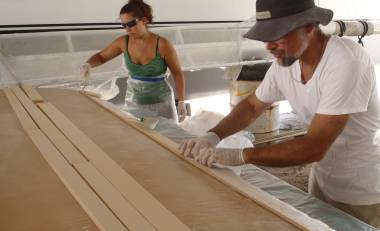 Amanda & Jon laying down the first of 4 strips of foam |
Sue's afternoon job involved more gloves, this time about 6 sets of the latex gloves we use for epoxy protection, as she worked on filling the bolt holes on the sugar scoop walls. She also got another layer of biaxial and 6 circles of chop strand epoxied in the pad‑eye hole for the new prod down in port fo'c's'l. Can we say Hot and Sweaty?
Amanda and Jon dedicated the day once again to the bimini foam. In the morning they laid out the 4 strips of foam that they'd cut last night to make up the front rim. First they mudded the glassed surface of the bimini, then epoxied the raw foam and stuck the first layer on. On top of that they put more epoxy, then a layer of engineering fiberglass (here it's called UD for uni‑directional, which is a misnomer), then more mud, then the next strip of foam. When they'd epoxied all the strips down, they held it all together with a board and clamps and then weights.
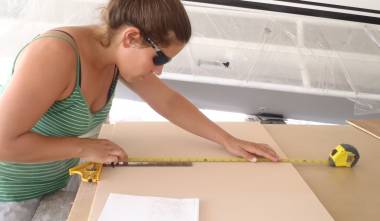 Amanda measured & cut more foam strips for the sides & middle |
The next part of the project involved carefully measuring, marking, then cutting more foam into strips to be used along the two sides and down the middle of the top of the bimini. The side rims couldn't be epoxied together today, as the front rim still had rough glass protruding, and it needs to cure and then be sanded smooth before the side strips can attach. More fun to come on Monday.
A few weeks ago Jon shredded his hands when he tried to lift our huge tent using only a rope pulley. One of the 4 poles he raised fell off its block, so it had to be raised again. This time, Jon went to the yard and asked (by pantomime, as they don't speak English) to borrow a chain‑hoist. This made things MUCH easier. In about 10 minutes, he and Amanda raised the recalcitrant pole, set it on a big cement block, and returned the chain‑hoist.
It's Saturday night, and time for a relaxing dinner (probably a big chef salad in the apartment) then a movie on Amanda's big TV in her apartment. Happy weekend! And Hey! Enjoy your two day weekends, everyone. Here, they are one day long. At least we have Sunday brunch to look forward to tomorrow morning!
Thai Refit:
Ocelot Pages:
Top Level: Home | Destinations | Cruising Info | Underwater | Boat Guests | Ocelot | Sue | Jon | Amanda | Chris | Site Map | Make a Comment
|
If our information is useful, you can help by making a donation |
Copyright © 2000‑ Contact: Jon and Sue Hacking -- HackingFamily.com, svOcelot.com. All rights reserved.